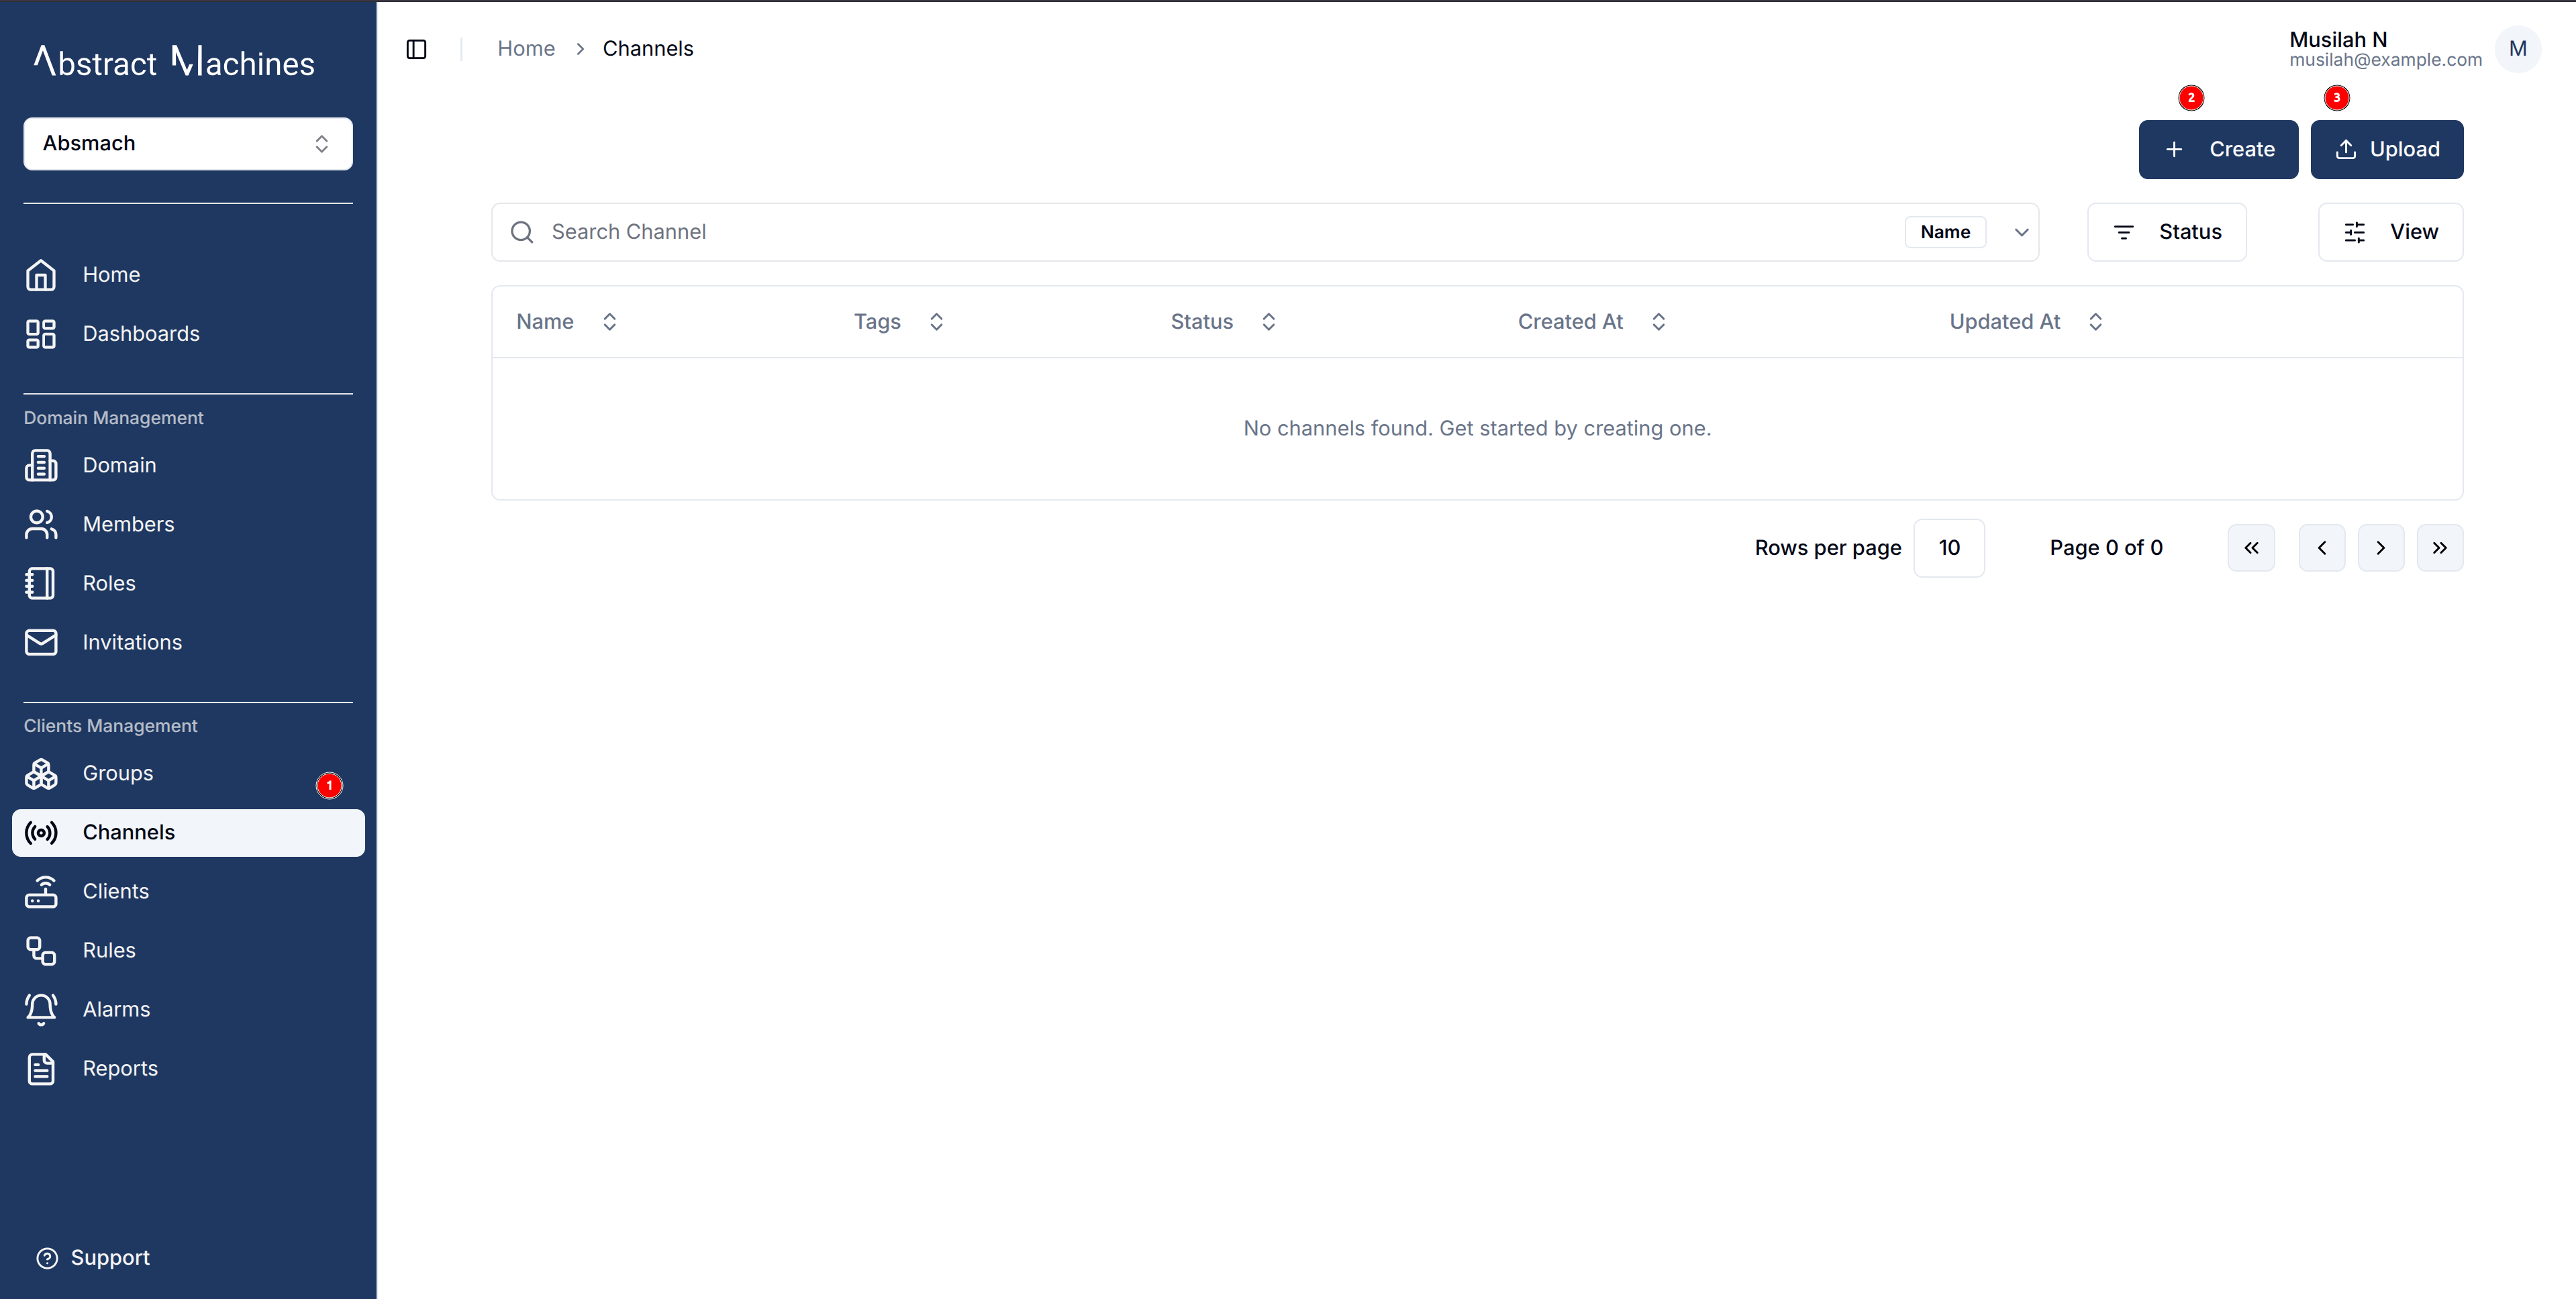
Channels
Channels act as message conduits. They are responsible for the messages exchange between clients and act as message topics that can be published or subscribed to by multiple Clients.
Clients are able to publish or subscribe to a channel depending on their connection.
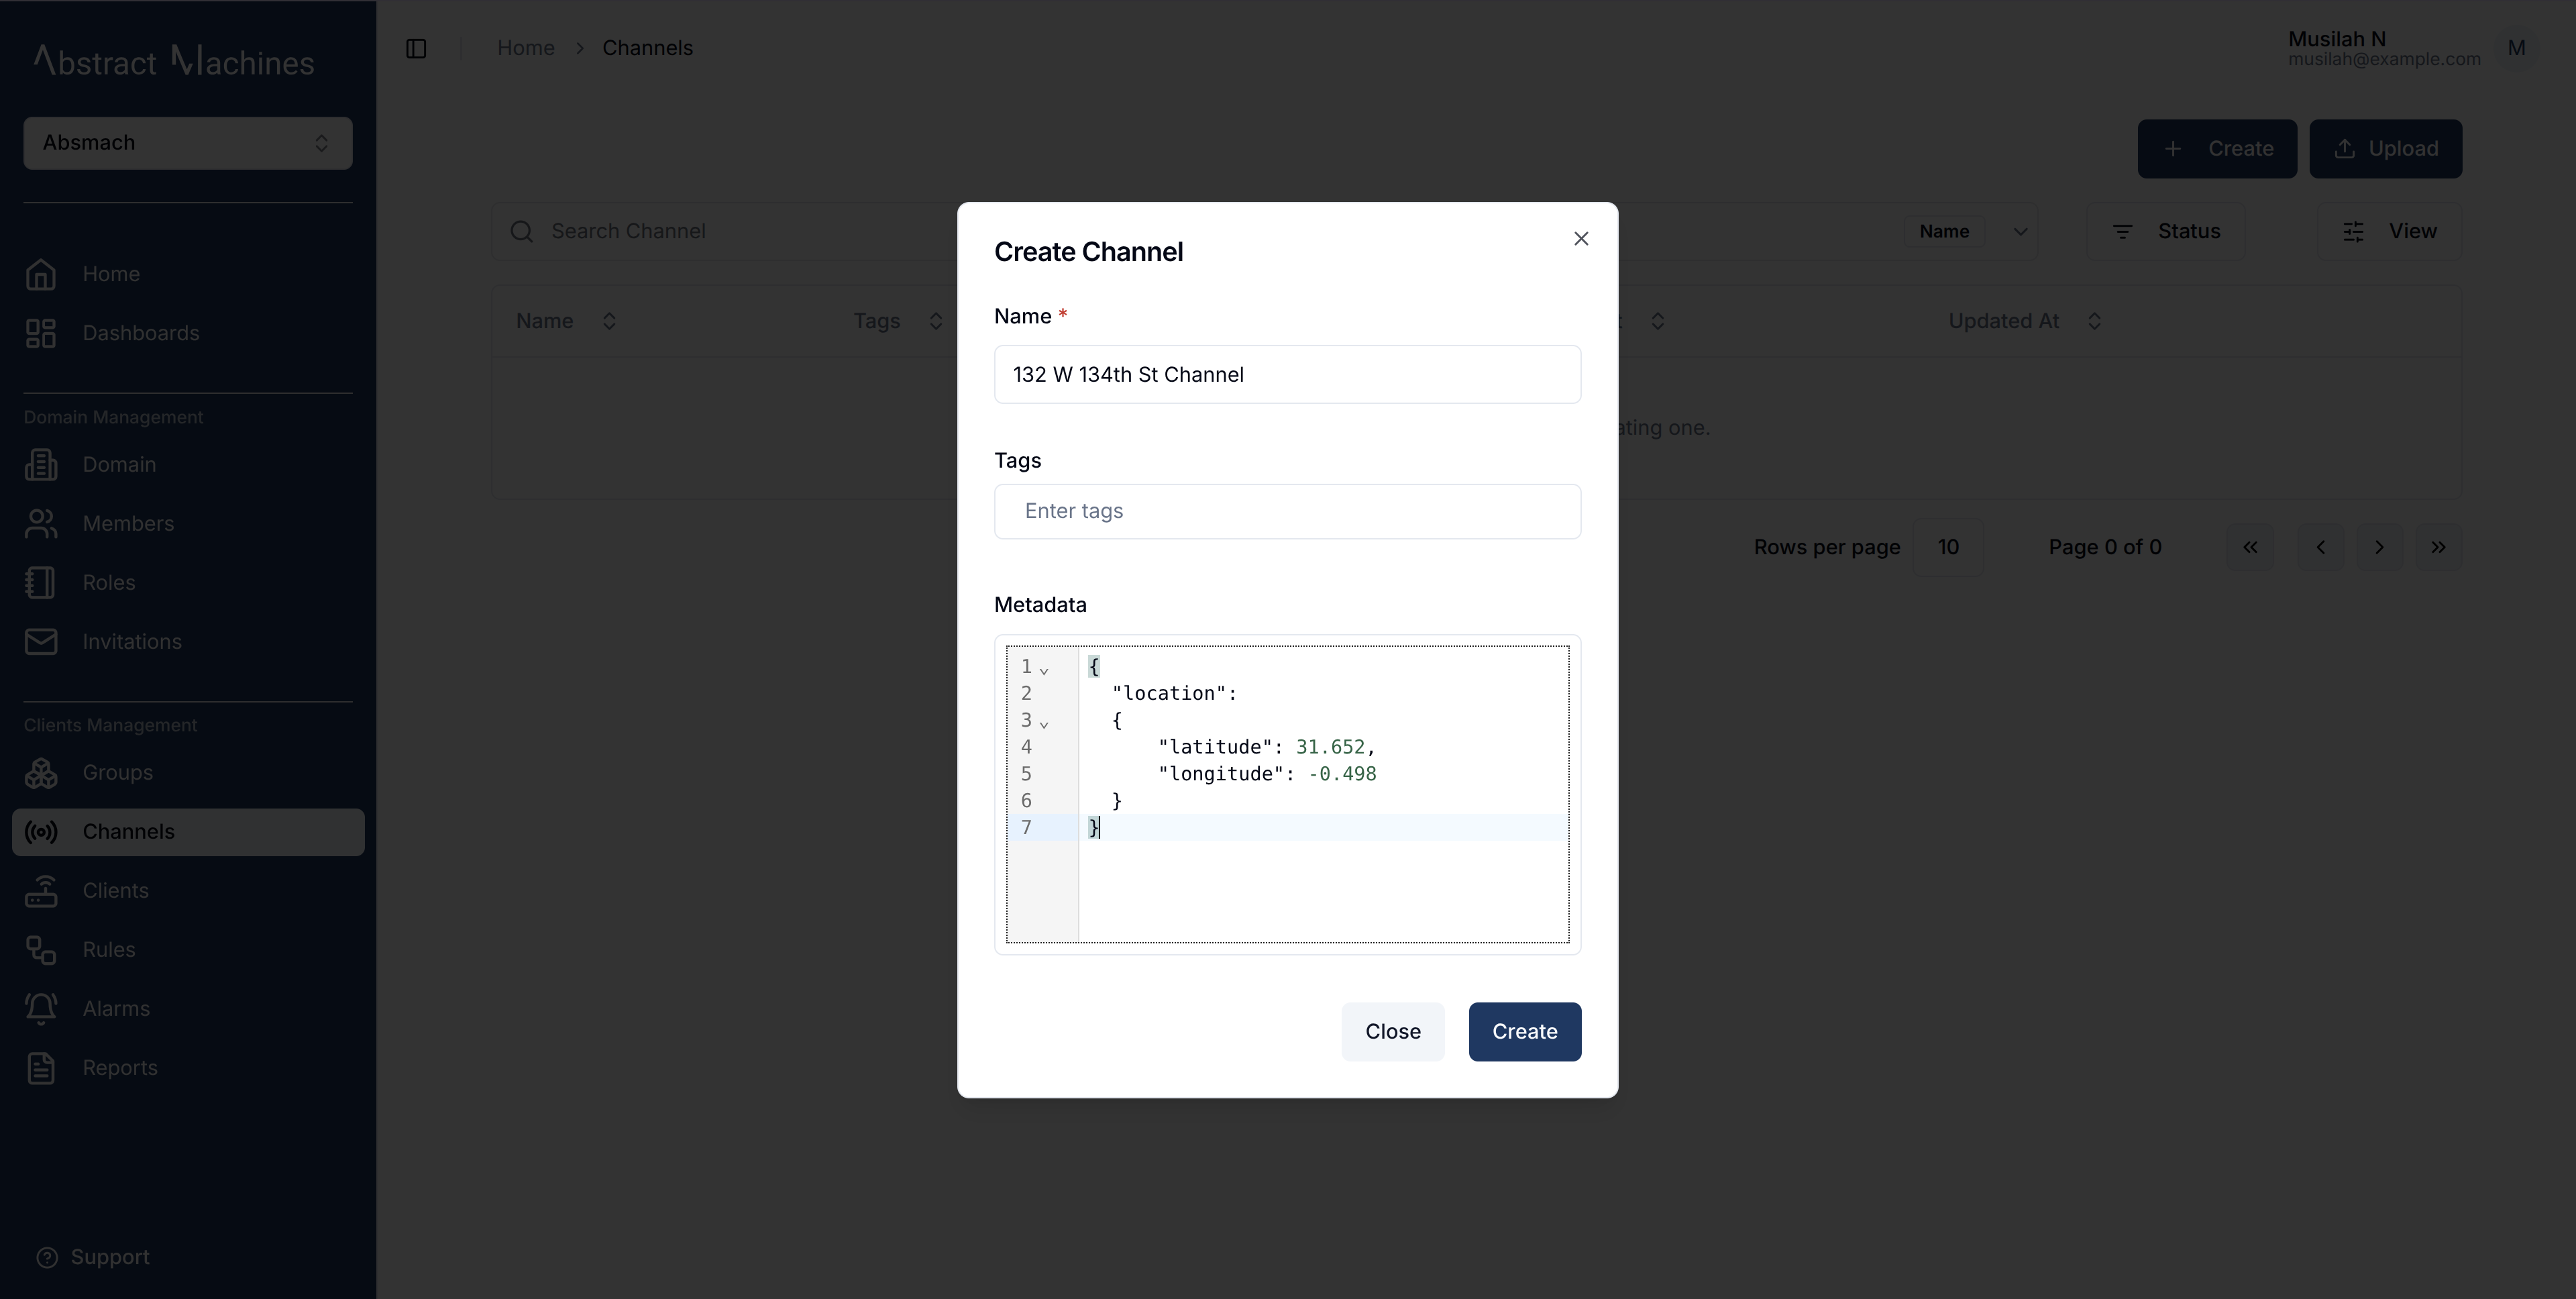
Create a Channel
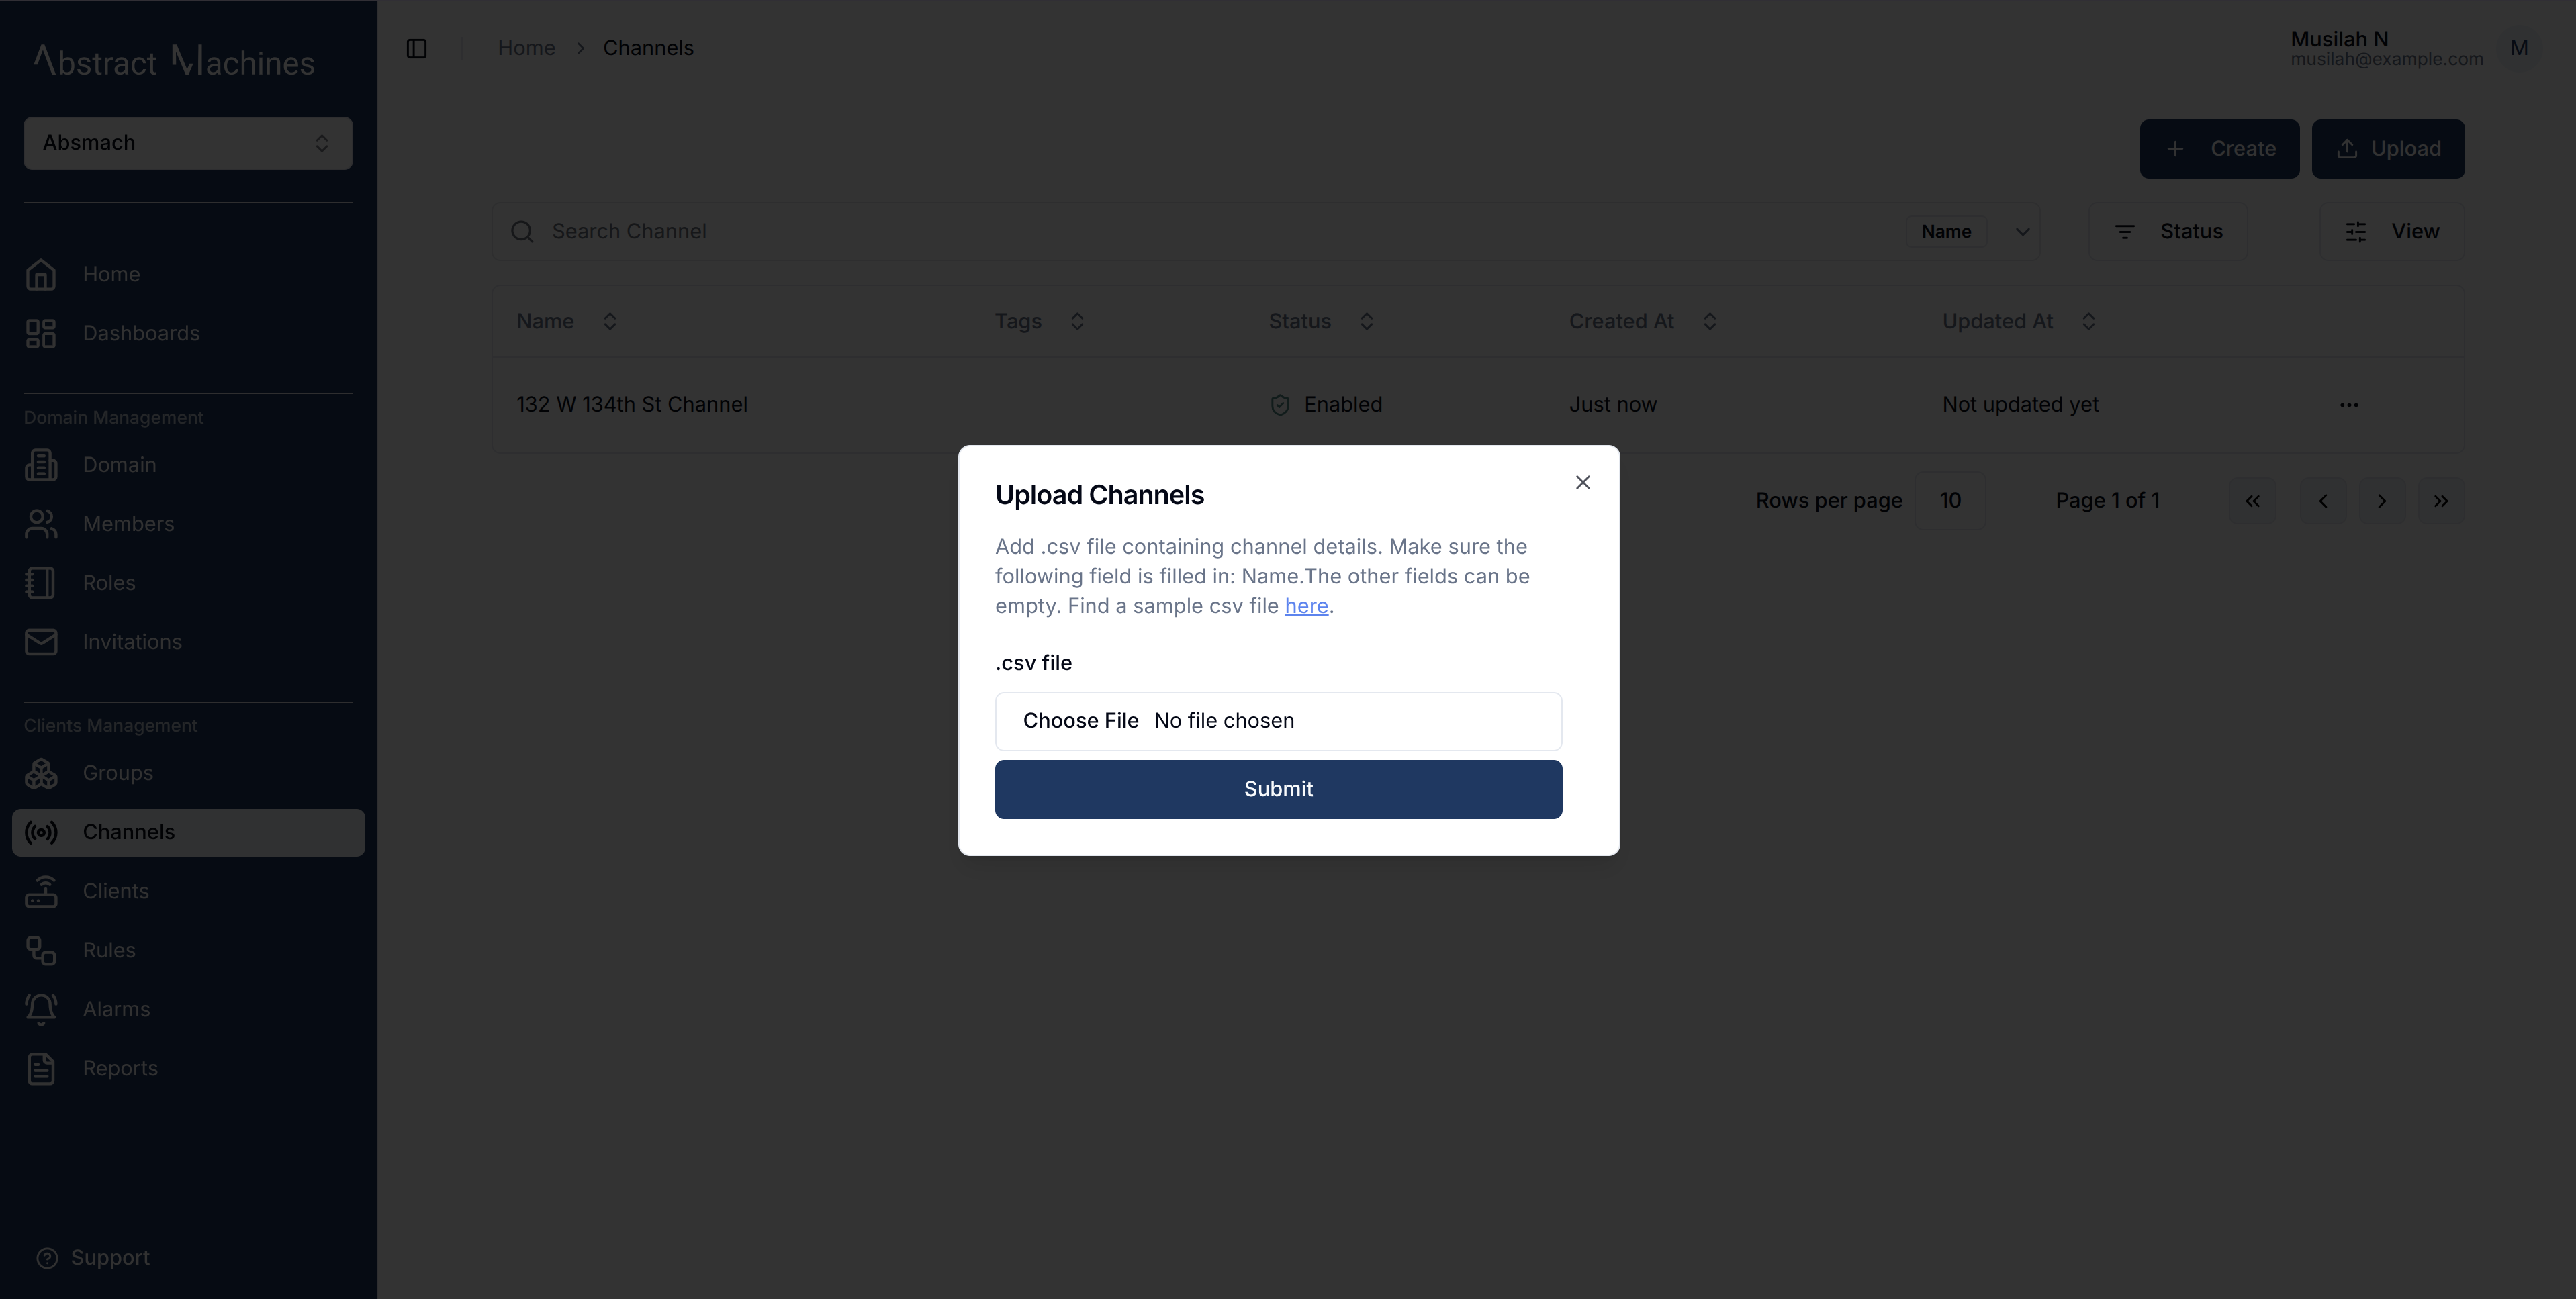
To create a channel, click on the + Create button present on the top-left corner of the page. You can also create multiple channels by clicking on the + Upload button and uploading a .csv file.
Channel Information
Add a channel name and optionally tags and metadata.
Bulk Creation
You can be able to create channels in bulk by uploading a .csv file with the following fields in order:
- Name (Required)
- Metadata
- Tags
A sample of the channels .csv file can be found here.
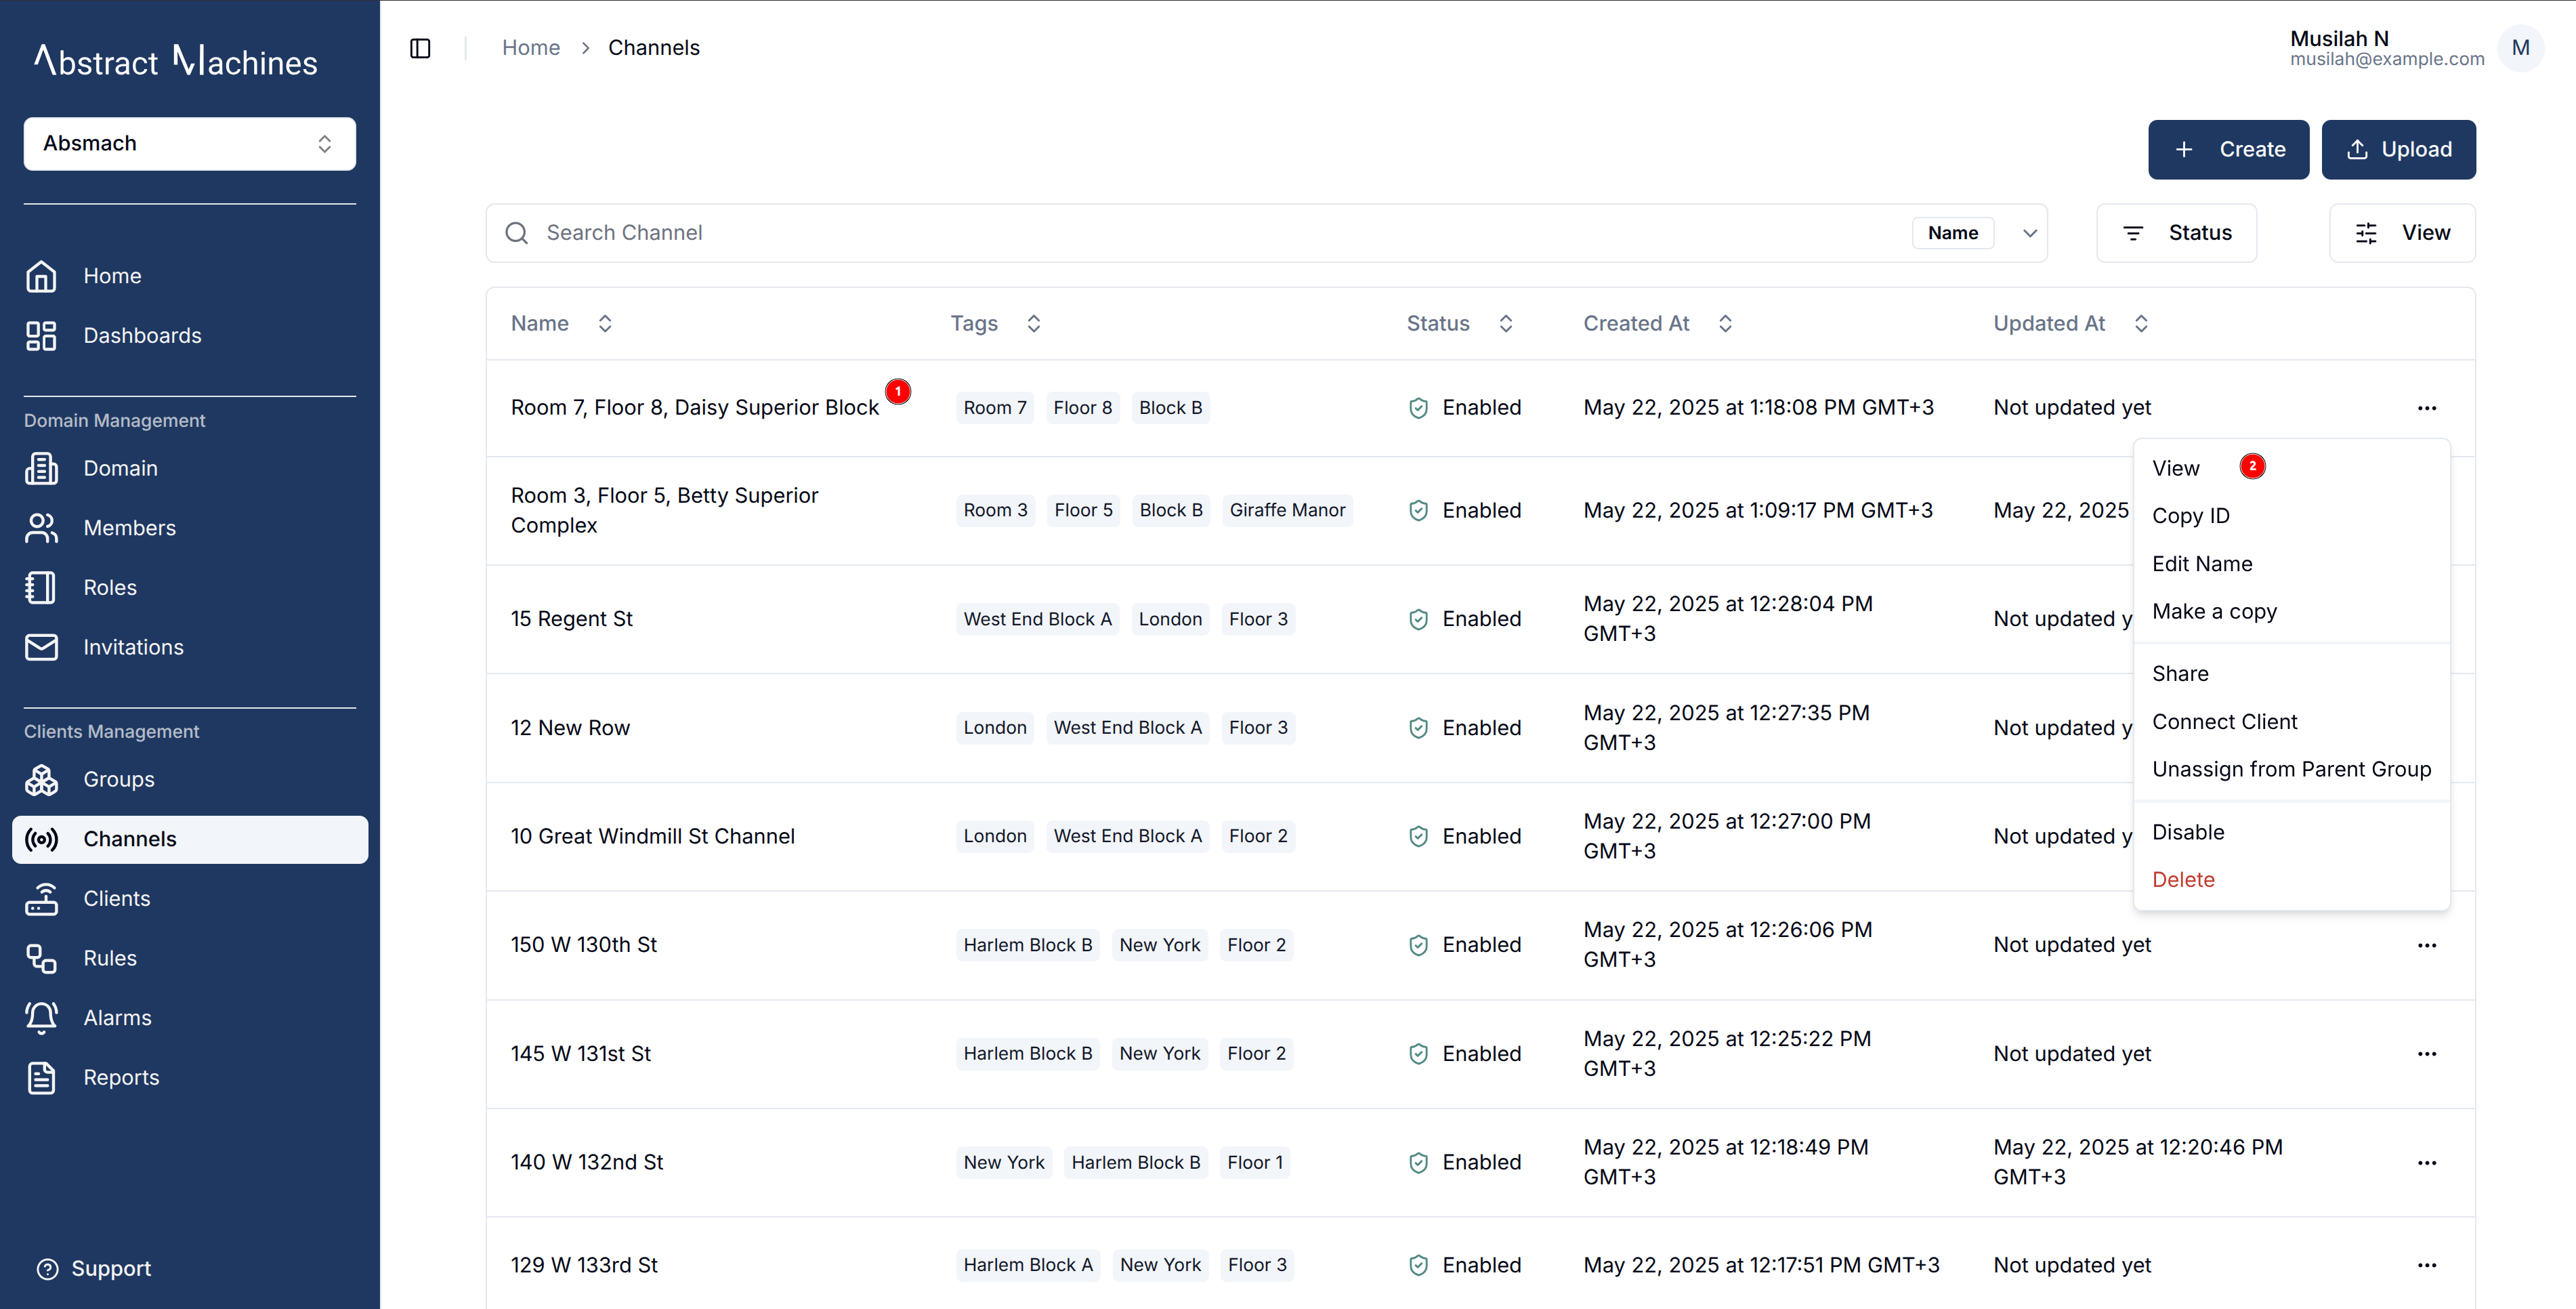
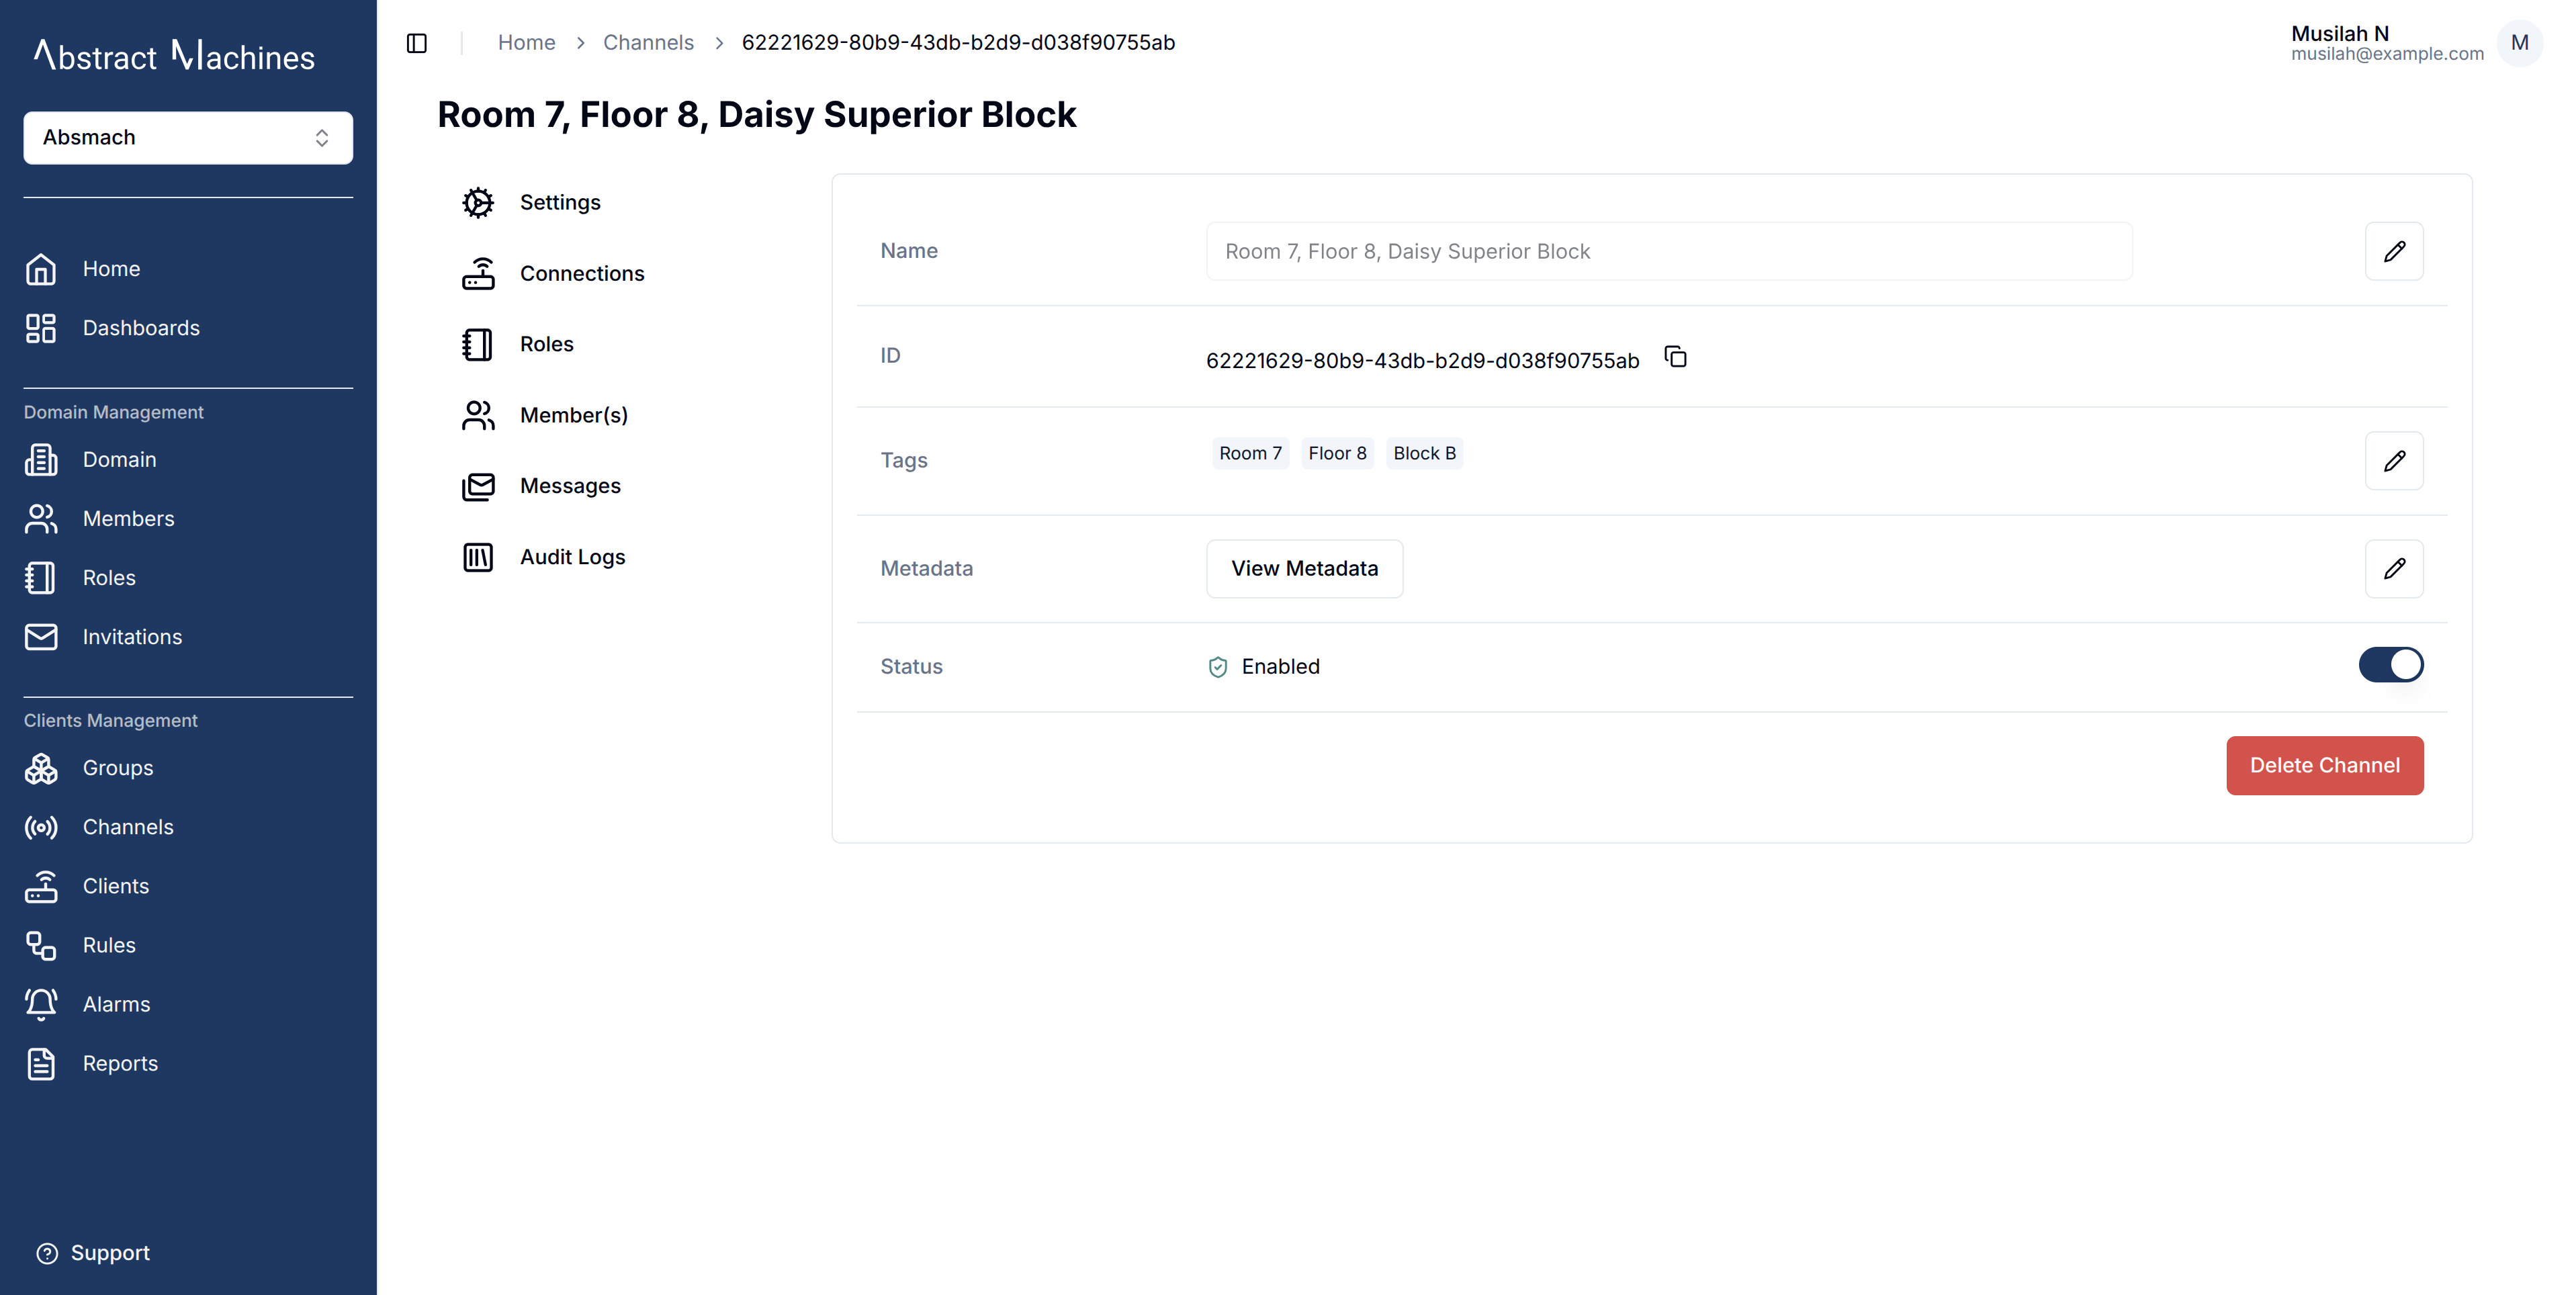
View a Channel
After creating a channel, it will appear in the channels table. To view that channel click on the row or the view button in the row actions.
This will lead you to the Channel Settings page, where you can view the channel's Name, ID, Metadata, Tags and Status.
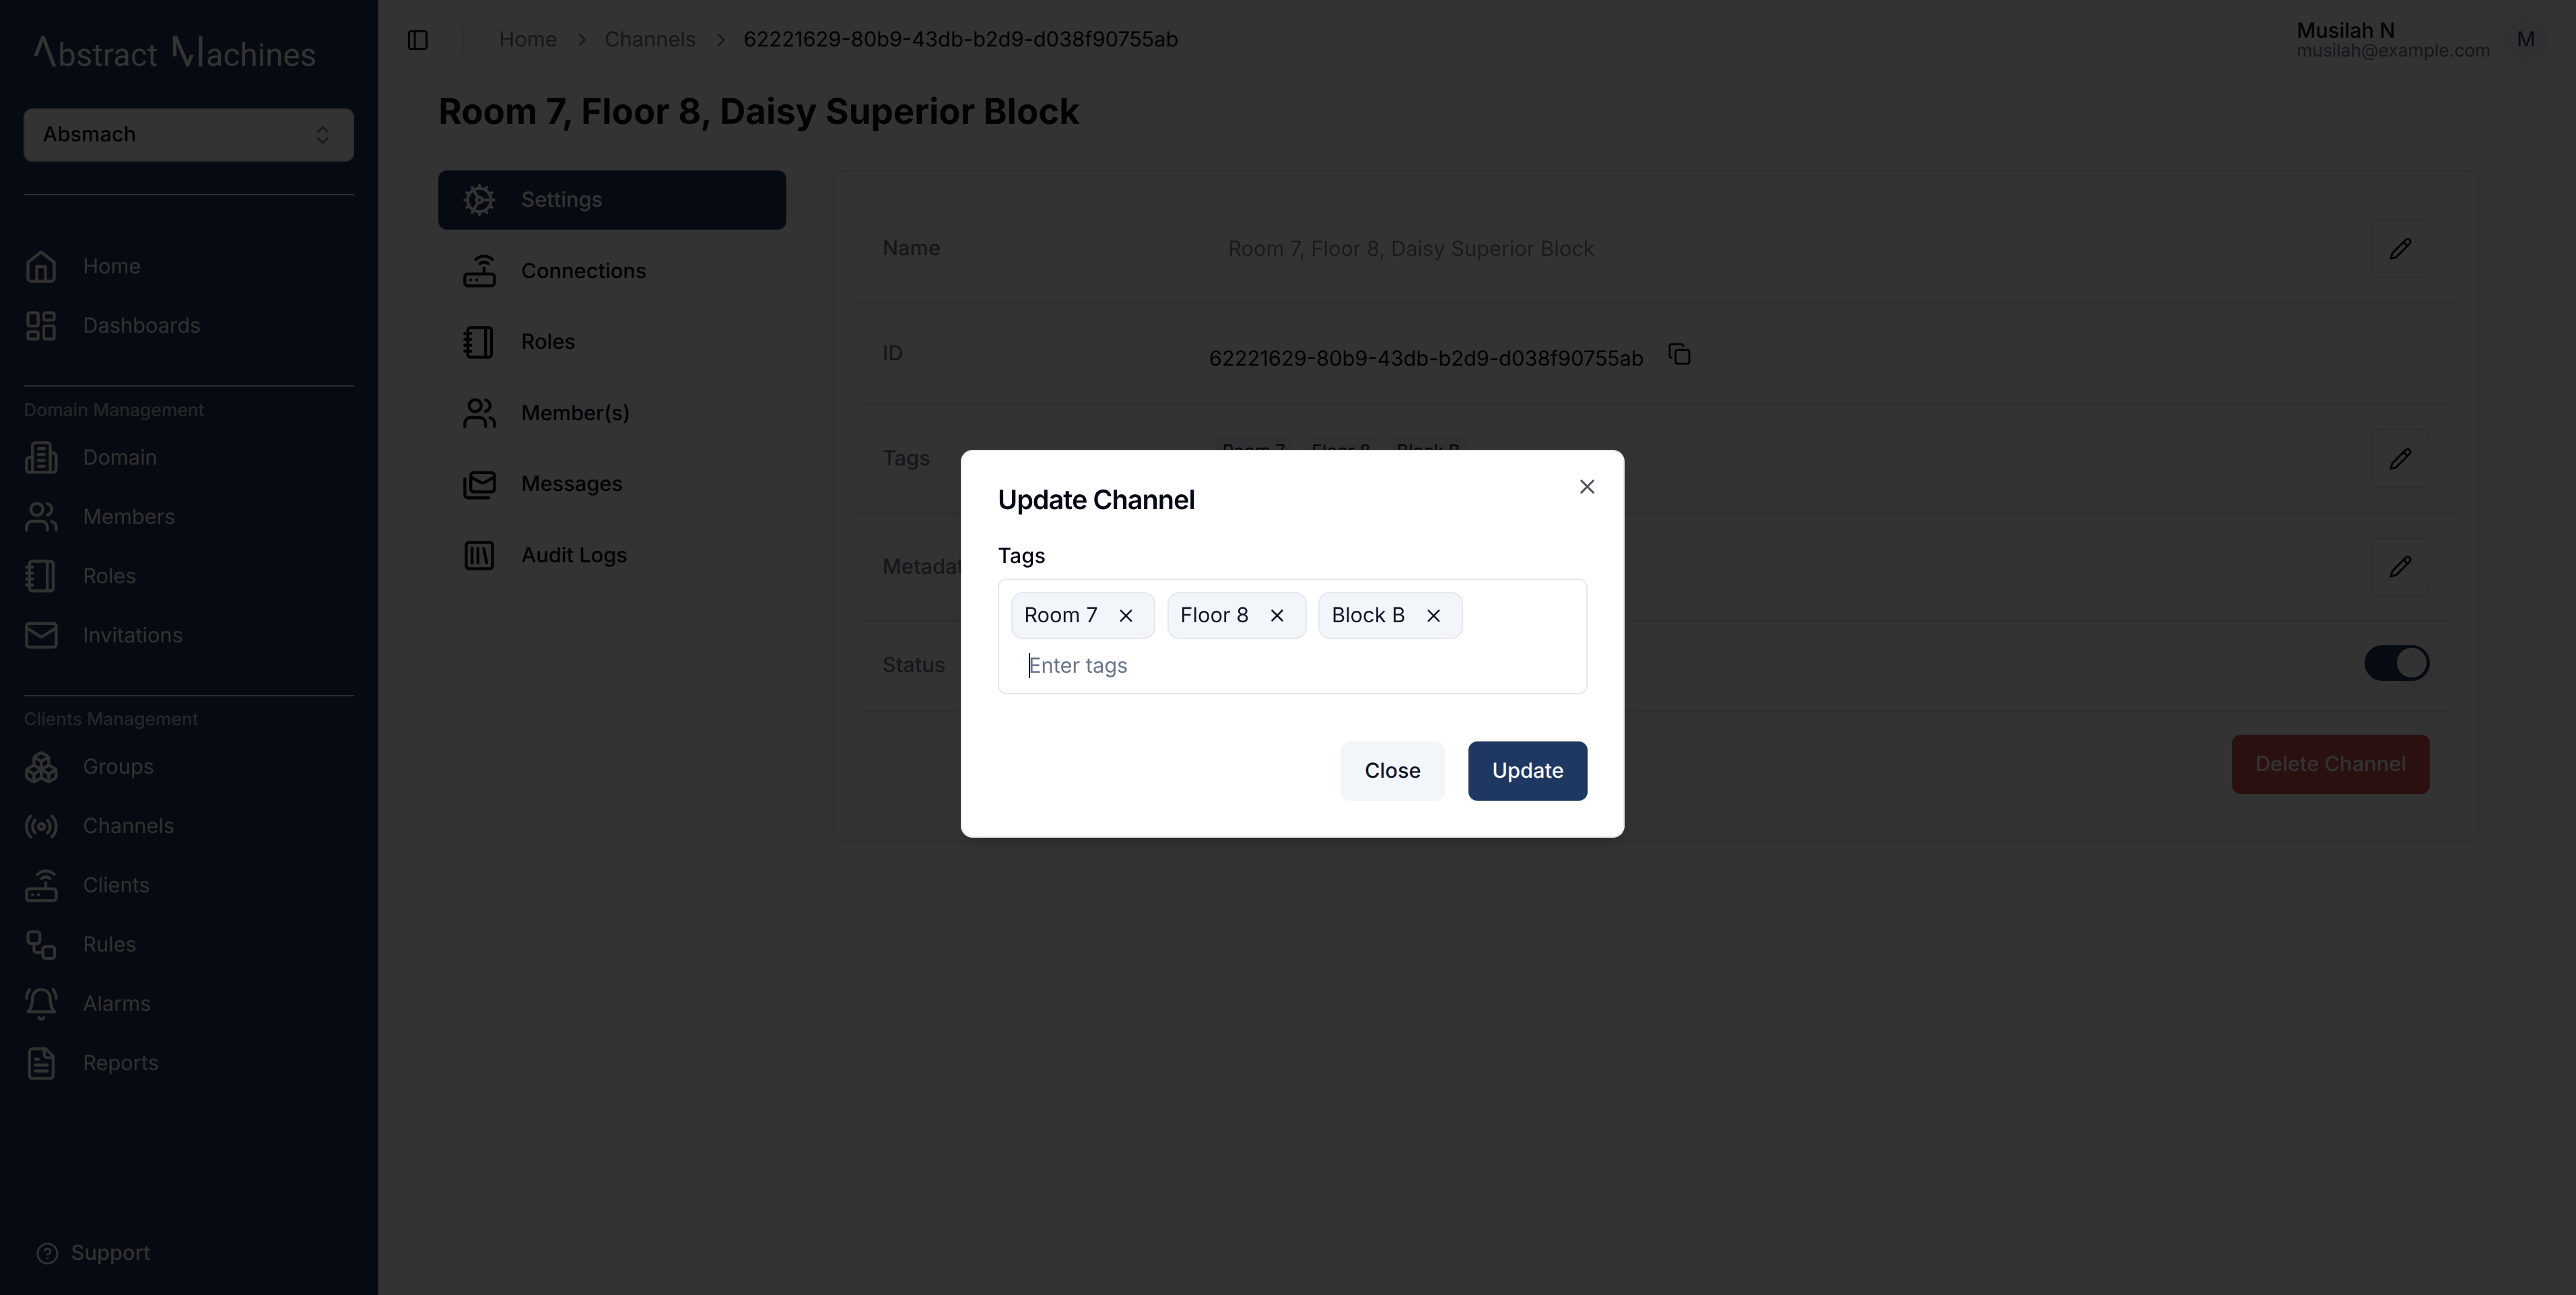
Update a Channel
In the channel settings page, you will be able to update the following channel details as long as you have the required permissions:
- Name
- Metadata
- Status
- Tags
To update a field, click on the pencil icon on the far end of the field to edit. Once you have updated the value, click on the check icon to update the changes or the cross icon to cancel the change. To update the channel status, toggle the switch on the far end of the status field.
This is an example of updating tags.
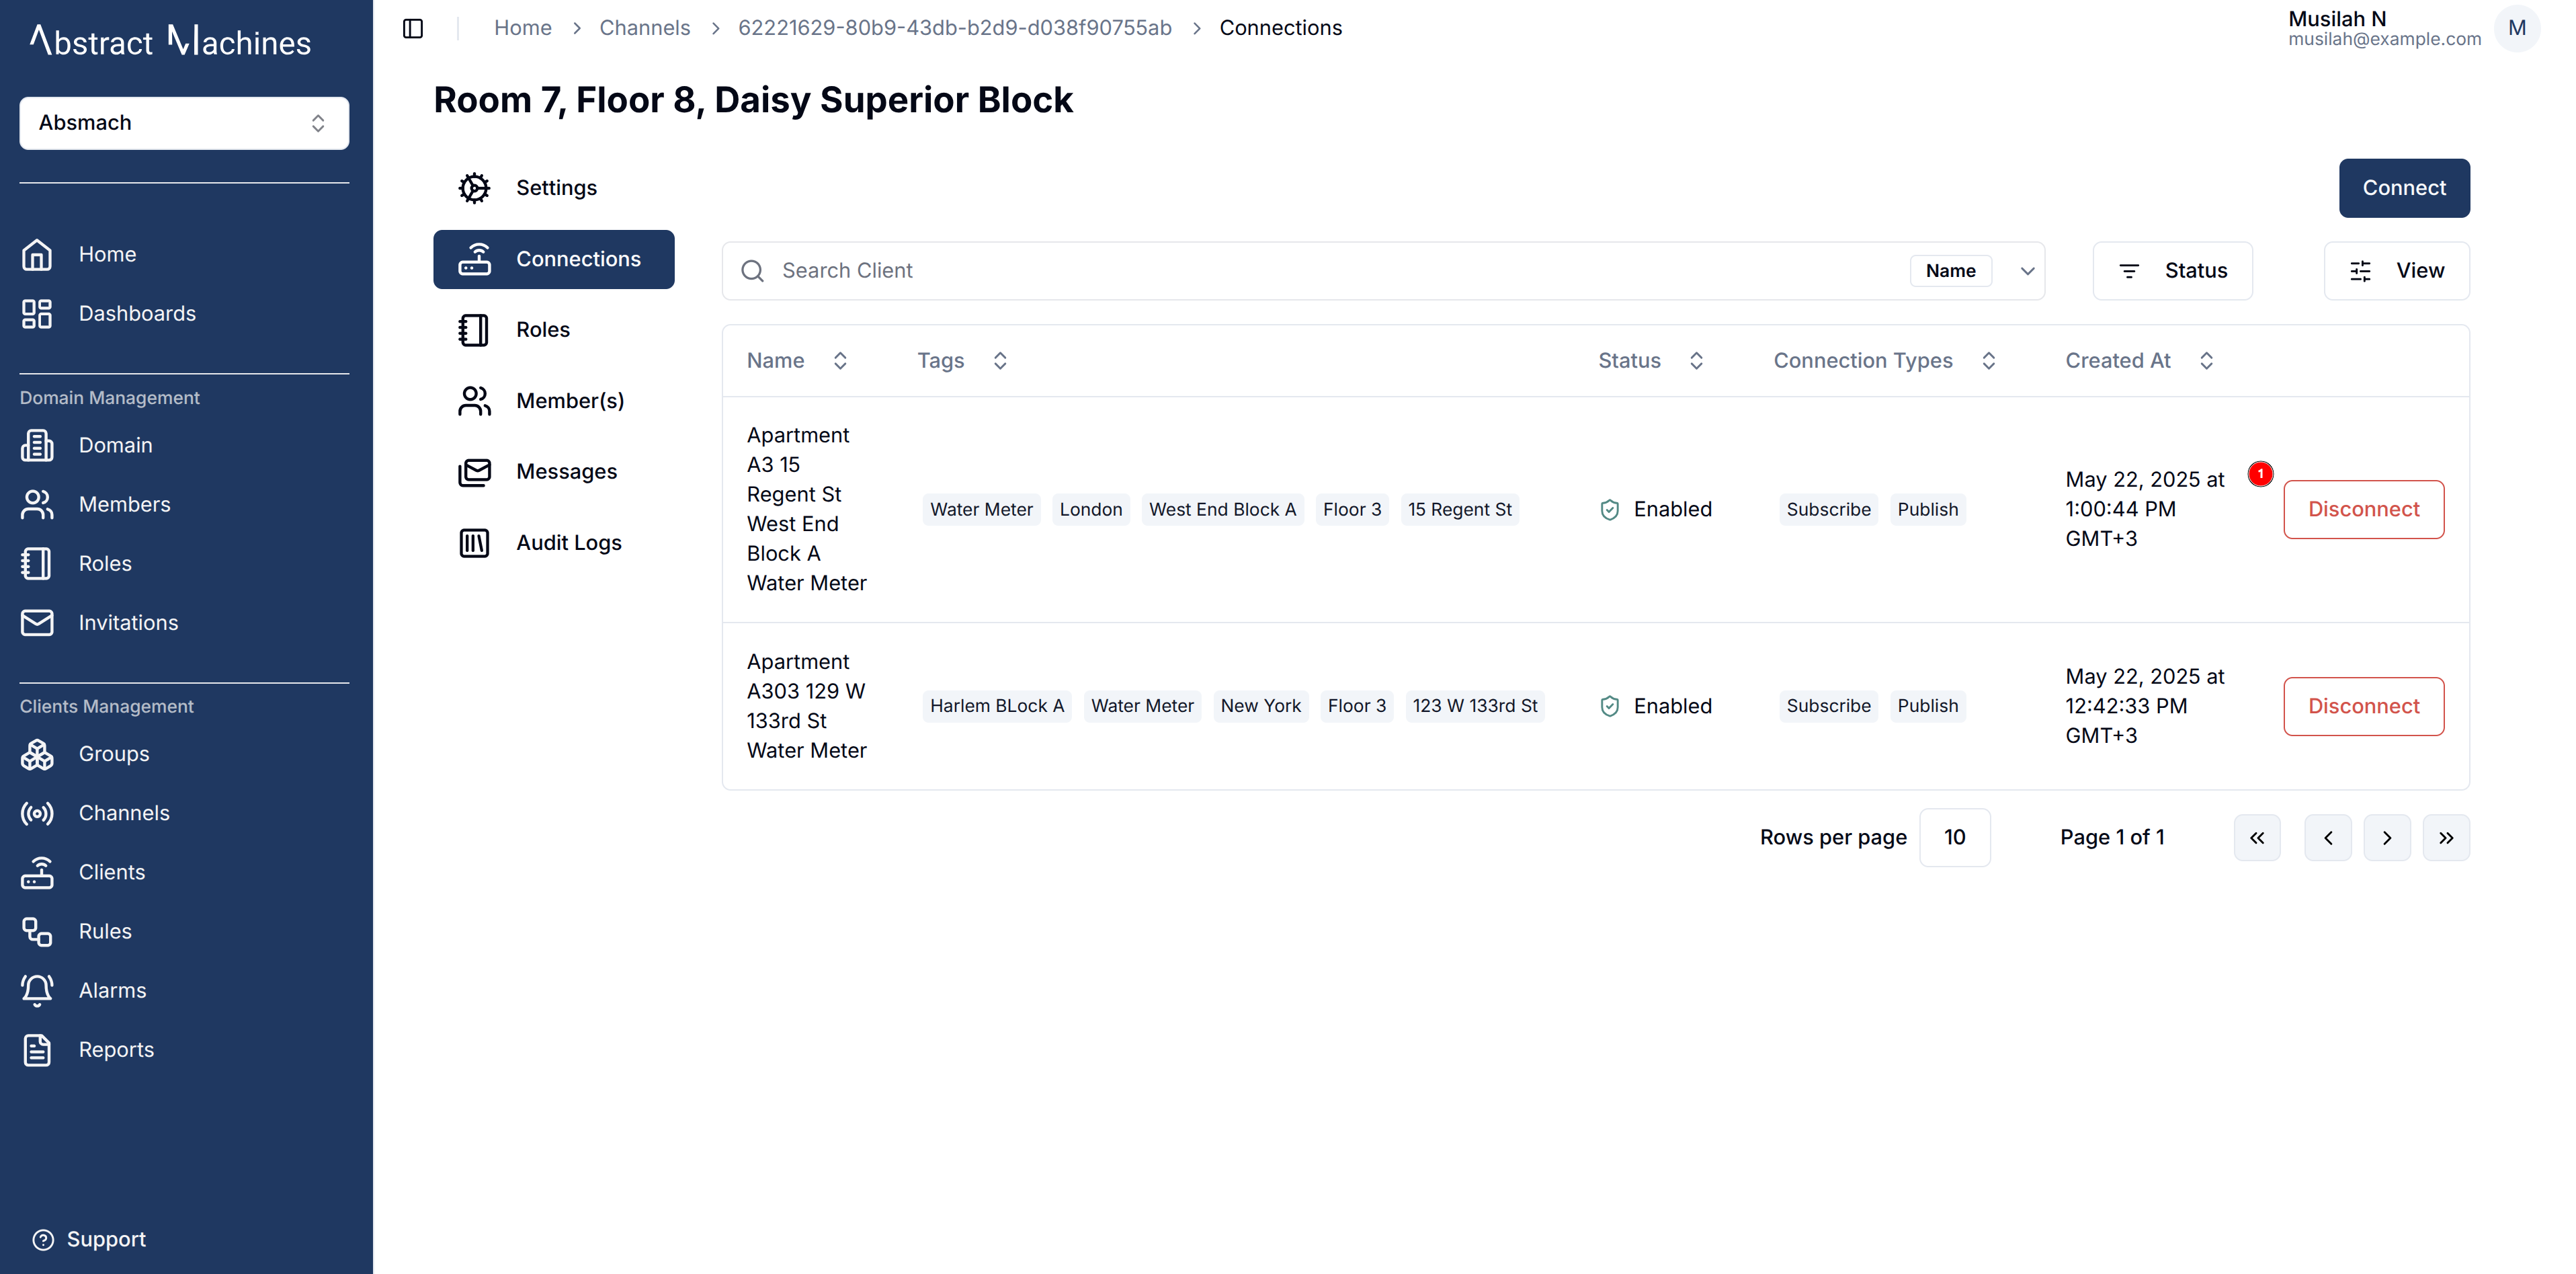
Connect to a Client
Navigate to the Connections section of the channel navigation. This will lead you to the connections page where you can view the clients connected to a channel.
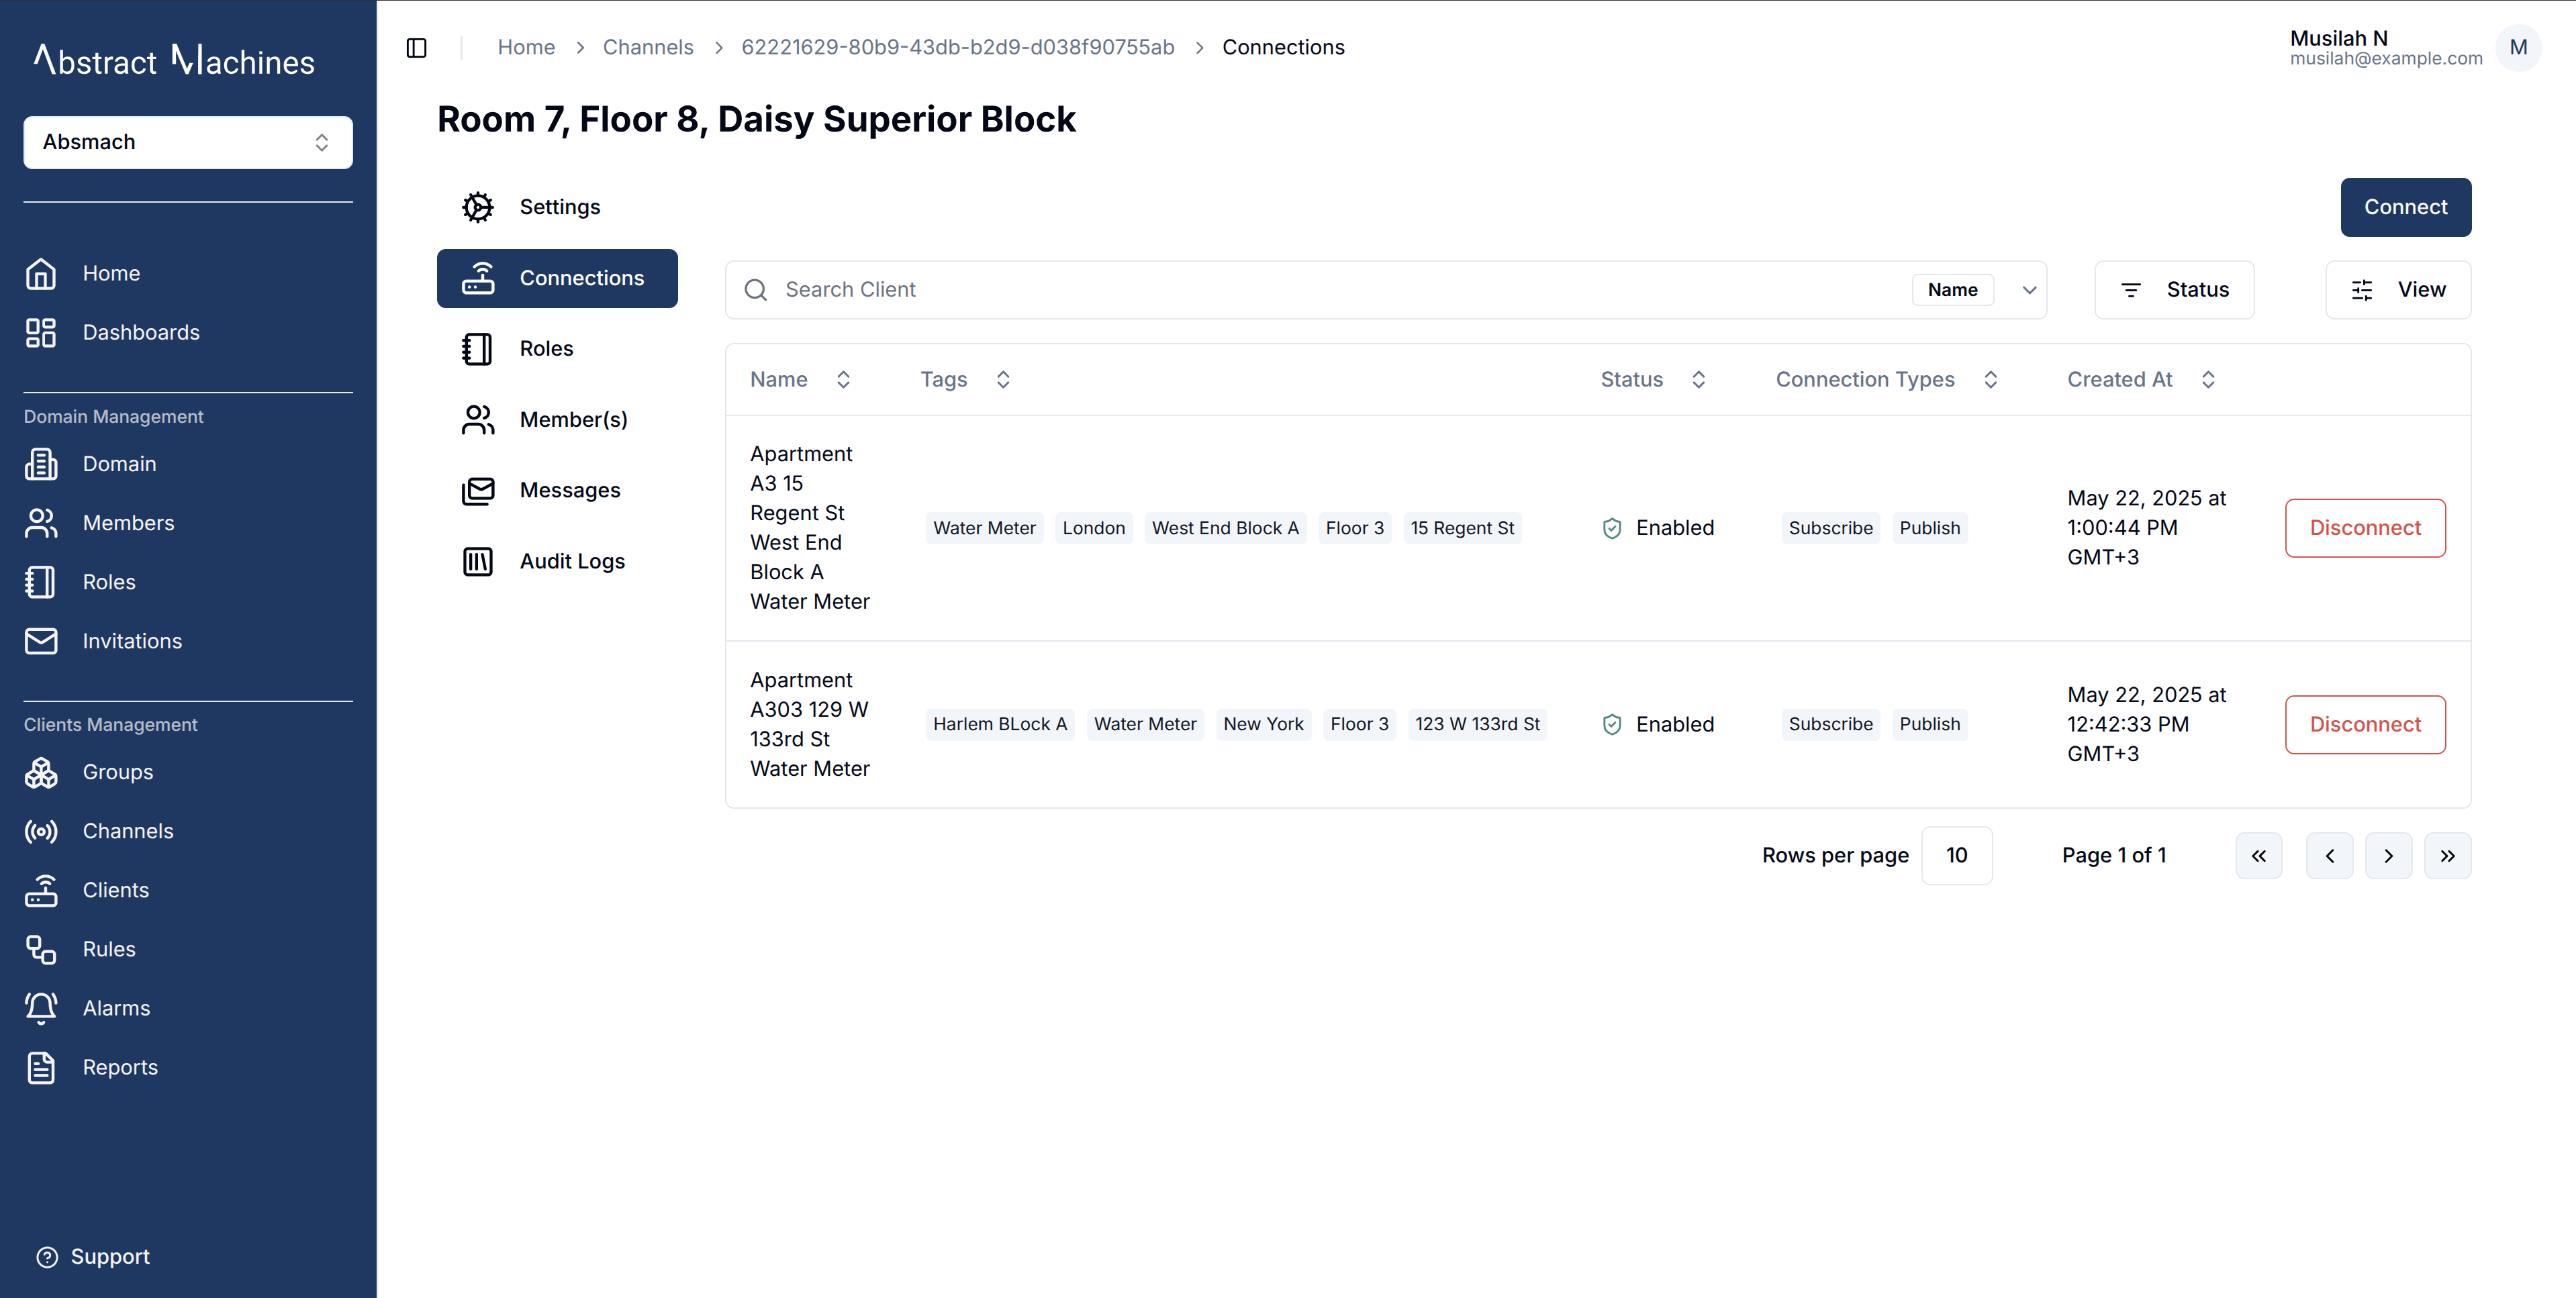
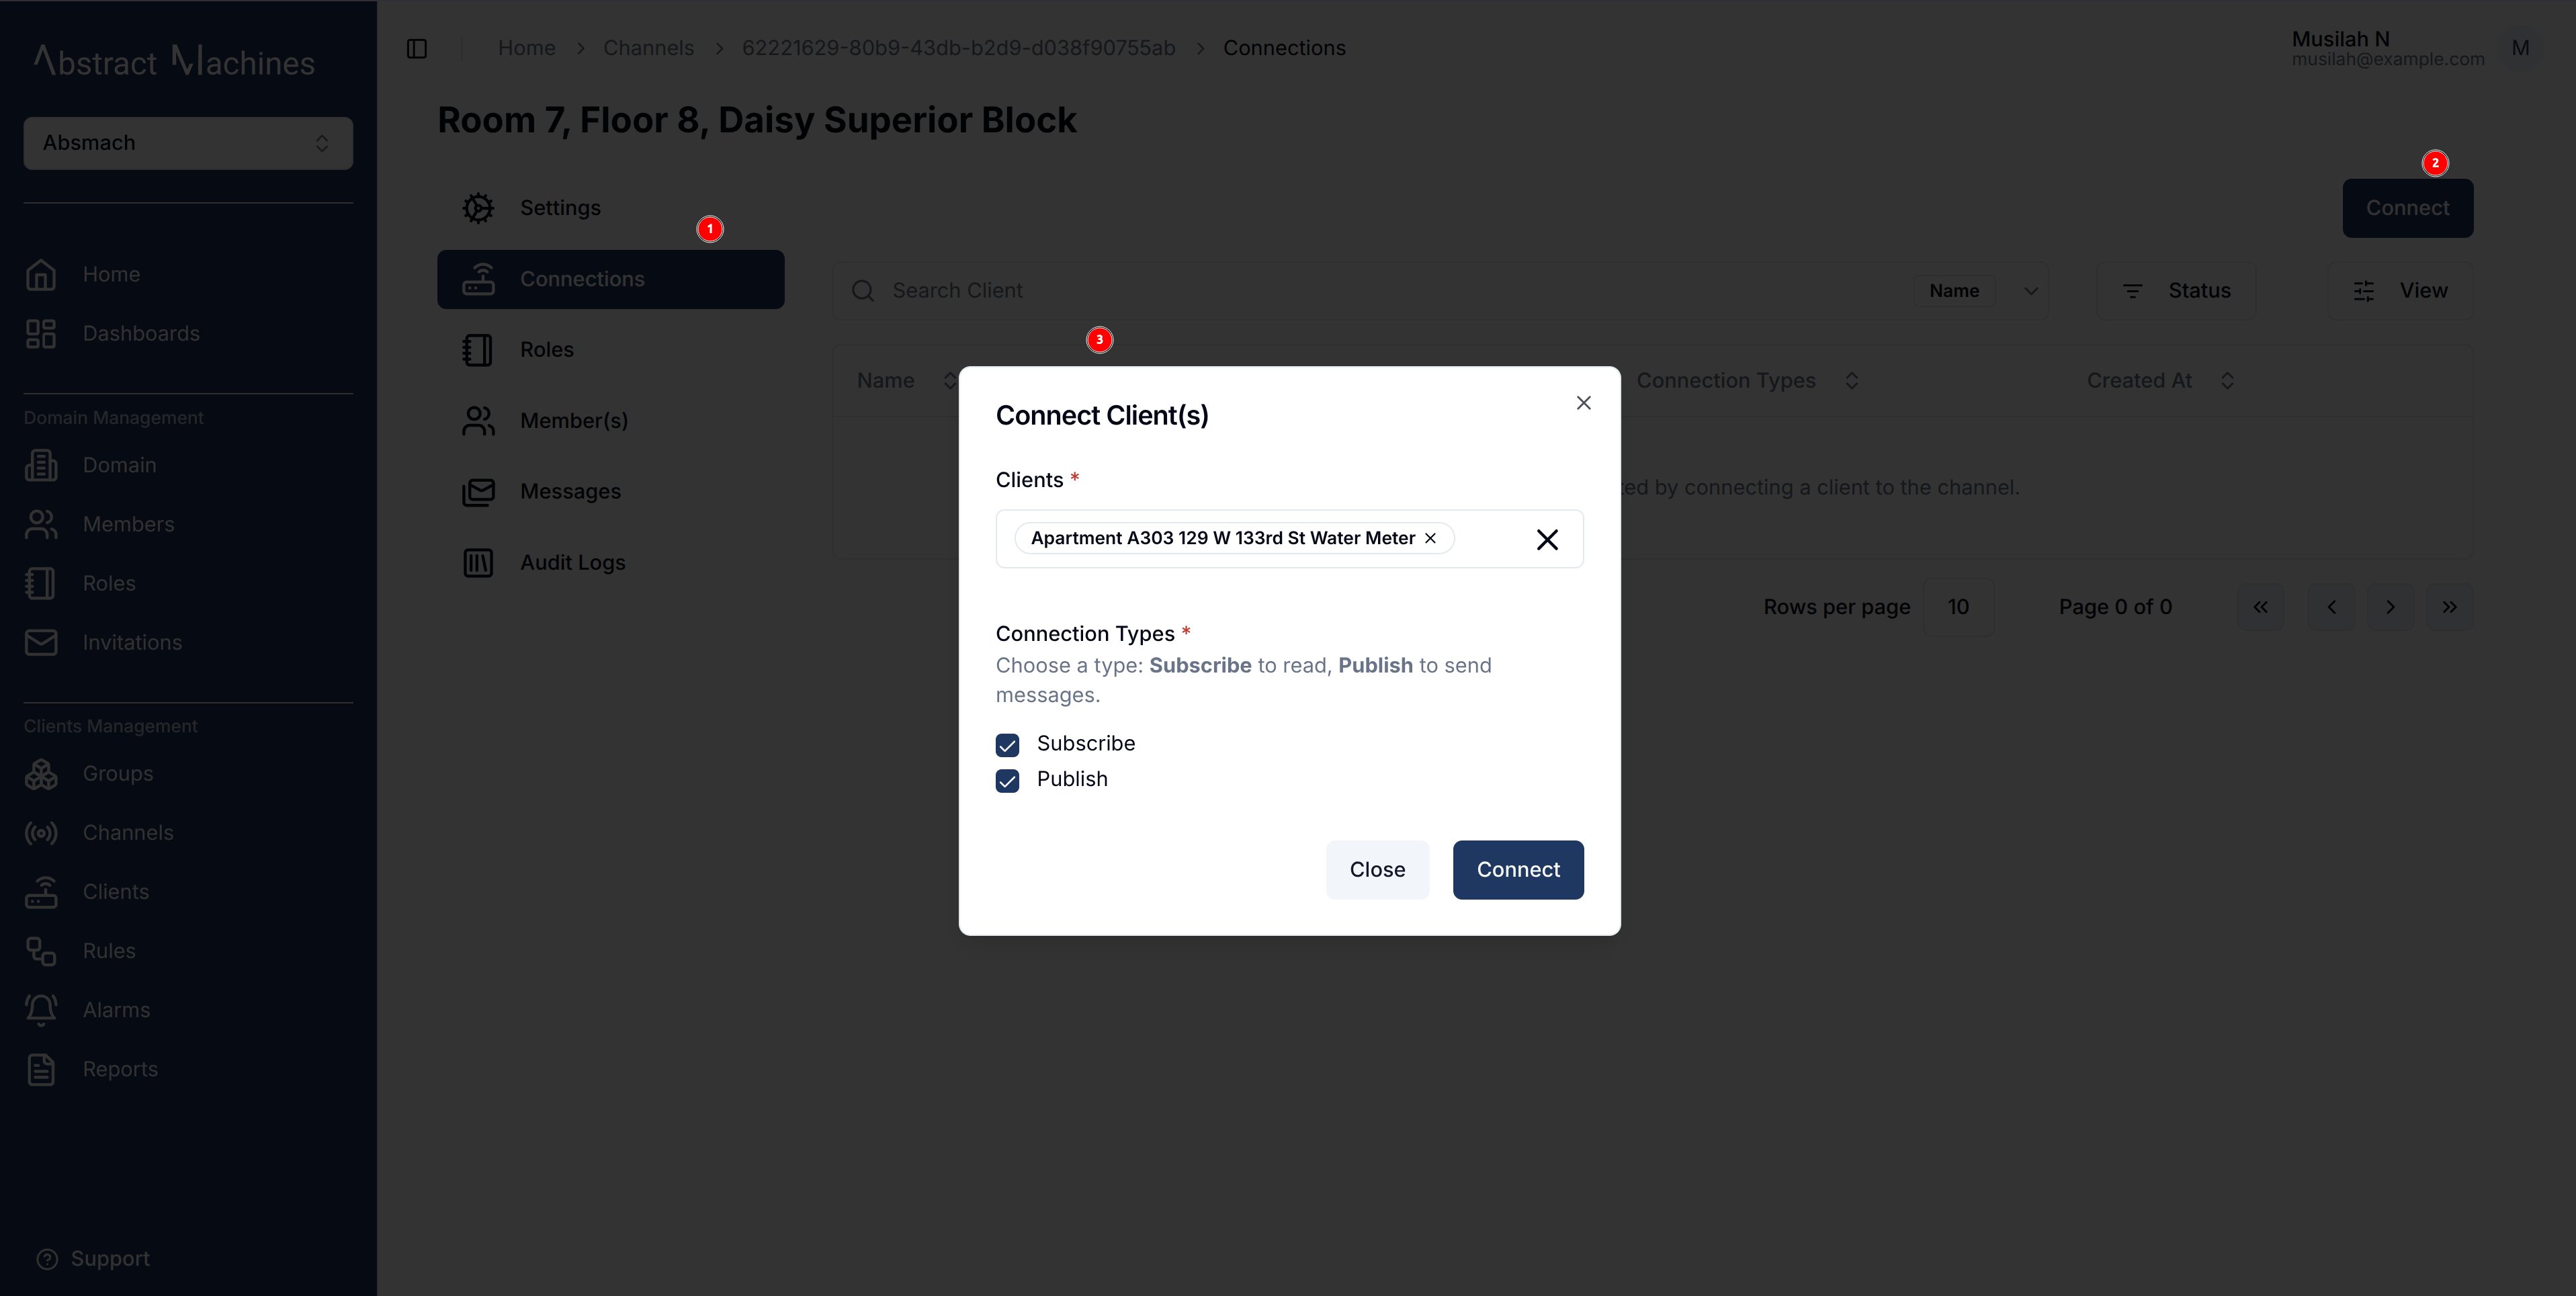
In this page you are able to add a connection by clicking on the Connect button on the top right corner.
This opens up a dialog box that allows you to select the clients you want to connect and with which connection type.
There are two connection type options:
- Publish: Allows the client to send messages in the channel
- Subscribe: Allows the client to read messages in the channel
A client can have both connection types selected.
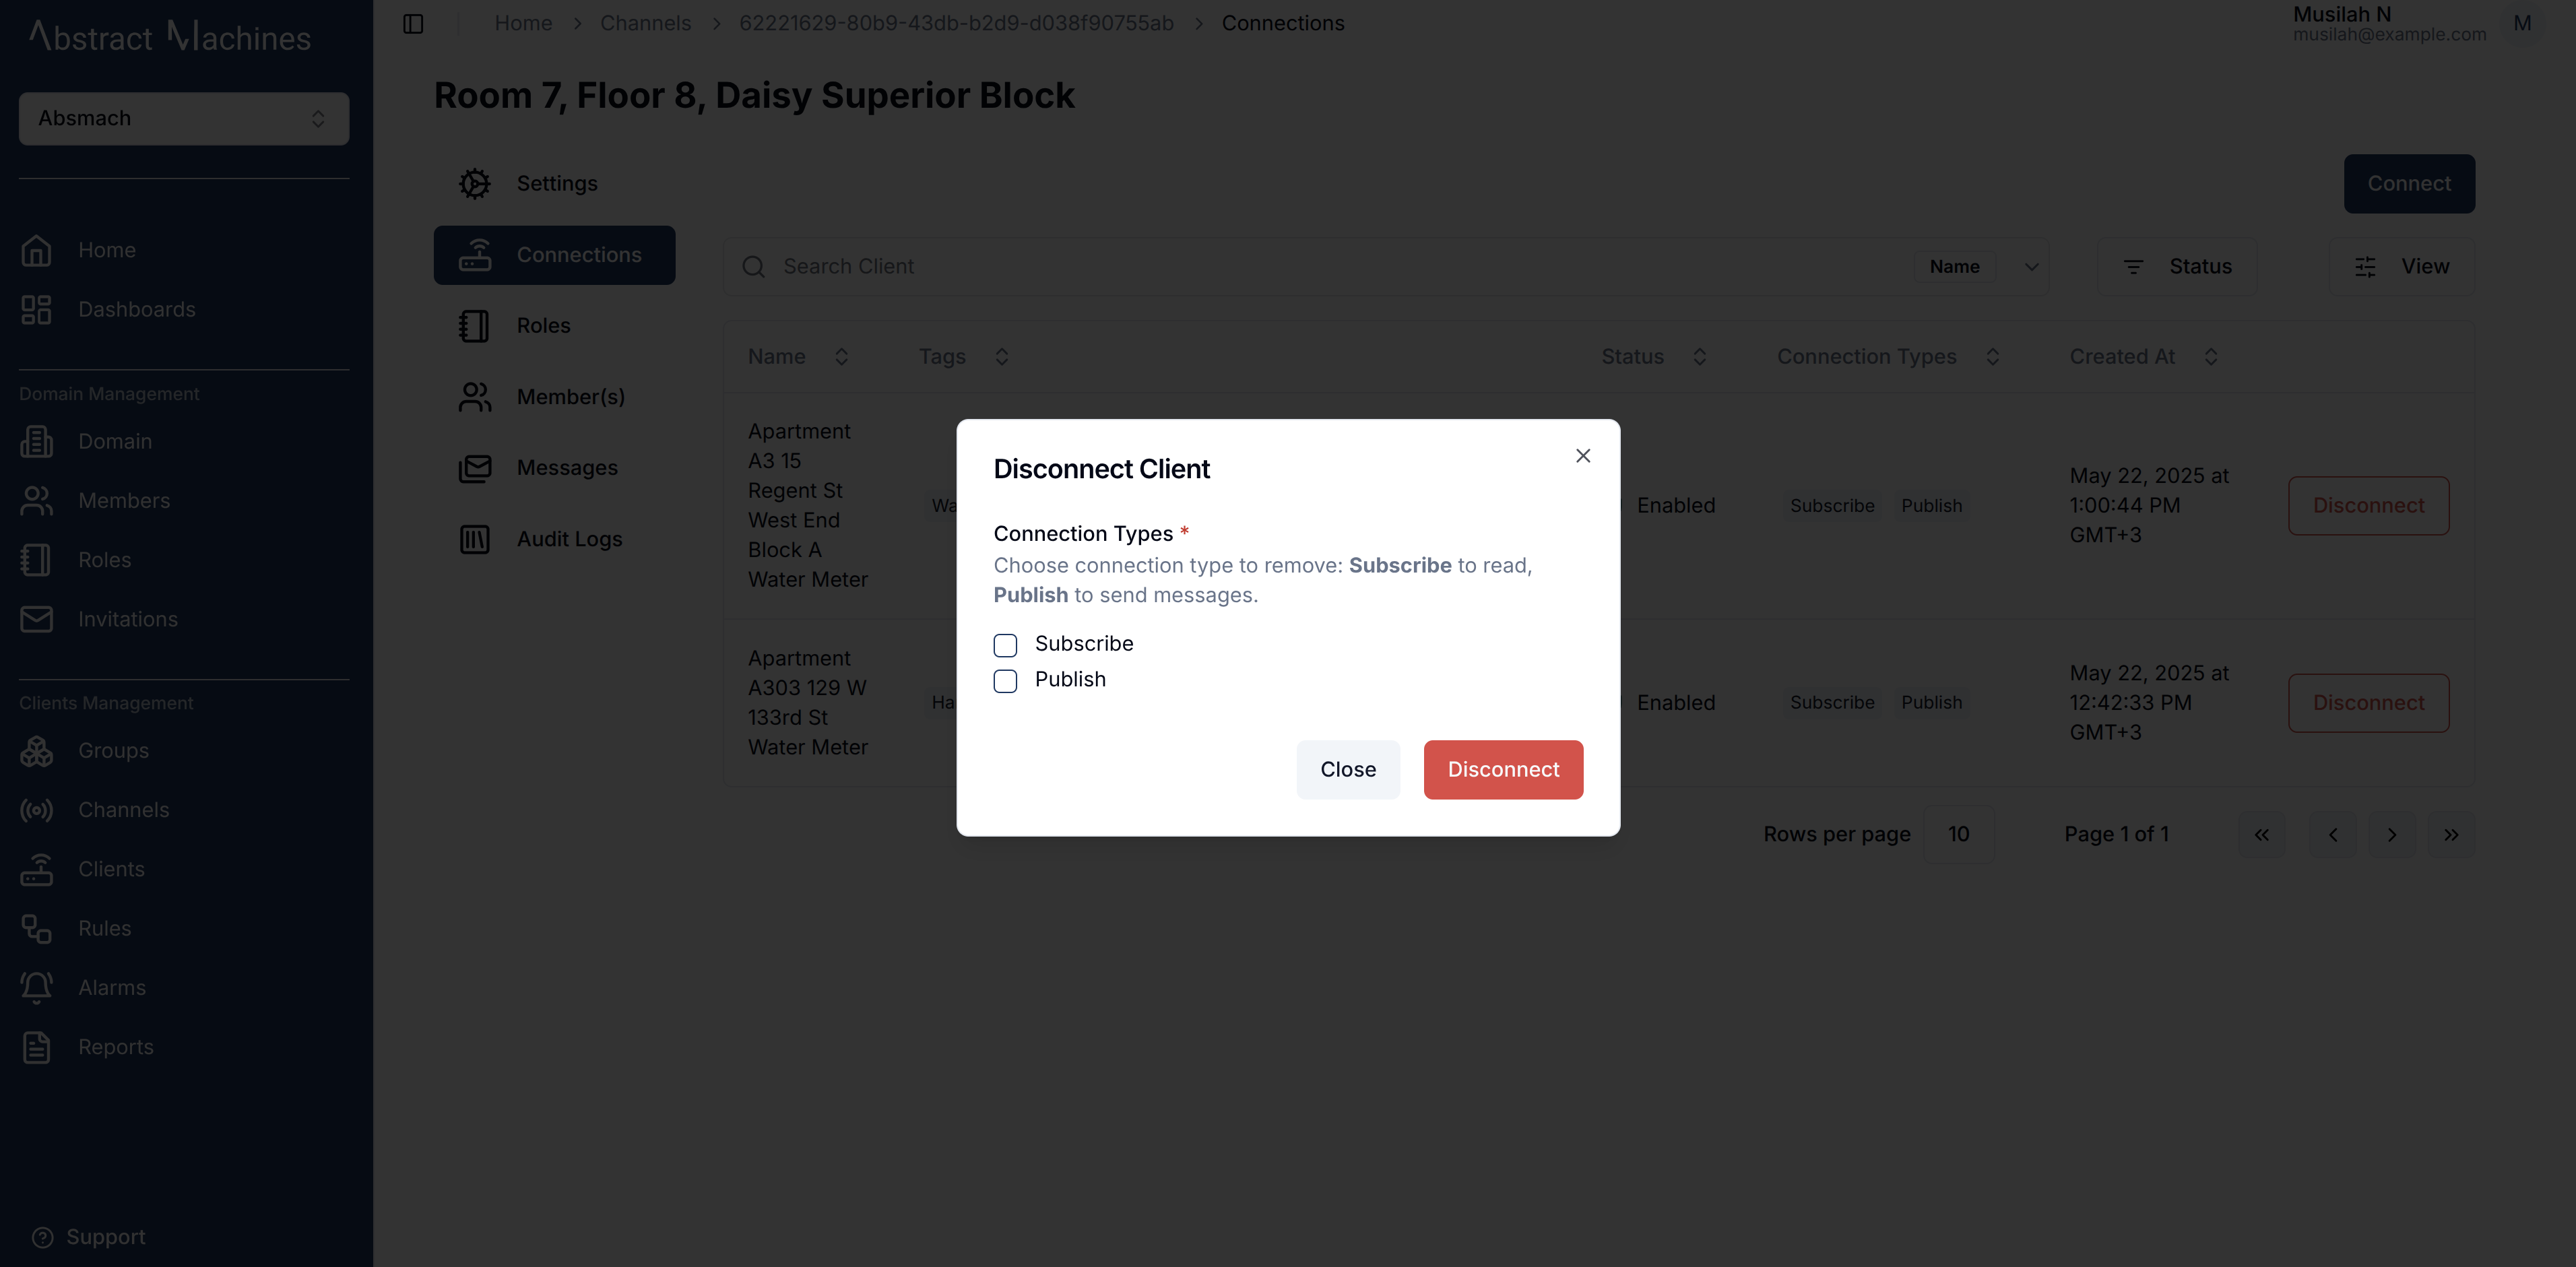
To disconnect the client, click on the Disconnect button at the end of the channel row.
This will open up a dialog that allows you to select which connection type you want to remove. You can remove one or both of the connection types if there are multiple.
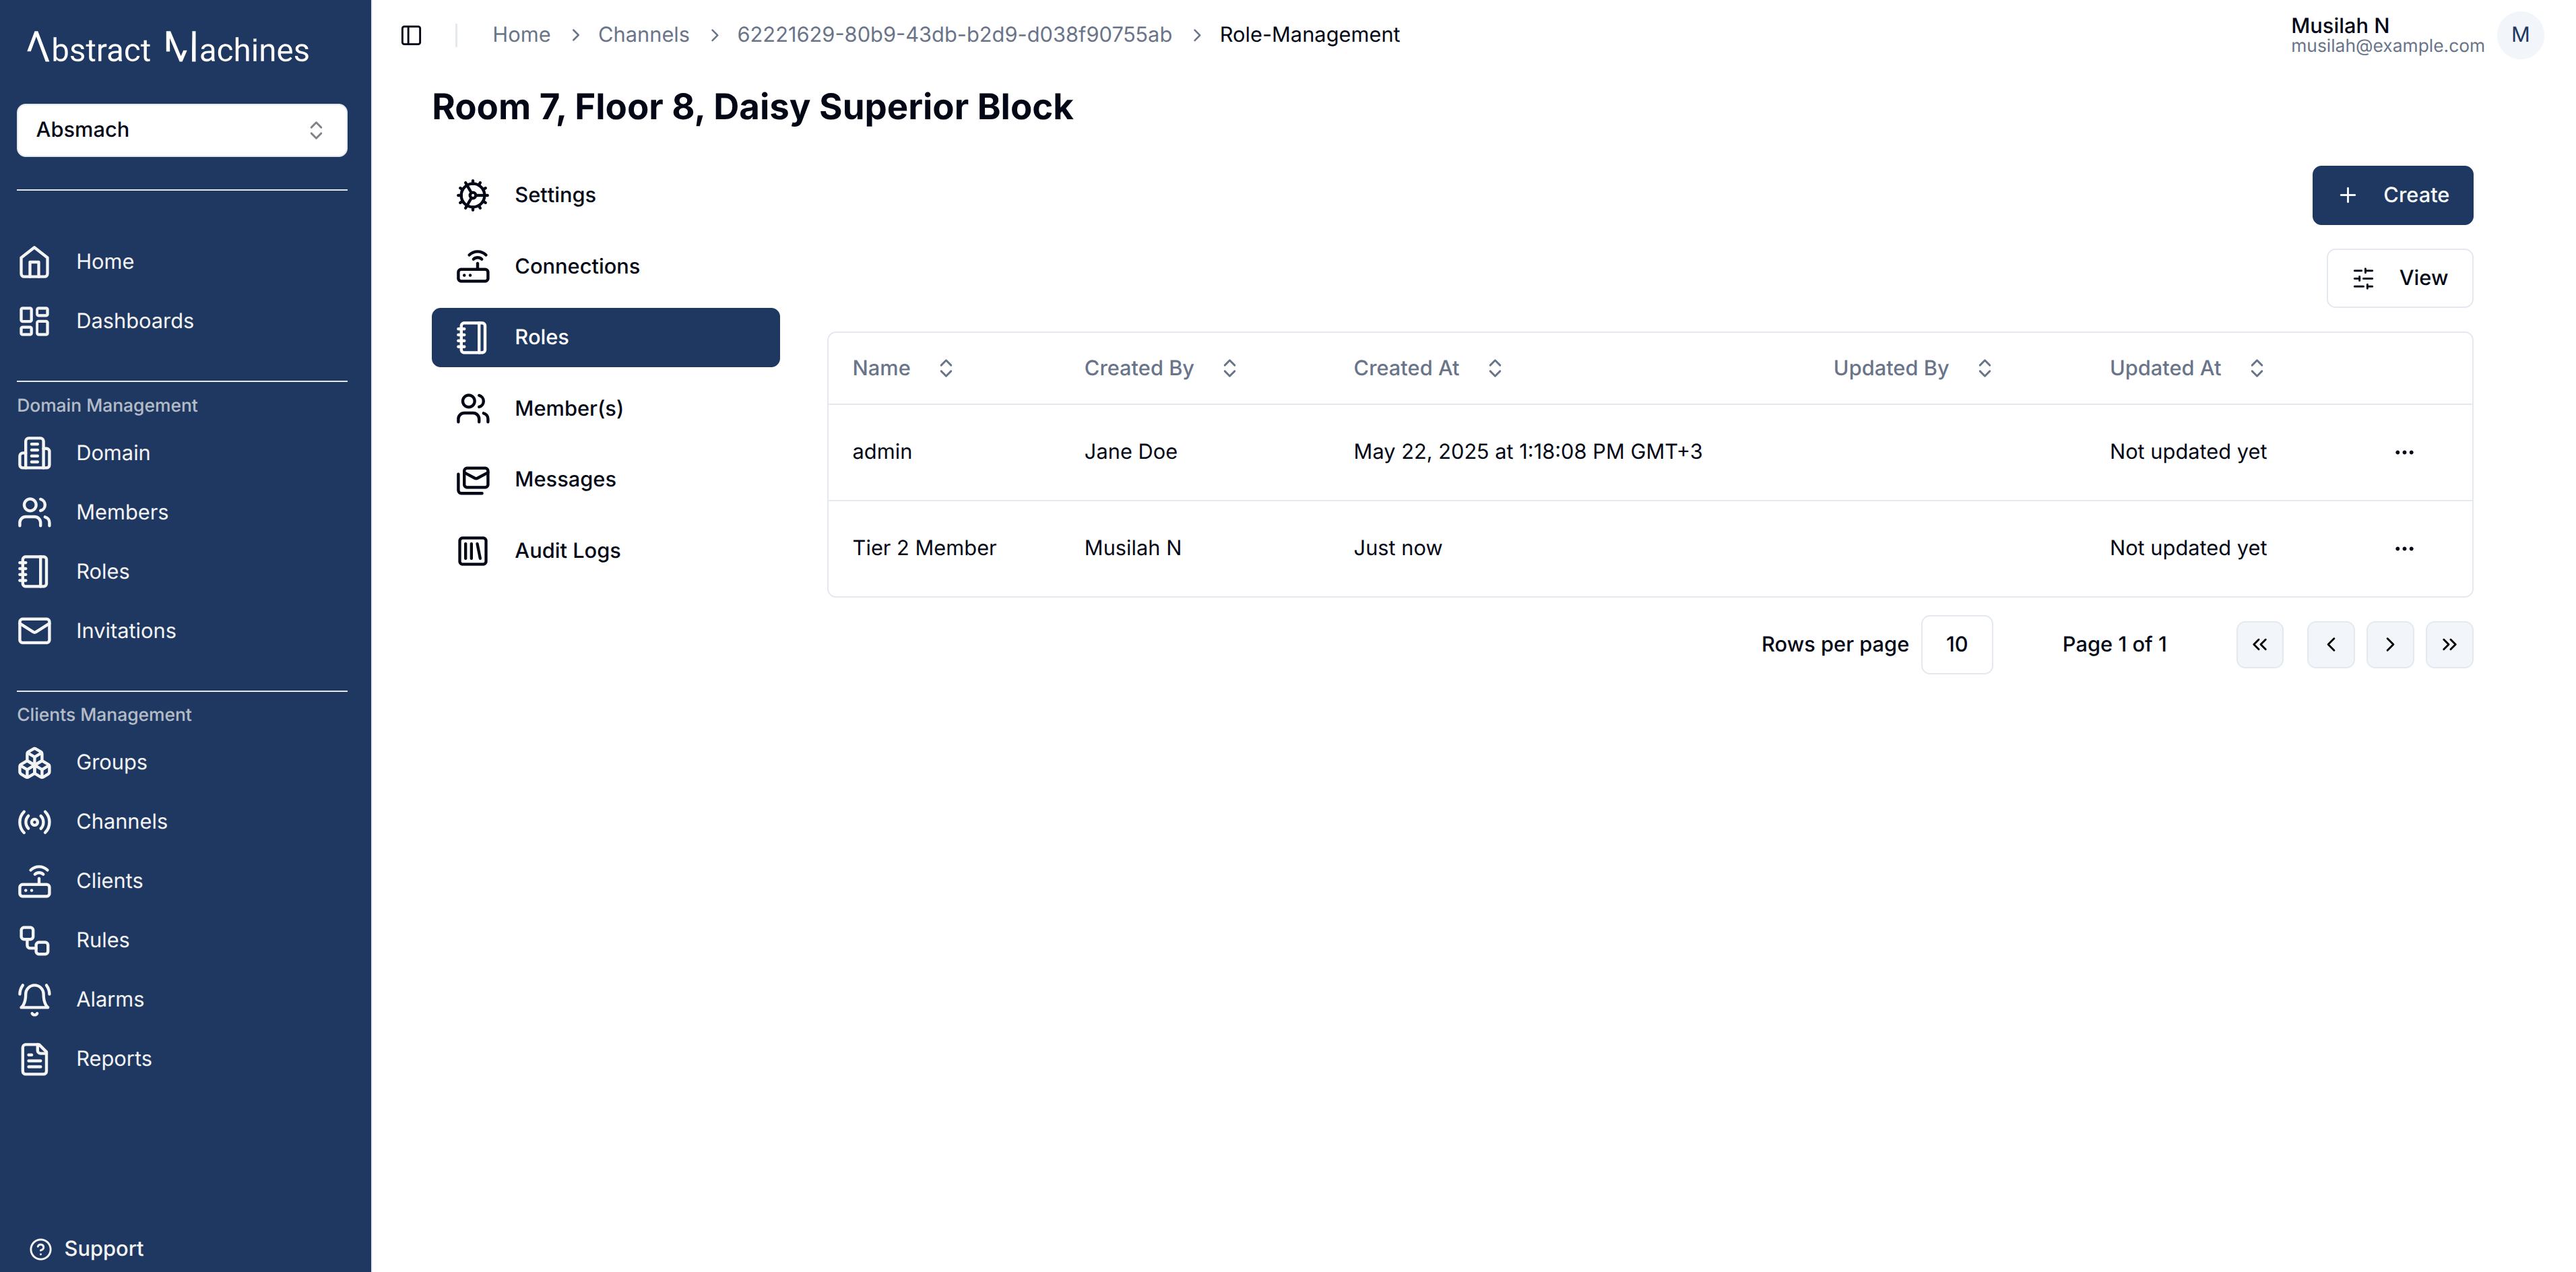
Channel Roles
Roles allow you to group a specific set of actions and allocate them to users. Navigate to the Roles section of the channel sidebar. This will lead you to a table of all the available roles in the channel.
To create a role, navigate to the roles section on the client navbar. Click on the + Create button and provide a role name. The actions and members are optional fields.
Channel Role Information
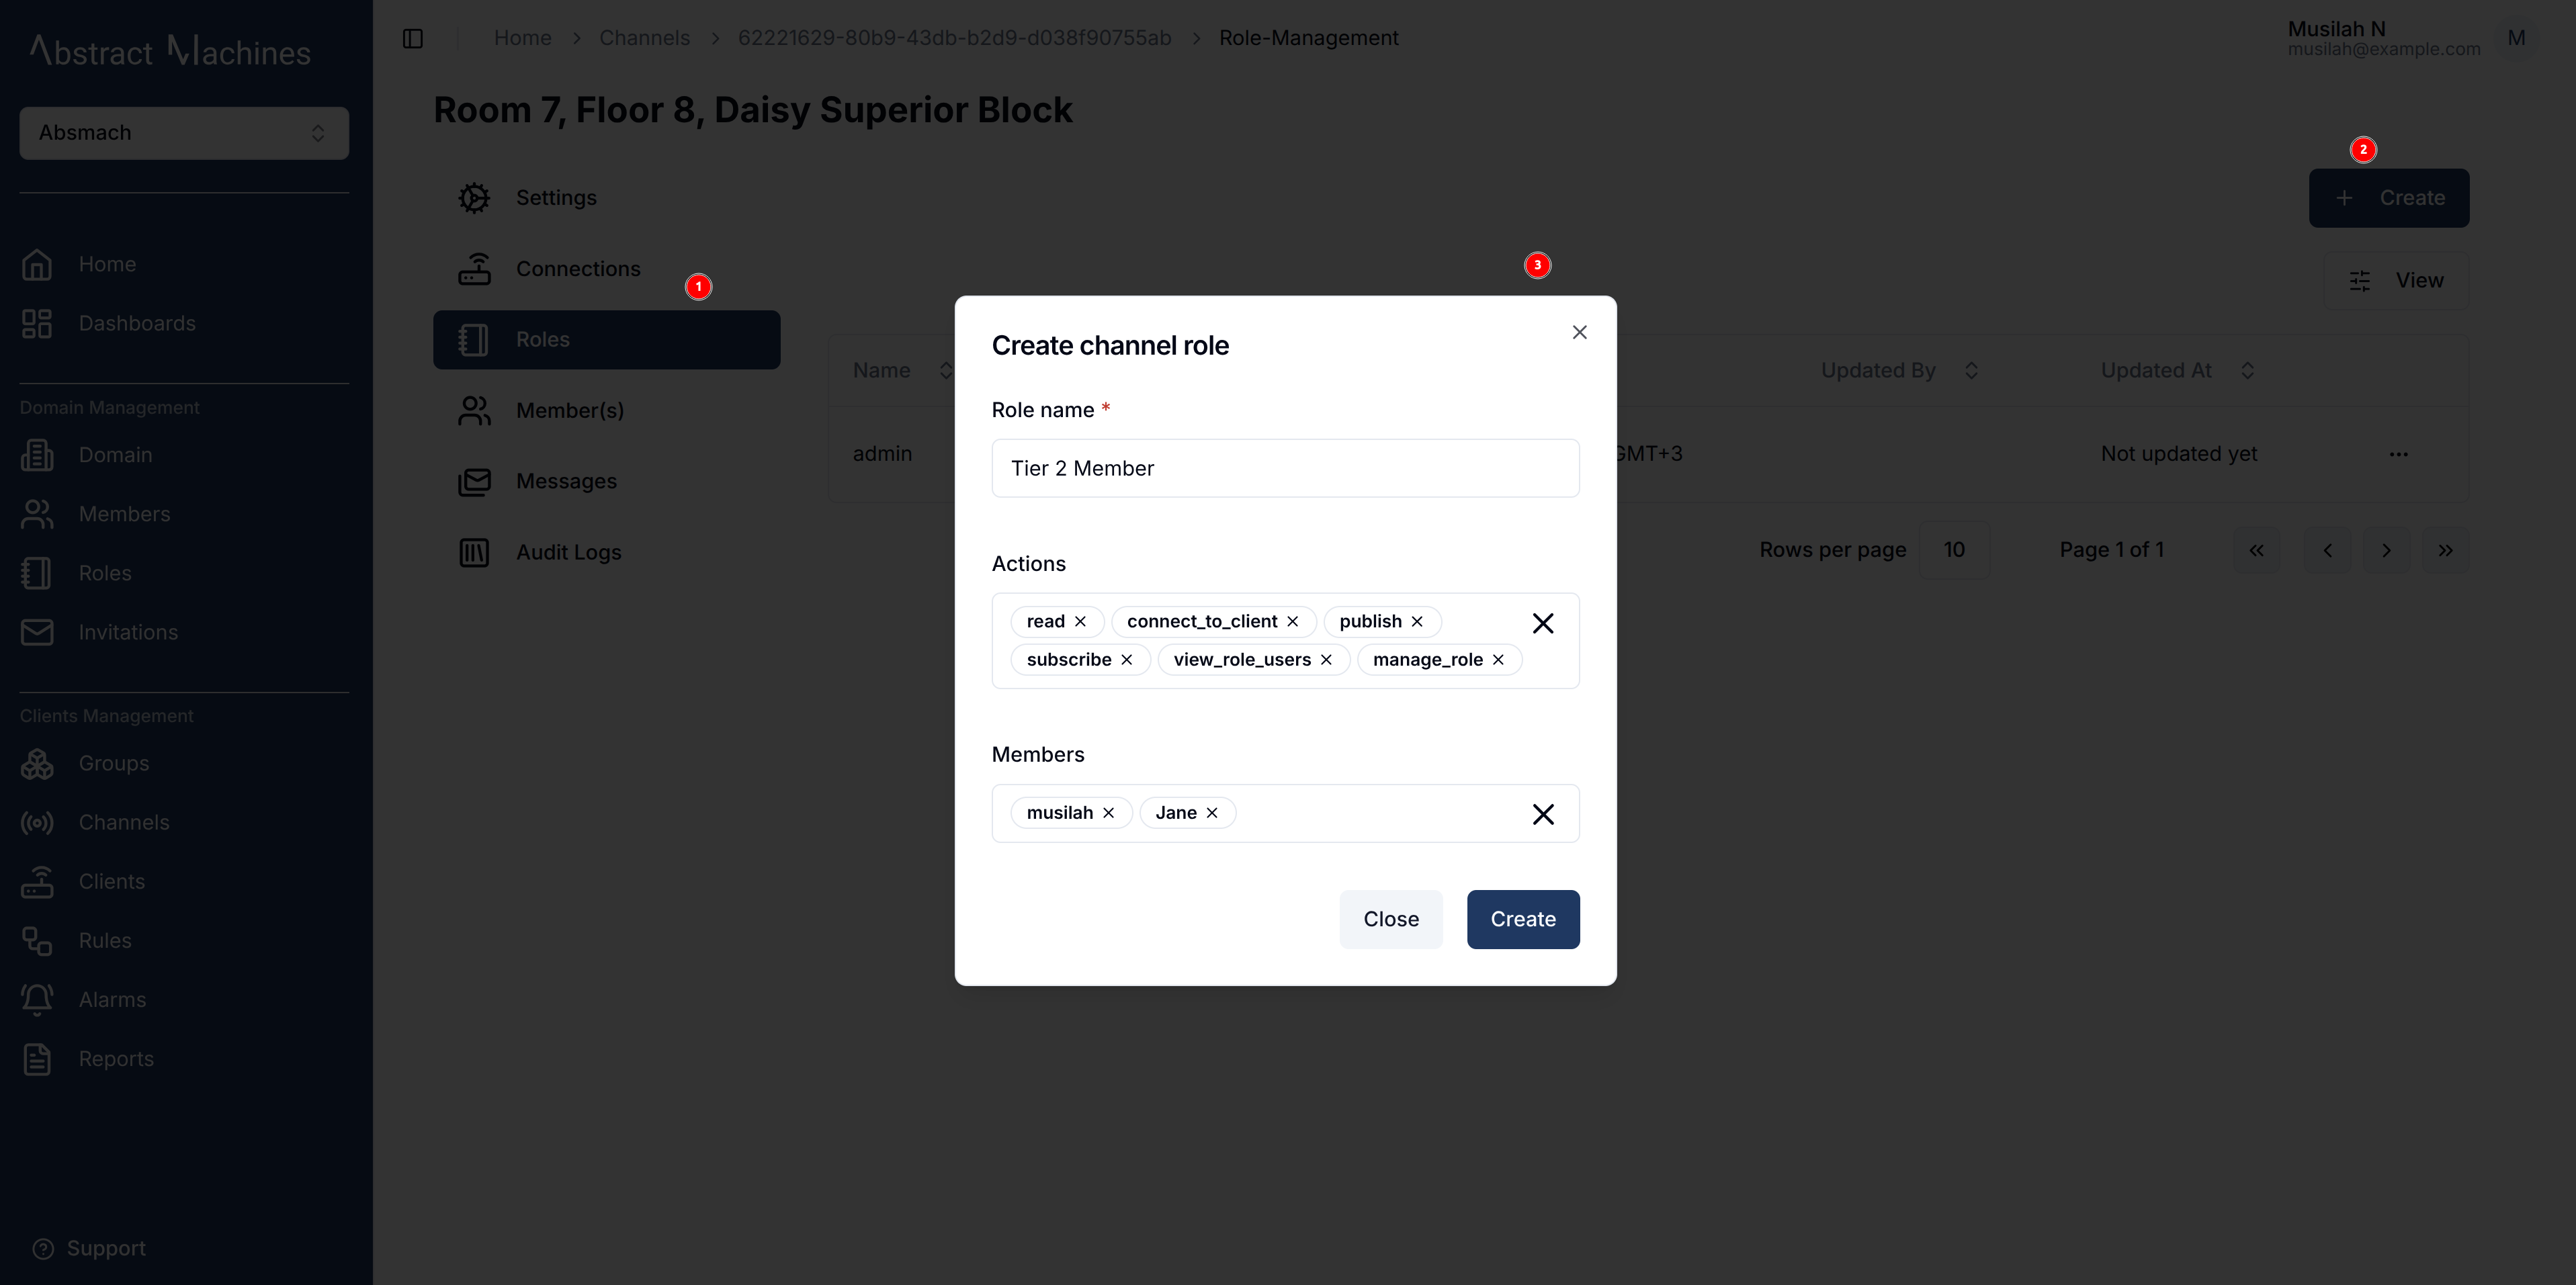
The Role Name is compulsory. You can provide the role actions by selecting from the available actions in the dropdown menu depending on which permissions you would wish each member to have access to. You can also optionally provide the members by searching for a user with their username.
The following is the list of available actions for a channel:
- update
- read
- delete
- set_parent_group
- connect_to_client
- publish
- subscribe
- manage_role
- add_role_users
- remove_role_users
- view_role_users
Update Channel Role Name
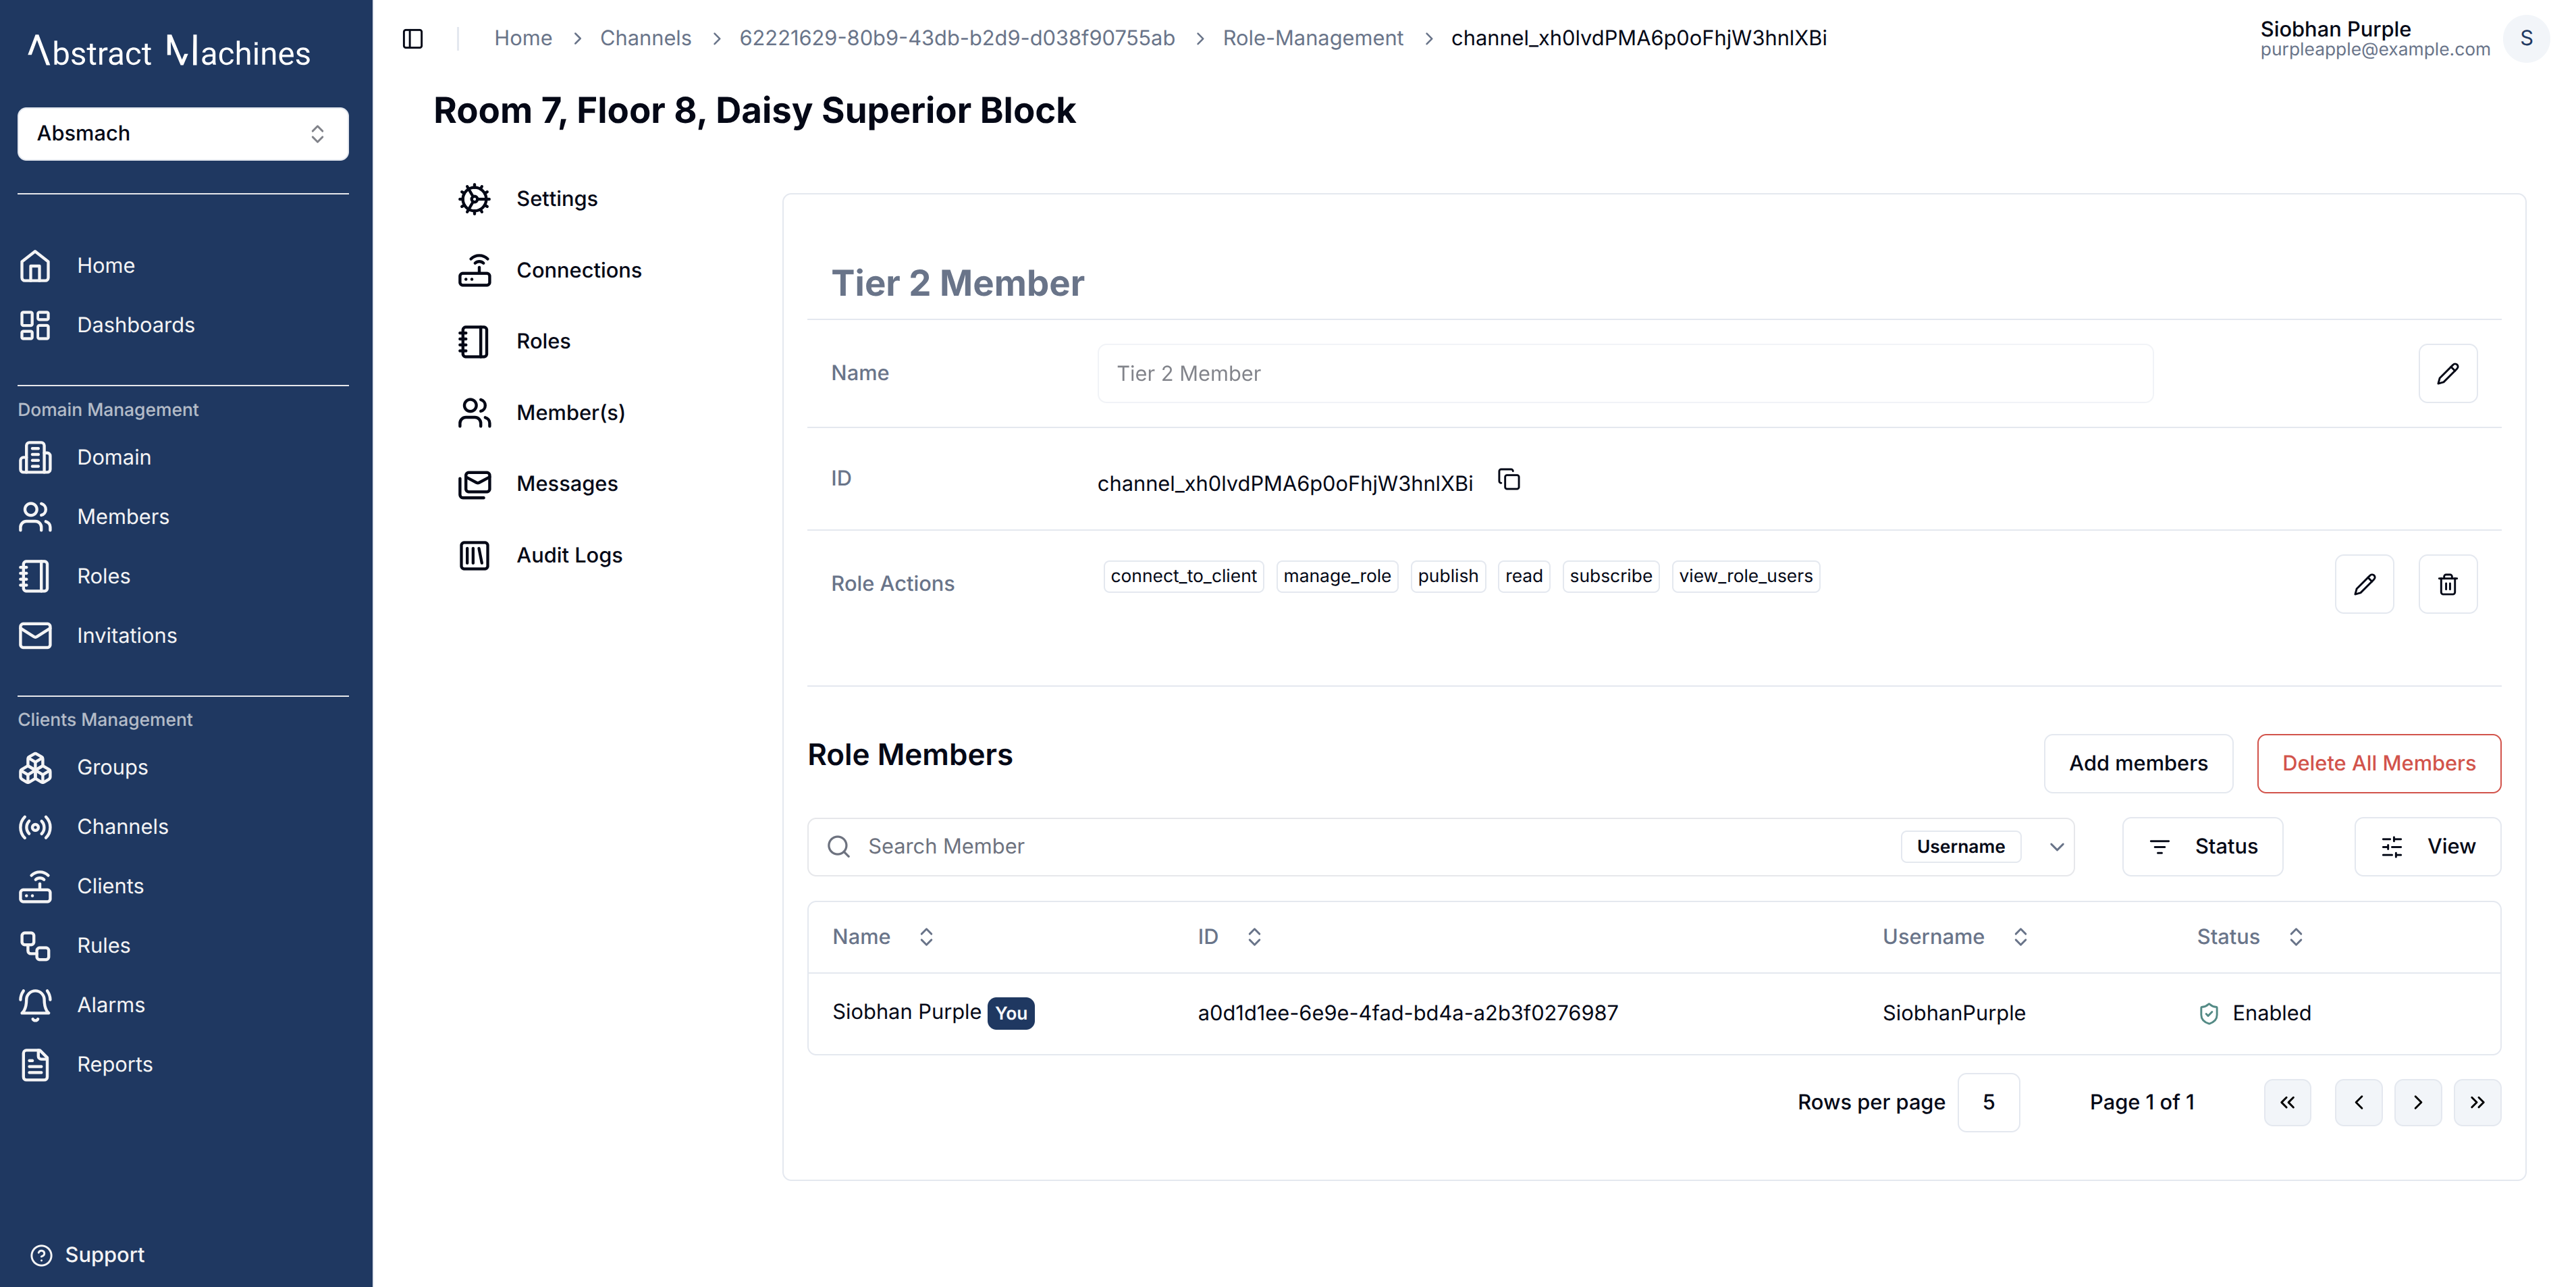
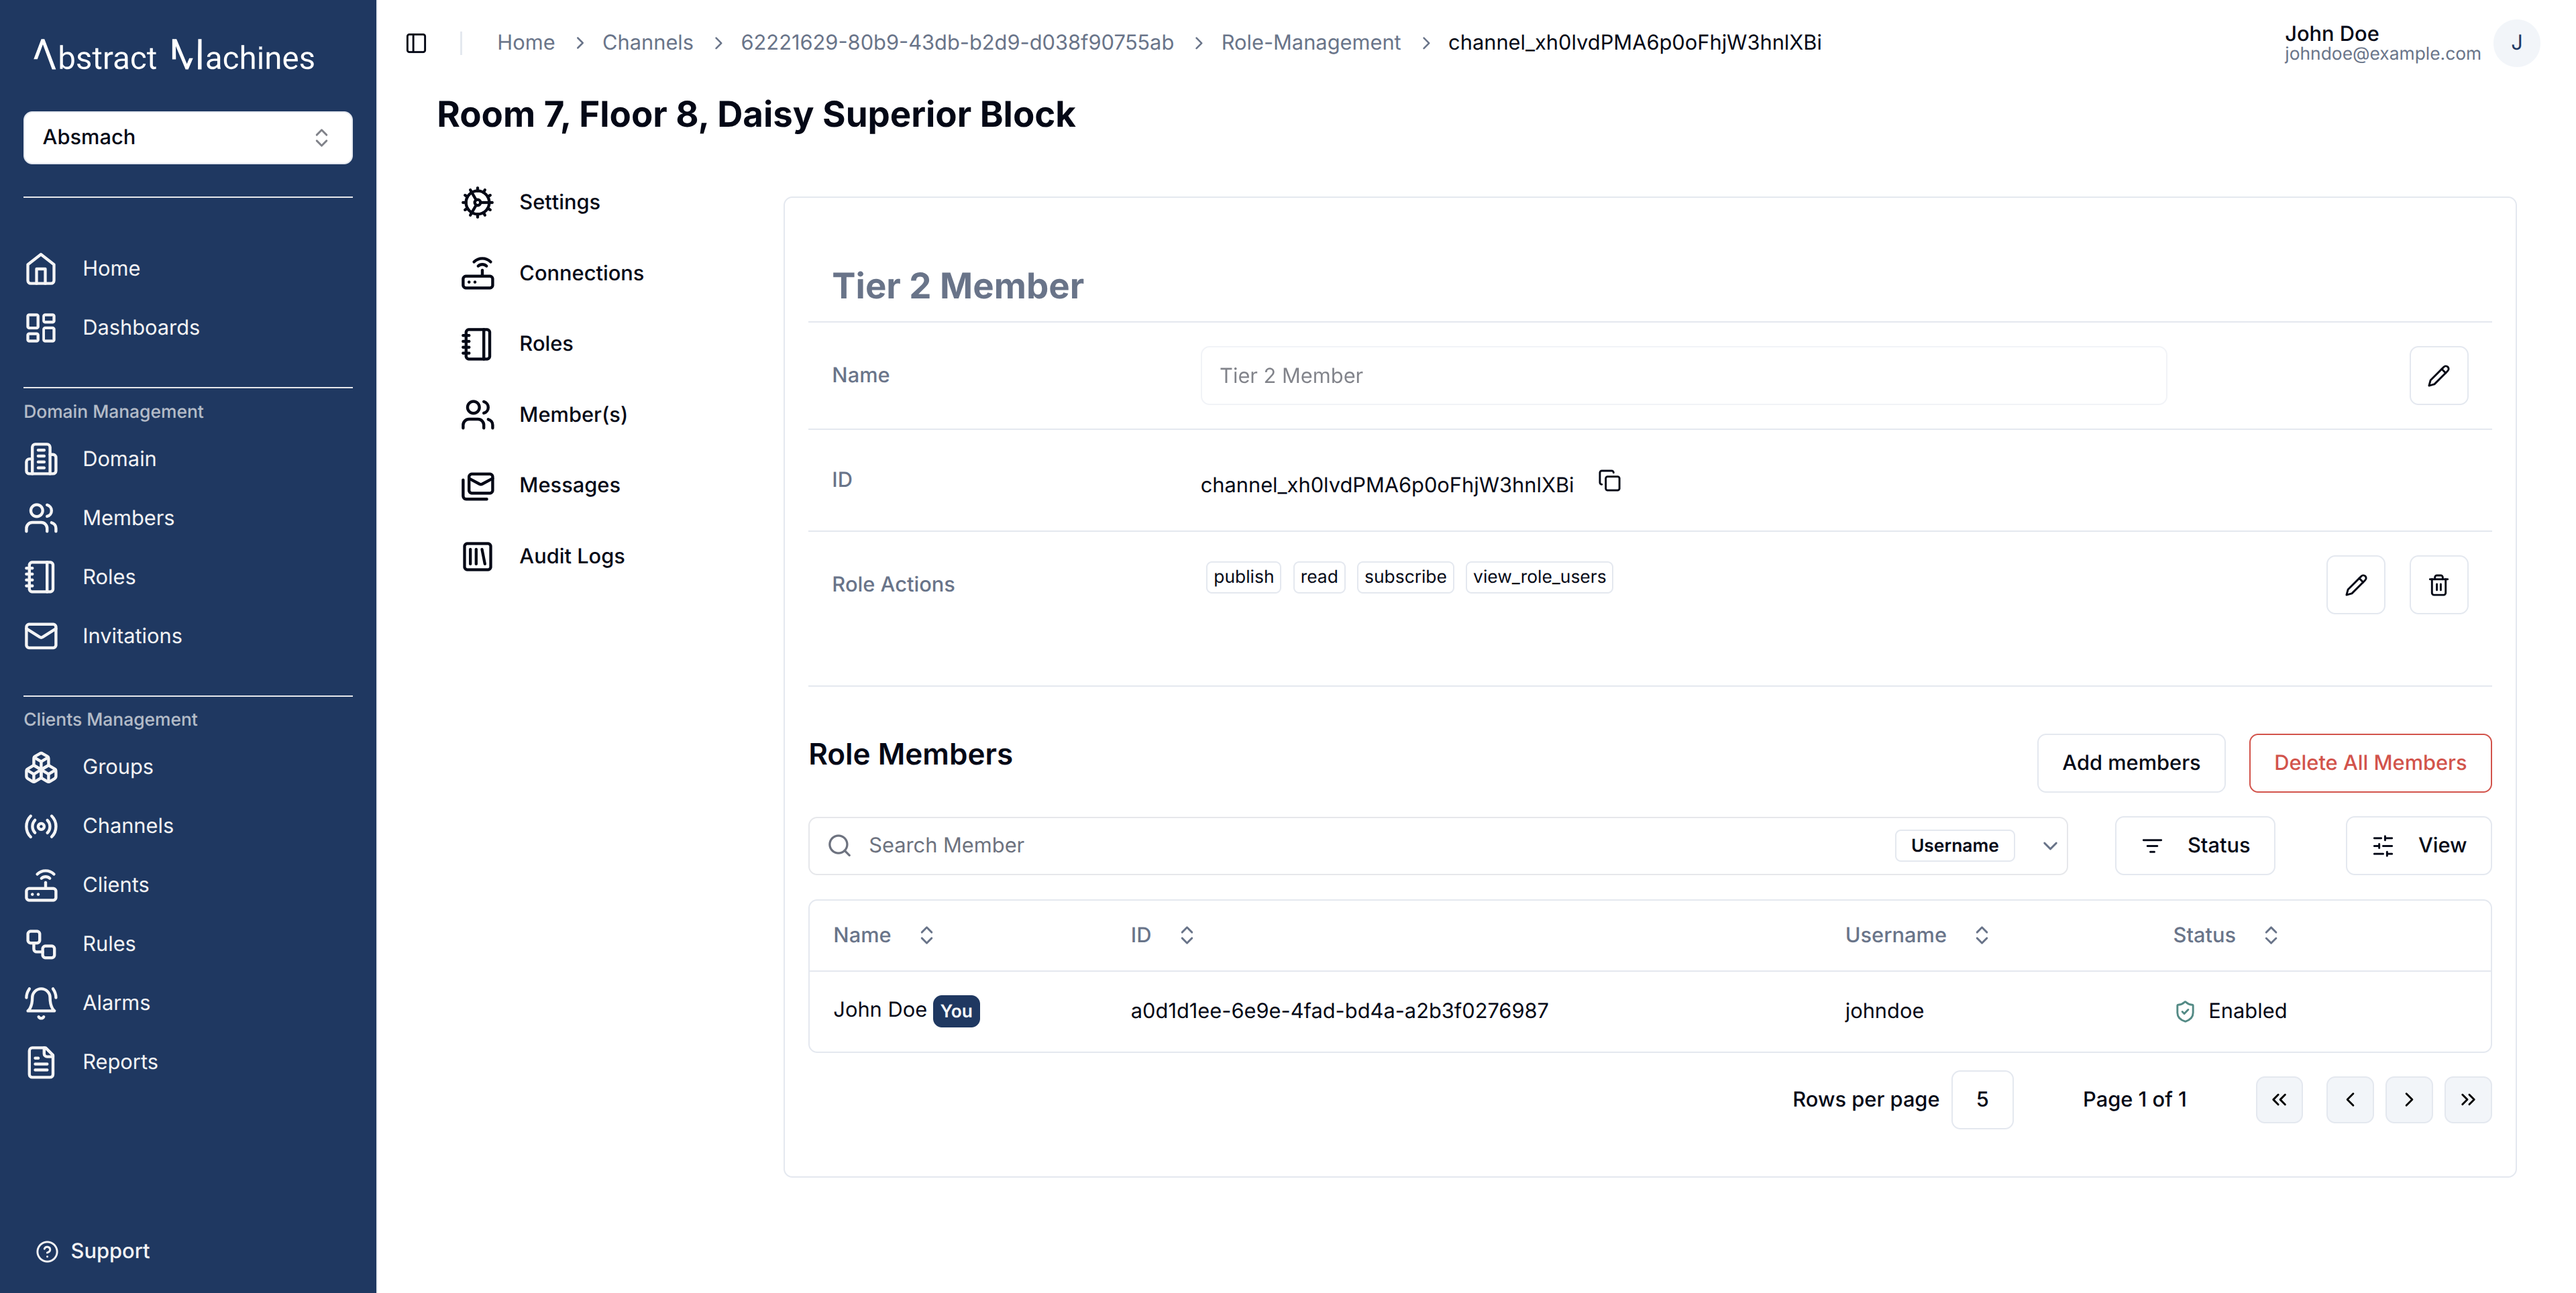
Clicking on a Channel Role leads you to the Role page with itss Role Actions and Role Members table.
To update a role name, click on the pencil icon on the far right end of the field, update the value then click on the check icon to update the changes or the cross icon to cancel the changes.
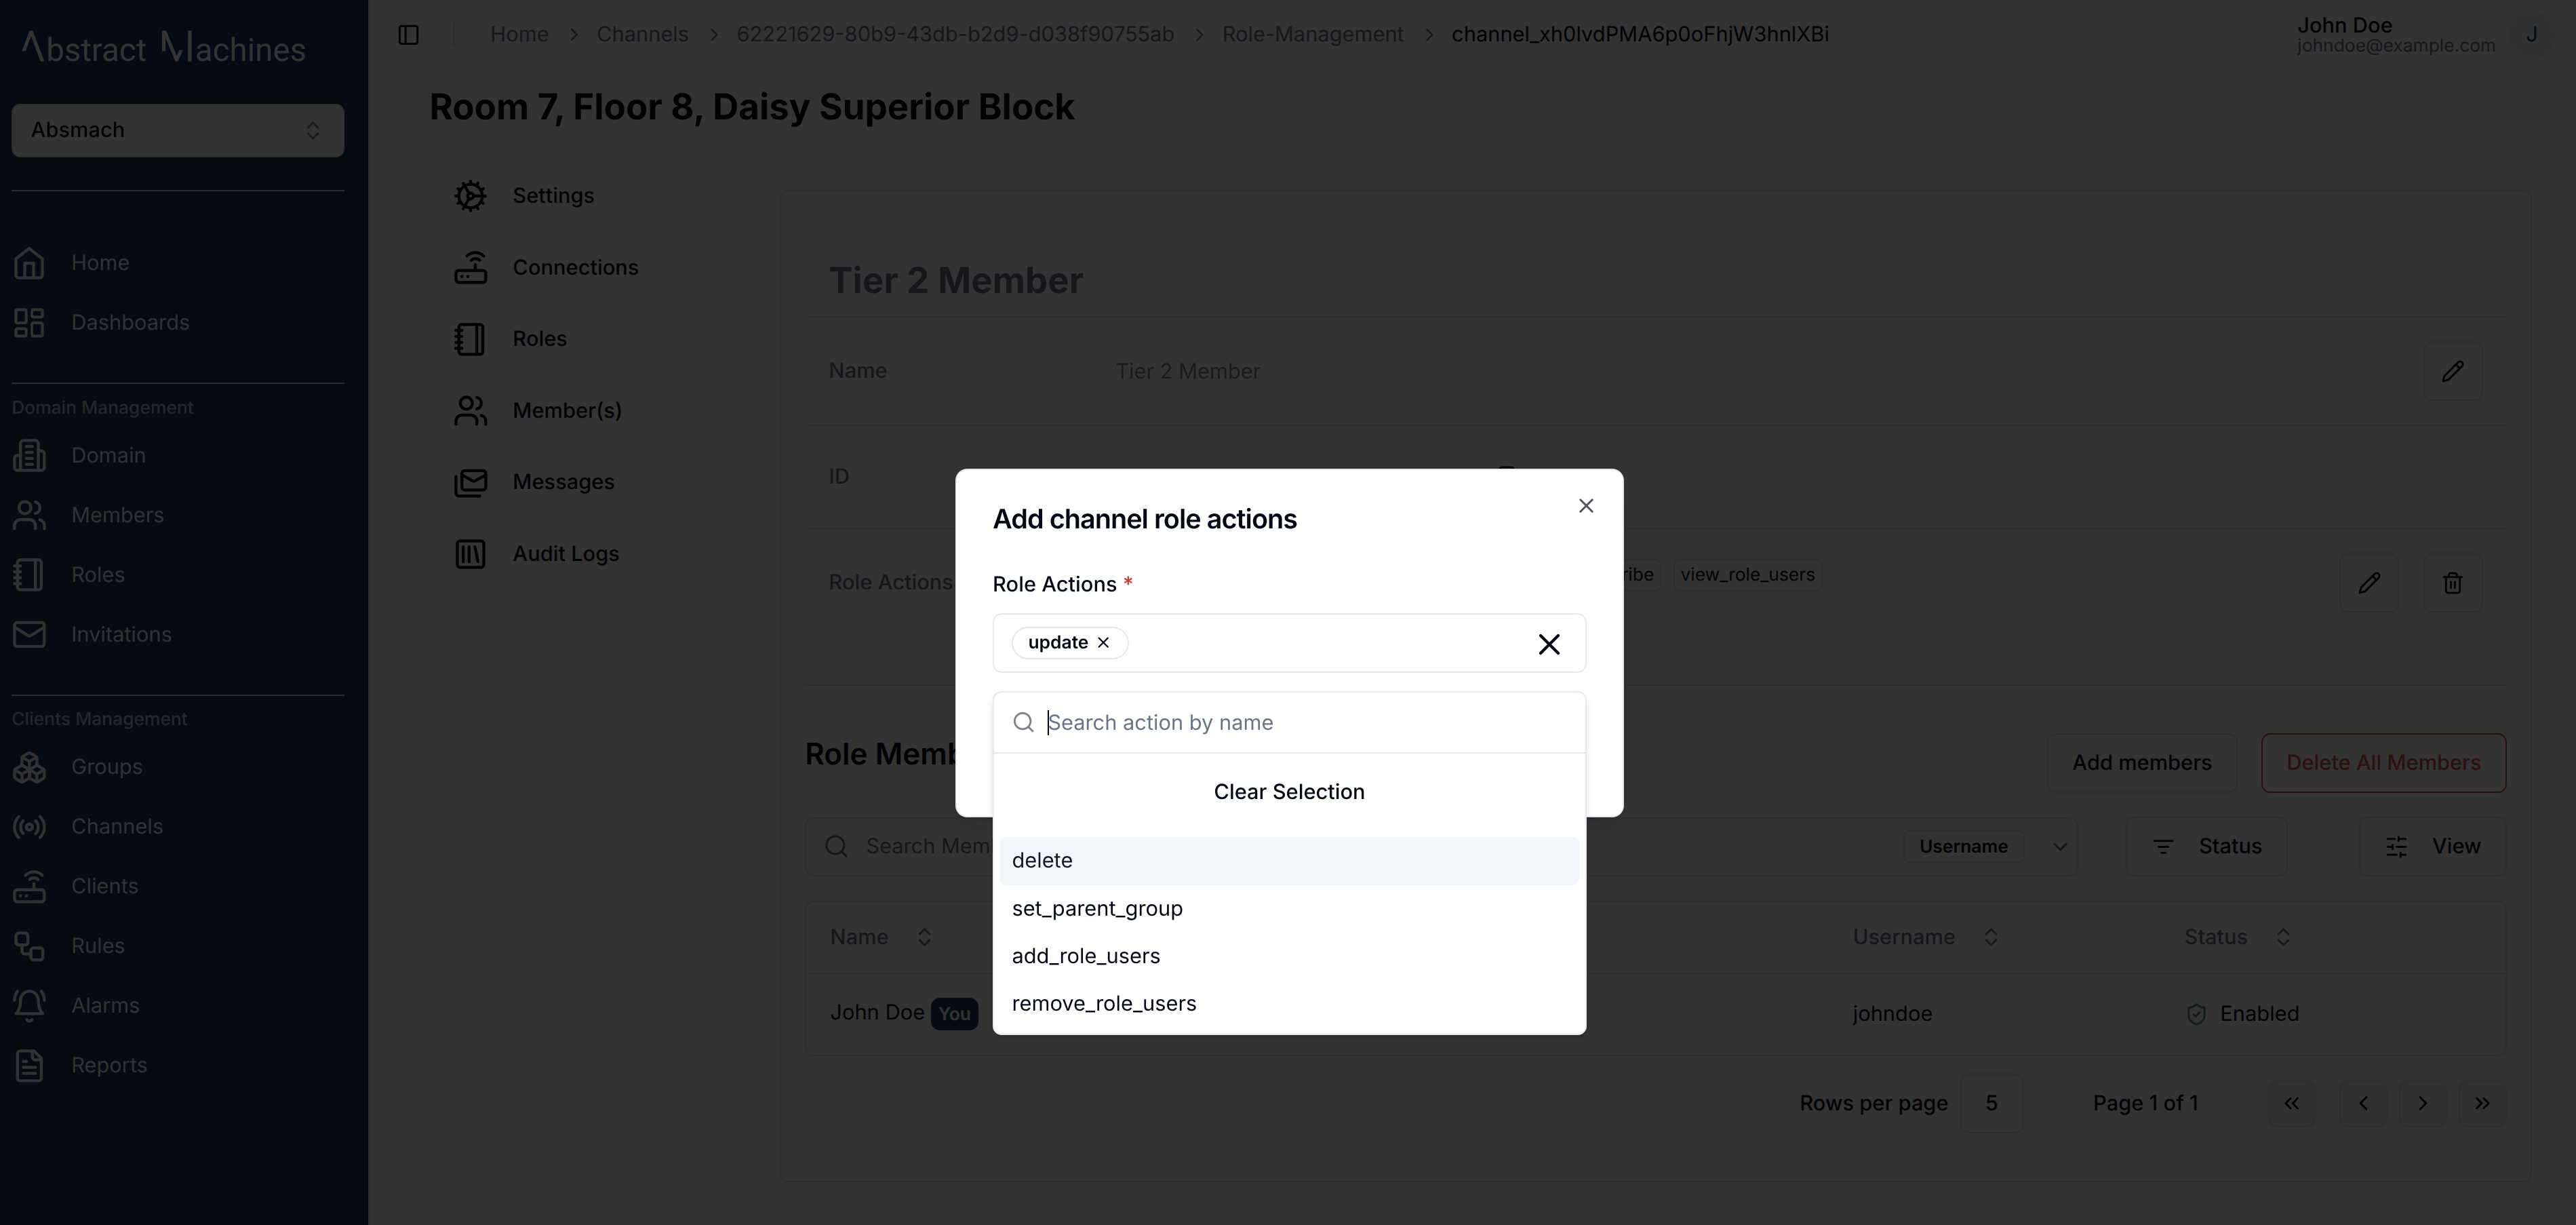
Update Channel Role Actions
To update the role actions, click the pencil icon on the row. Updating Role Actions will open a dialog box allowing you to select the Role Actions you want to add. This list will include all available actions that are not currently among your Role Actions.
Update Channel Role Members
Members are listed in a separate table below the Role Actions section.
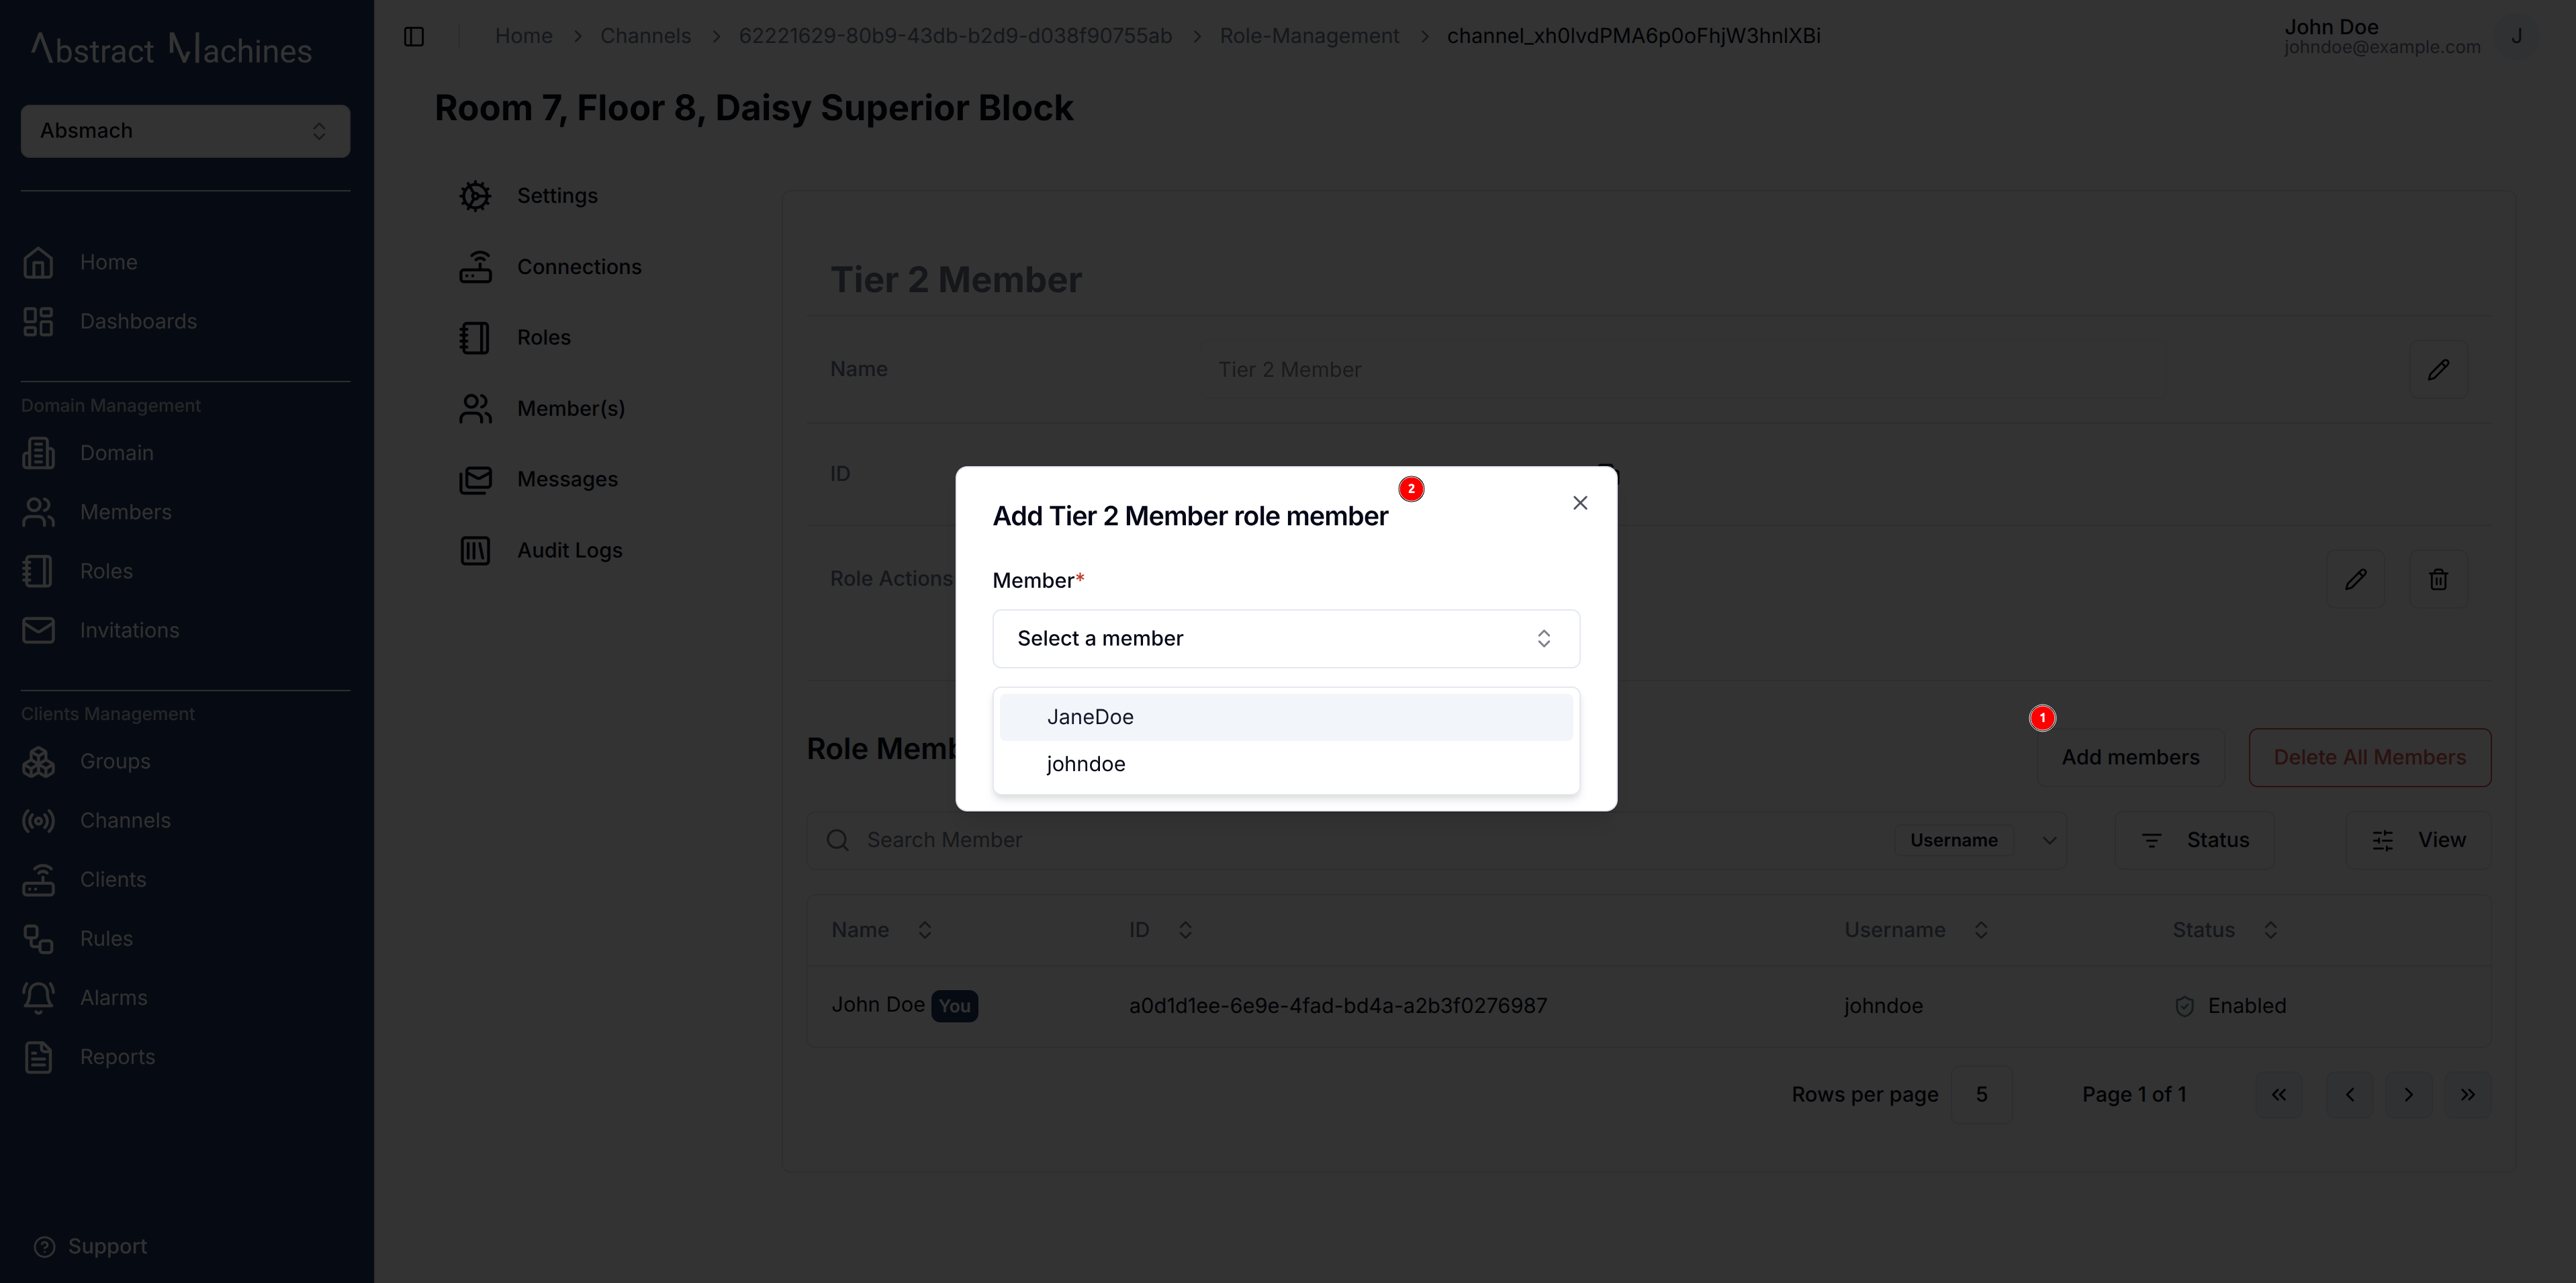
To add new members to the channel under the current role click on Add Members button. The pop-up dialog will allow you to add any user that is a member of the domain to the channel. The users will show up on a dropdown menu.
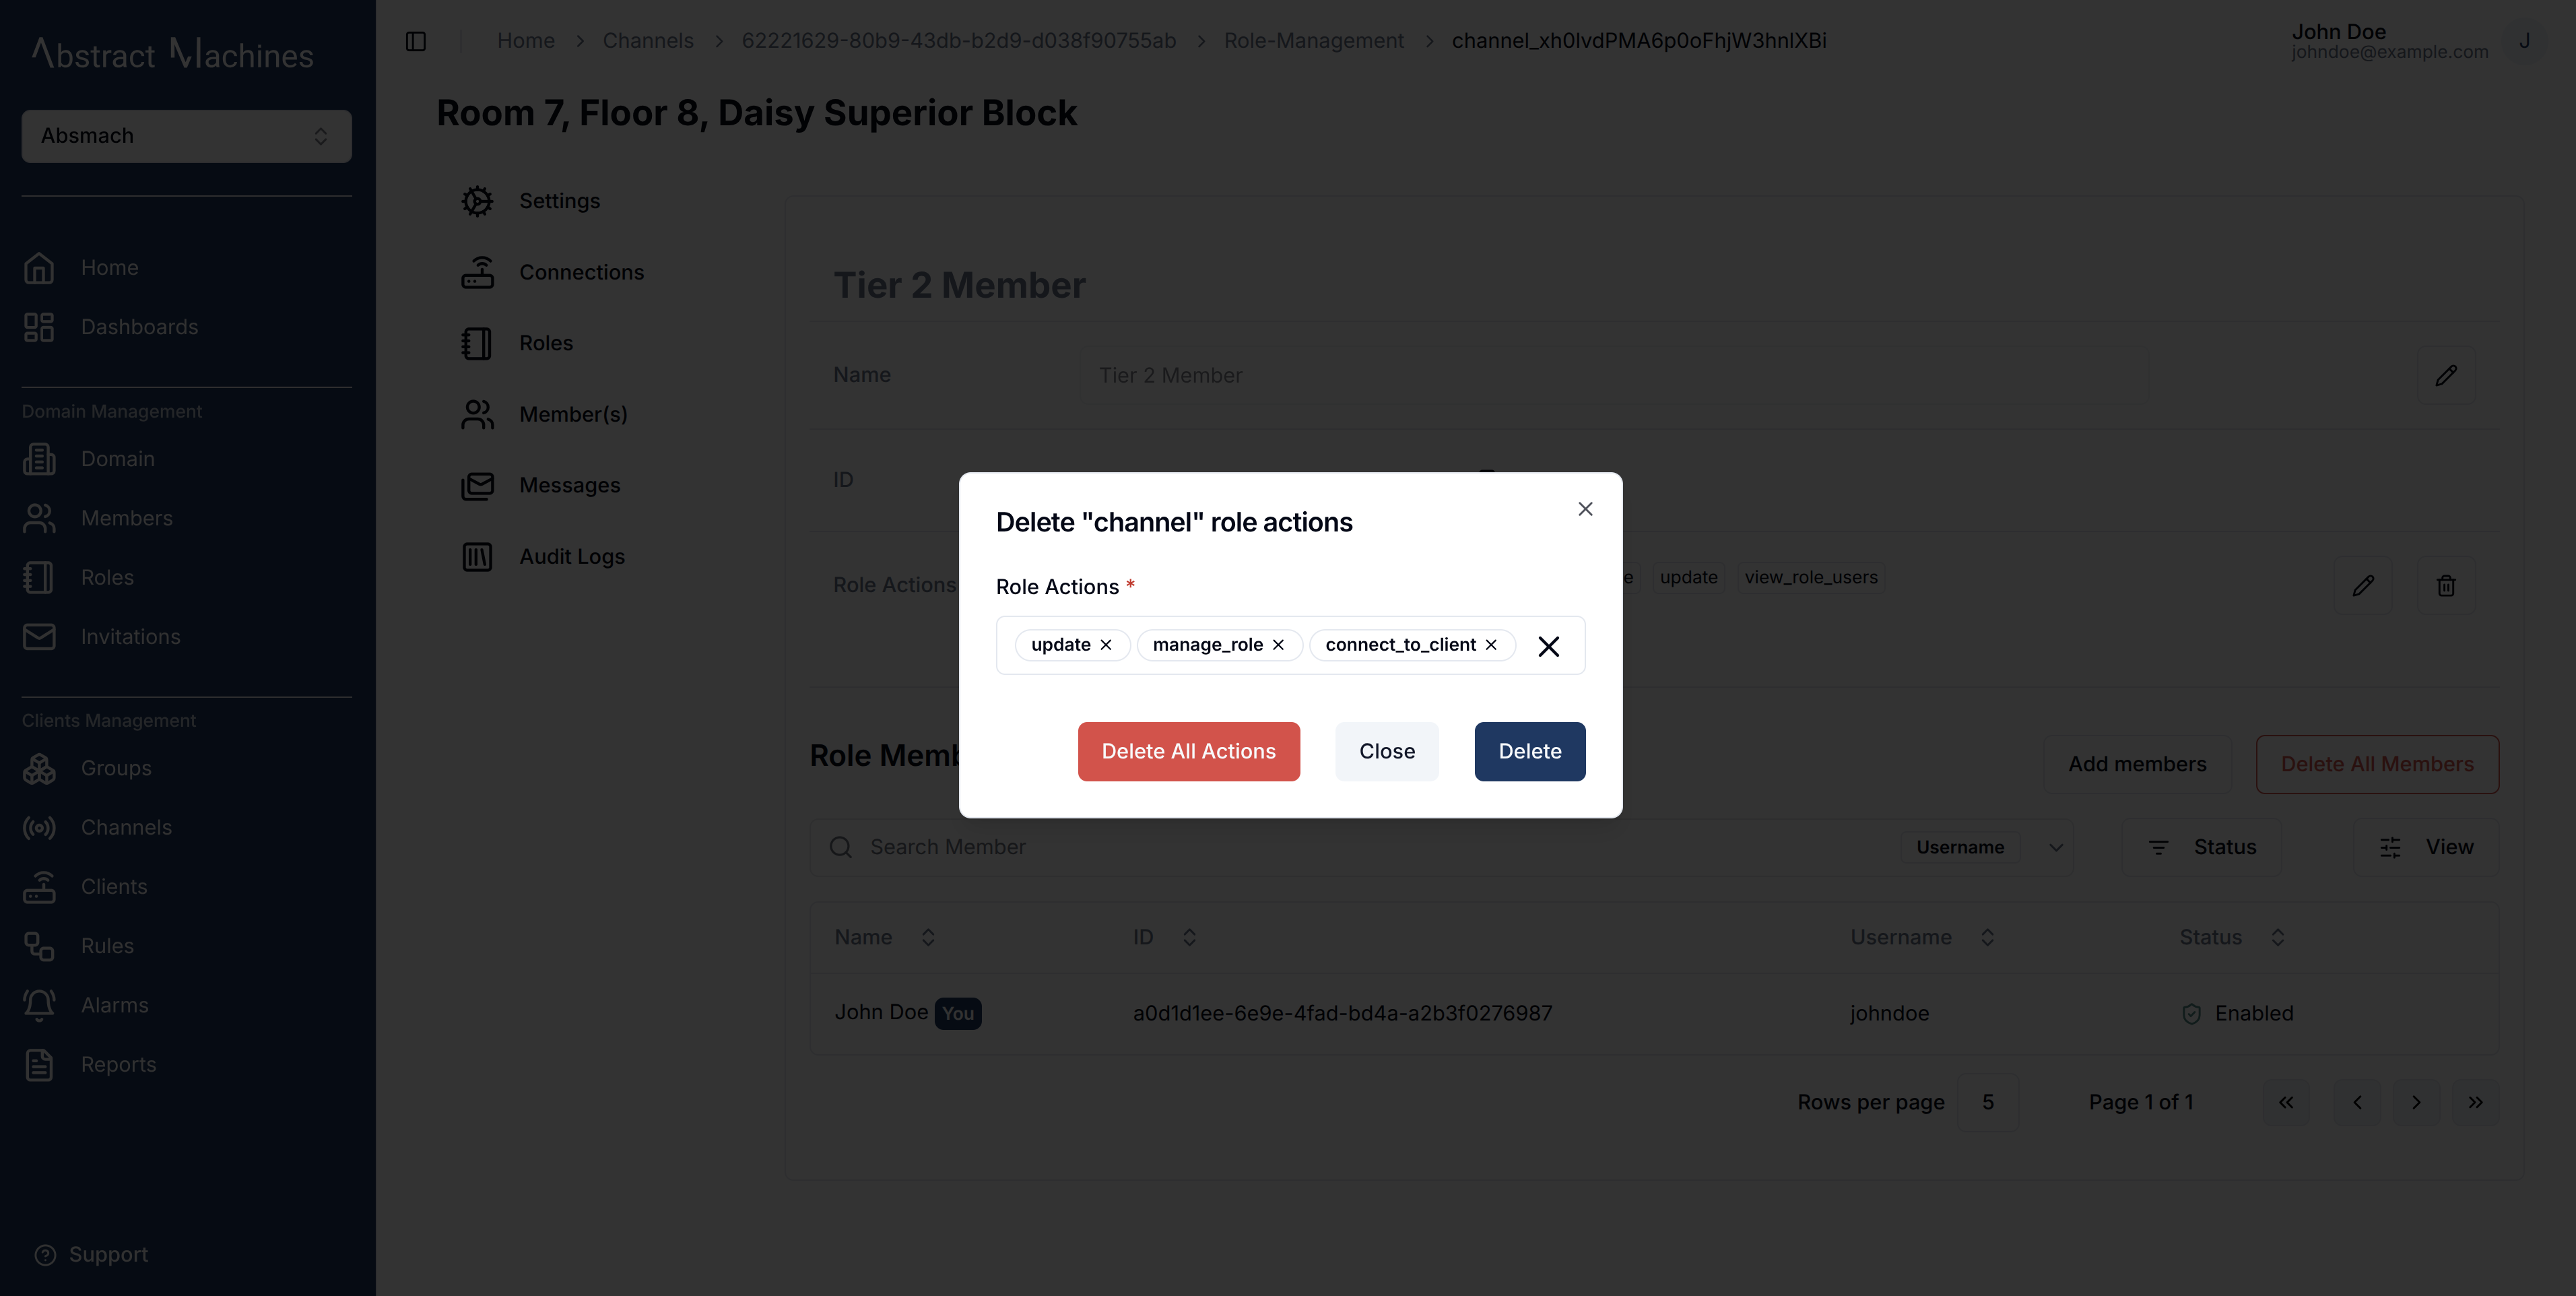
Delete Channel Role
If you would like to remove or delete any Role Action, click on the Trash icon. It pops up a dialog that allows you to select which Role Action you want to remove. Optionally you can delete all of the Role Actions by clicking on the Delete All Actions button.
Delete Channel Role Members
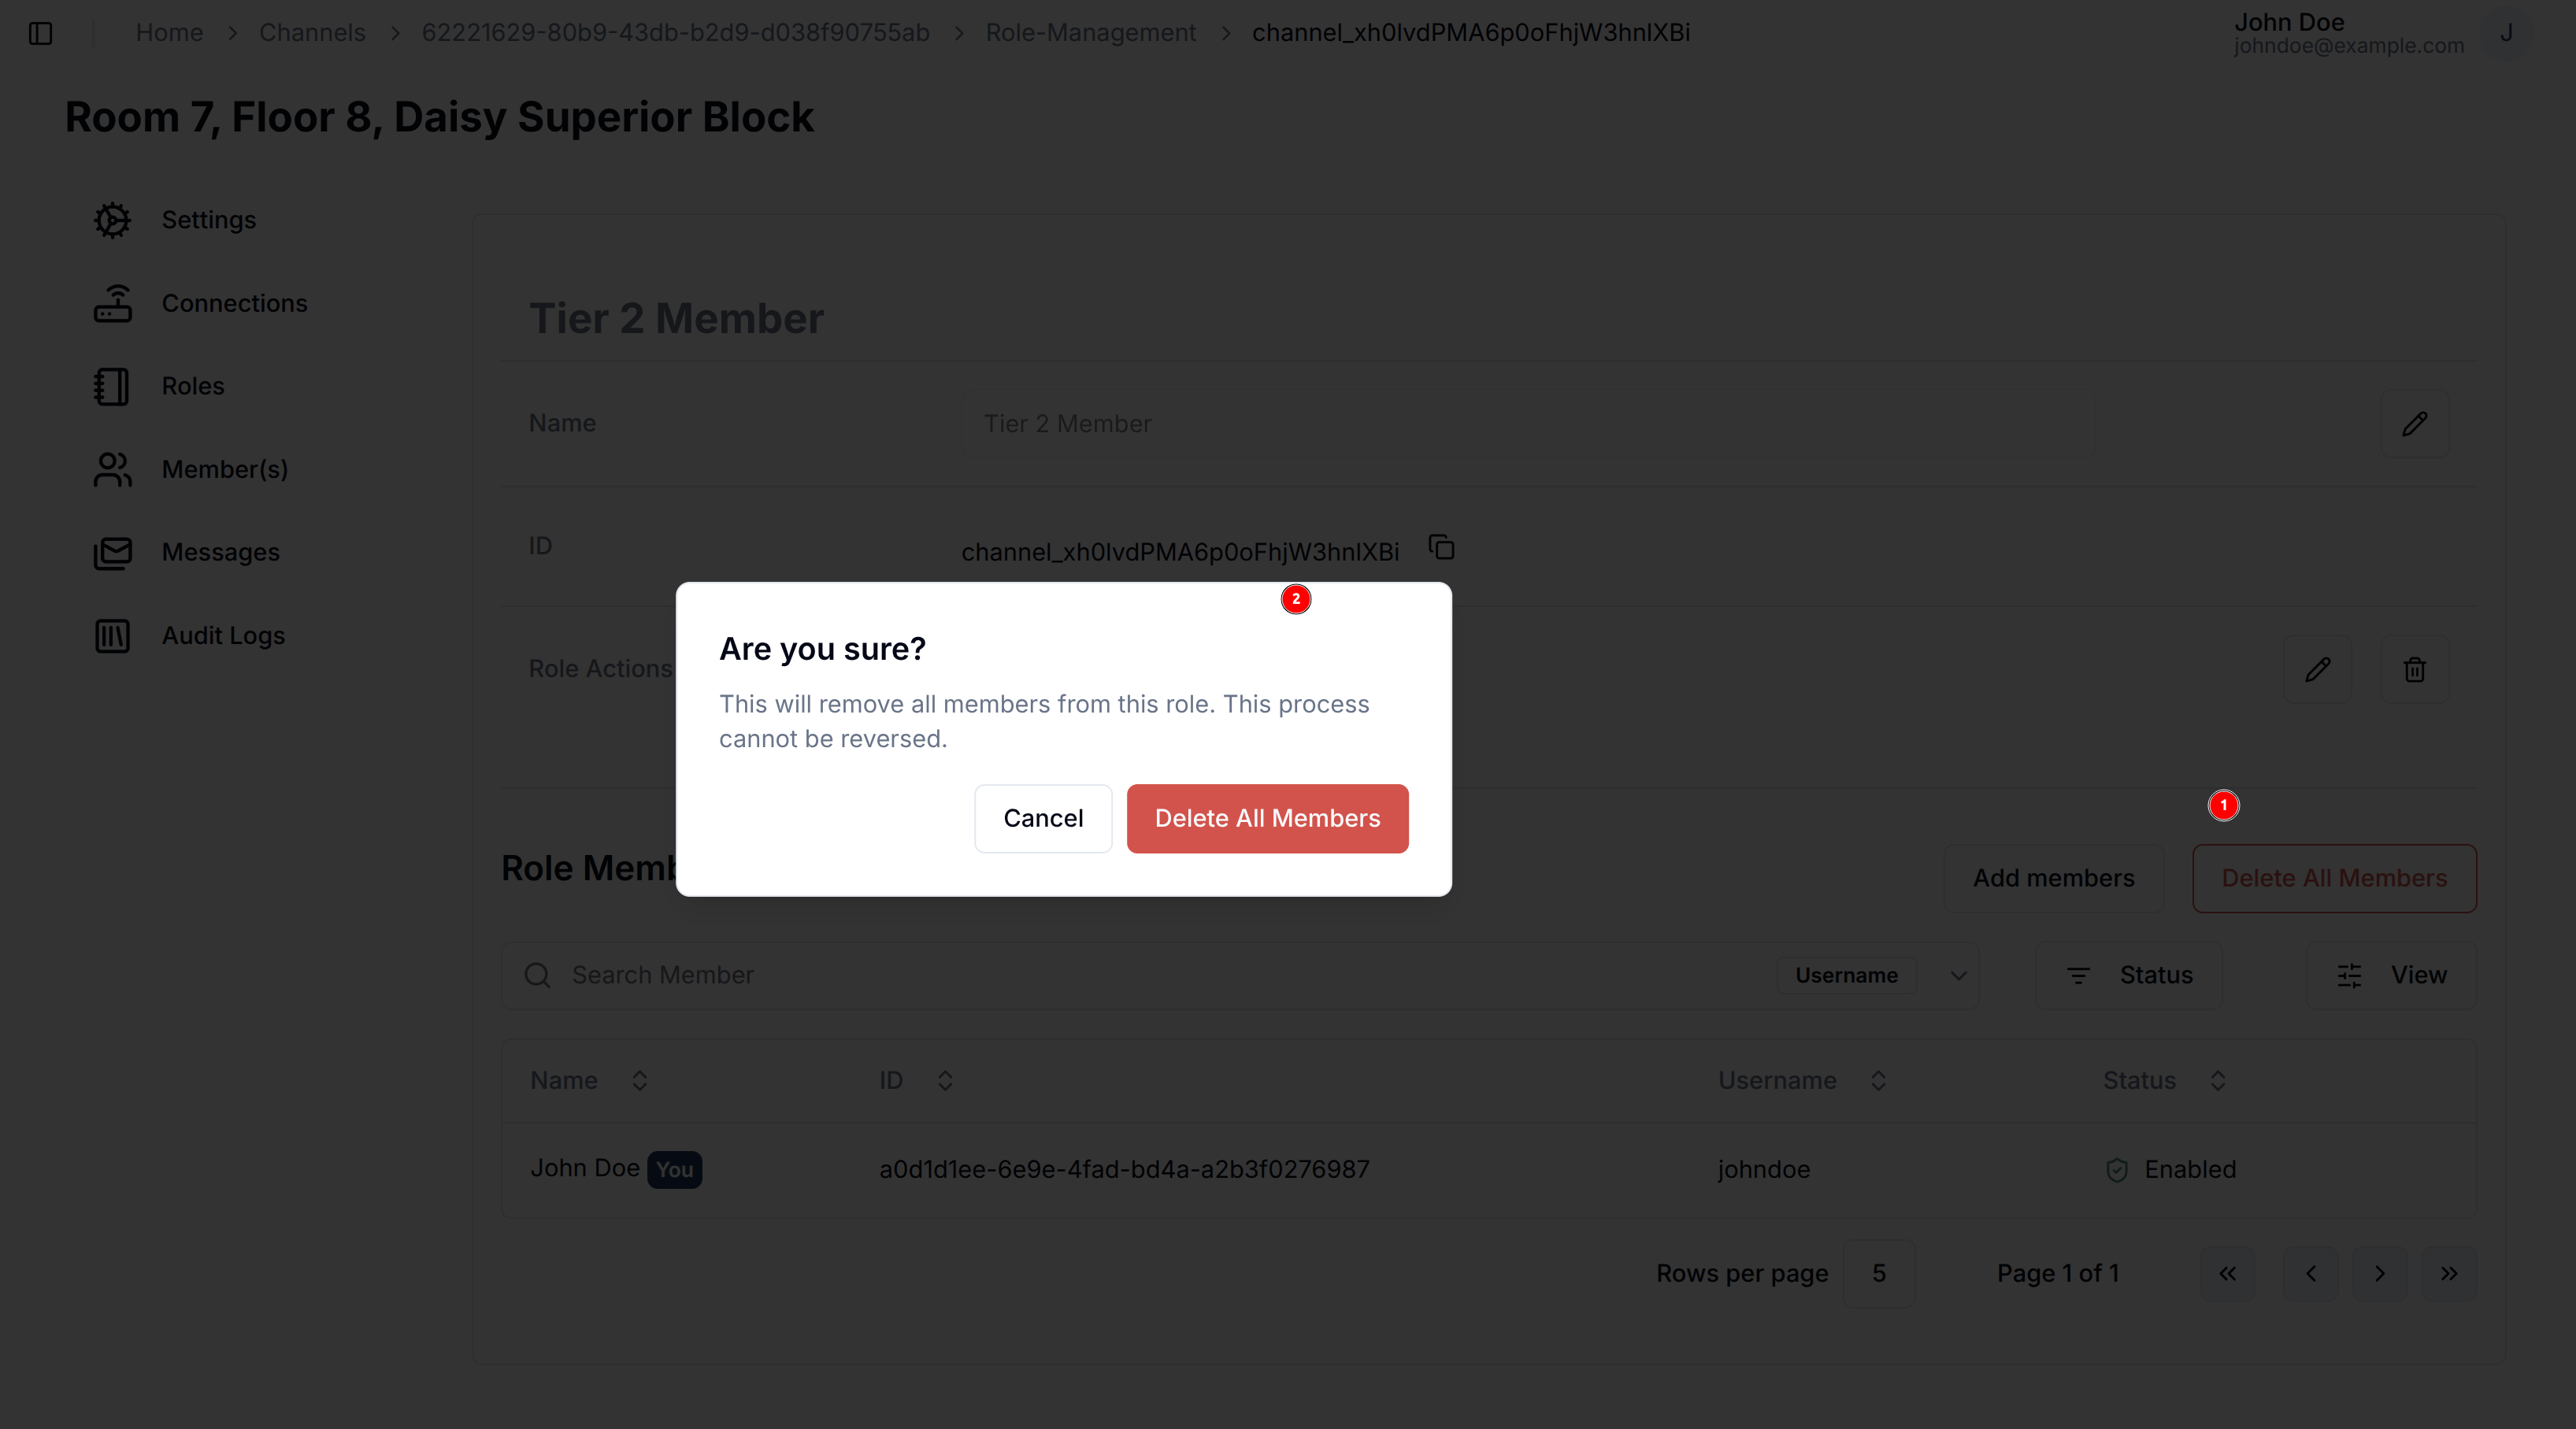
Clicking on the Delete All Members button will open an alert pop-up that requests for confirmation to delete the channel Role Members.
To delete individual members in a channel role, click on the trash icon on the Member row. This will open up a confirmation dialog.
Channel Members
A channel can have multiple users assigned to it with various roles. Much like the Channel Role Members users can create, update and delete any Members from this segment.
View Channel Members
Navigate to the Members tab under the Channel Menu. This will lead you to a table of all the available members as well their roles. The roles present here are the same roles as the Channel Roles in the section just above
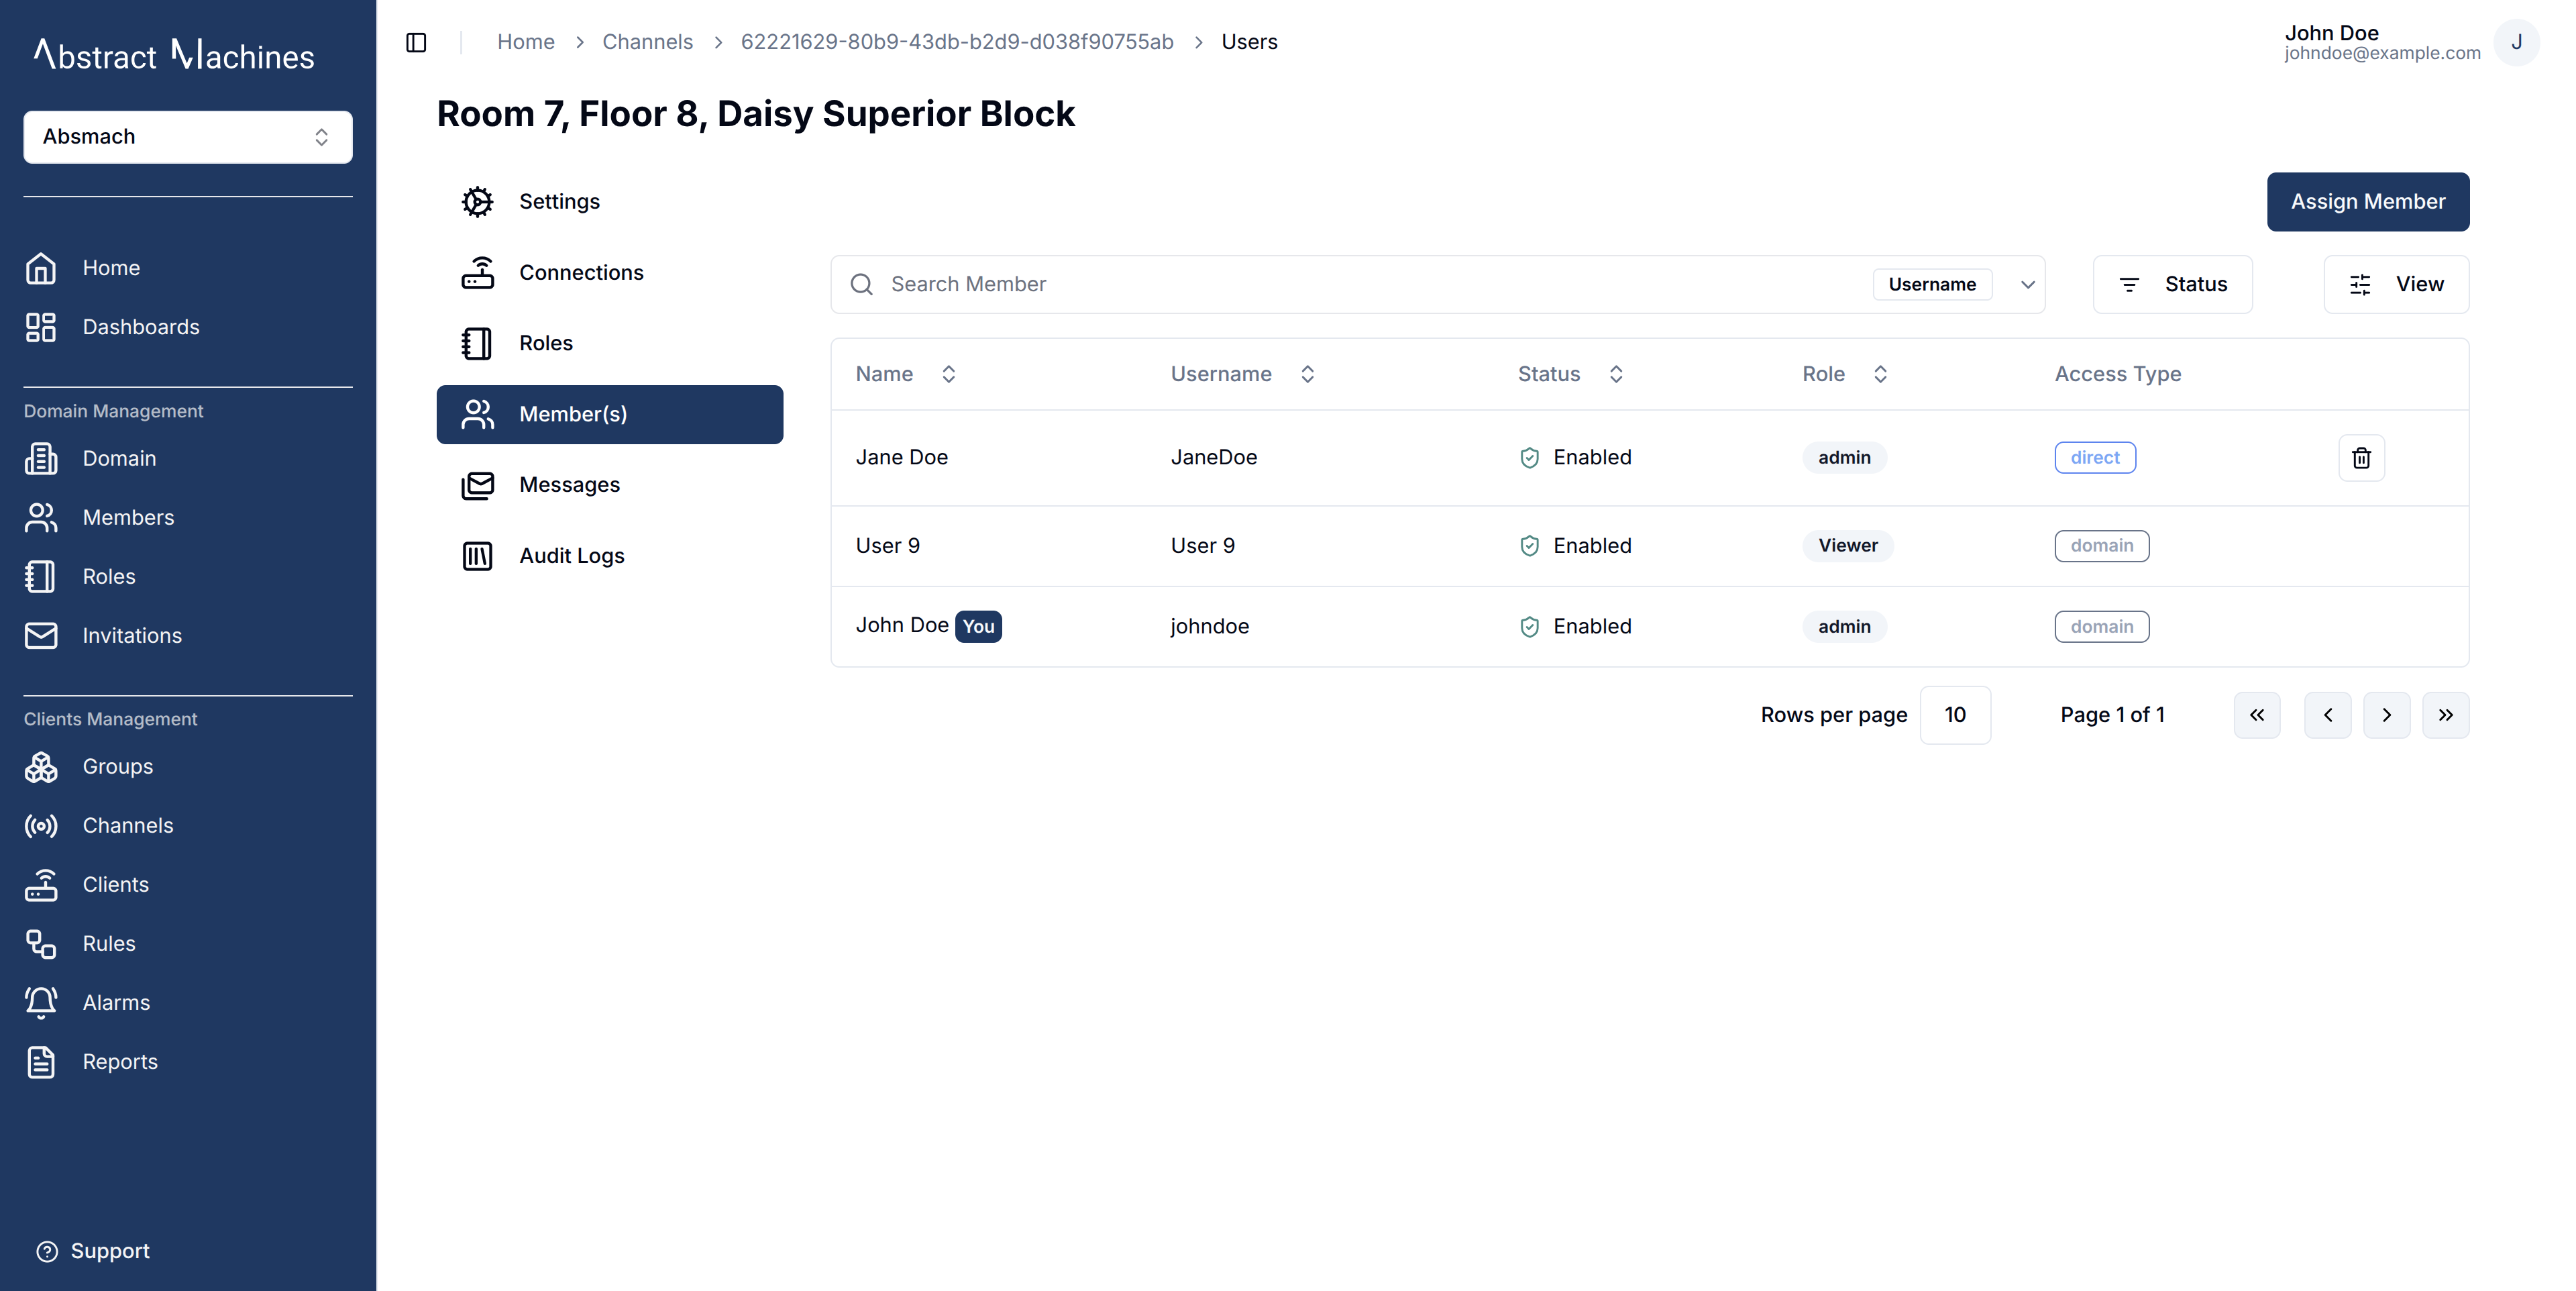
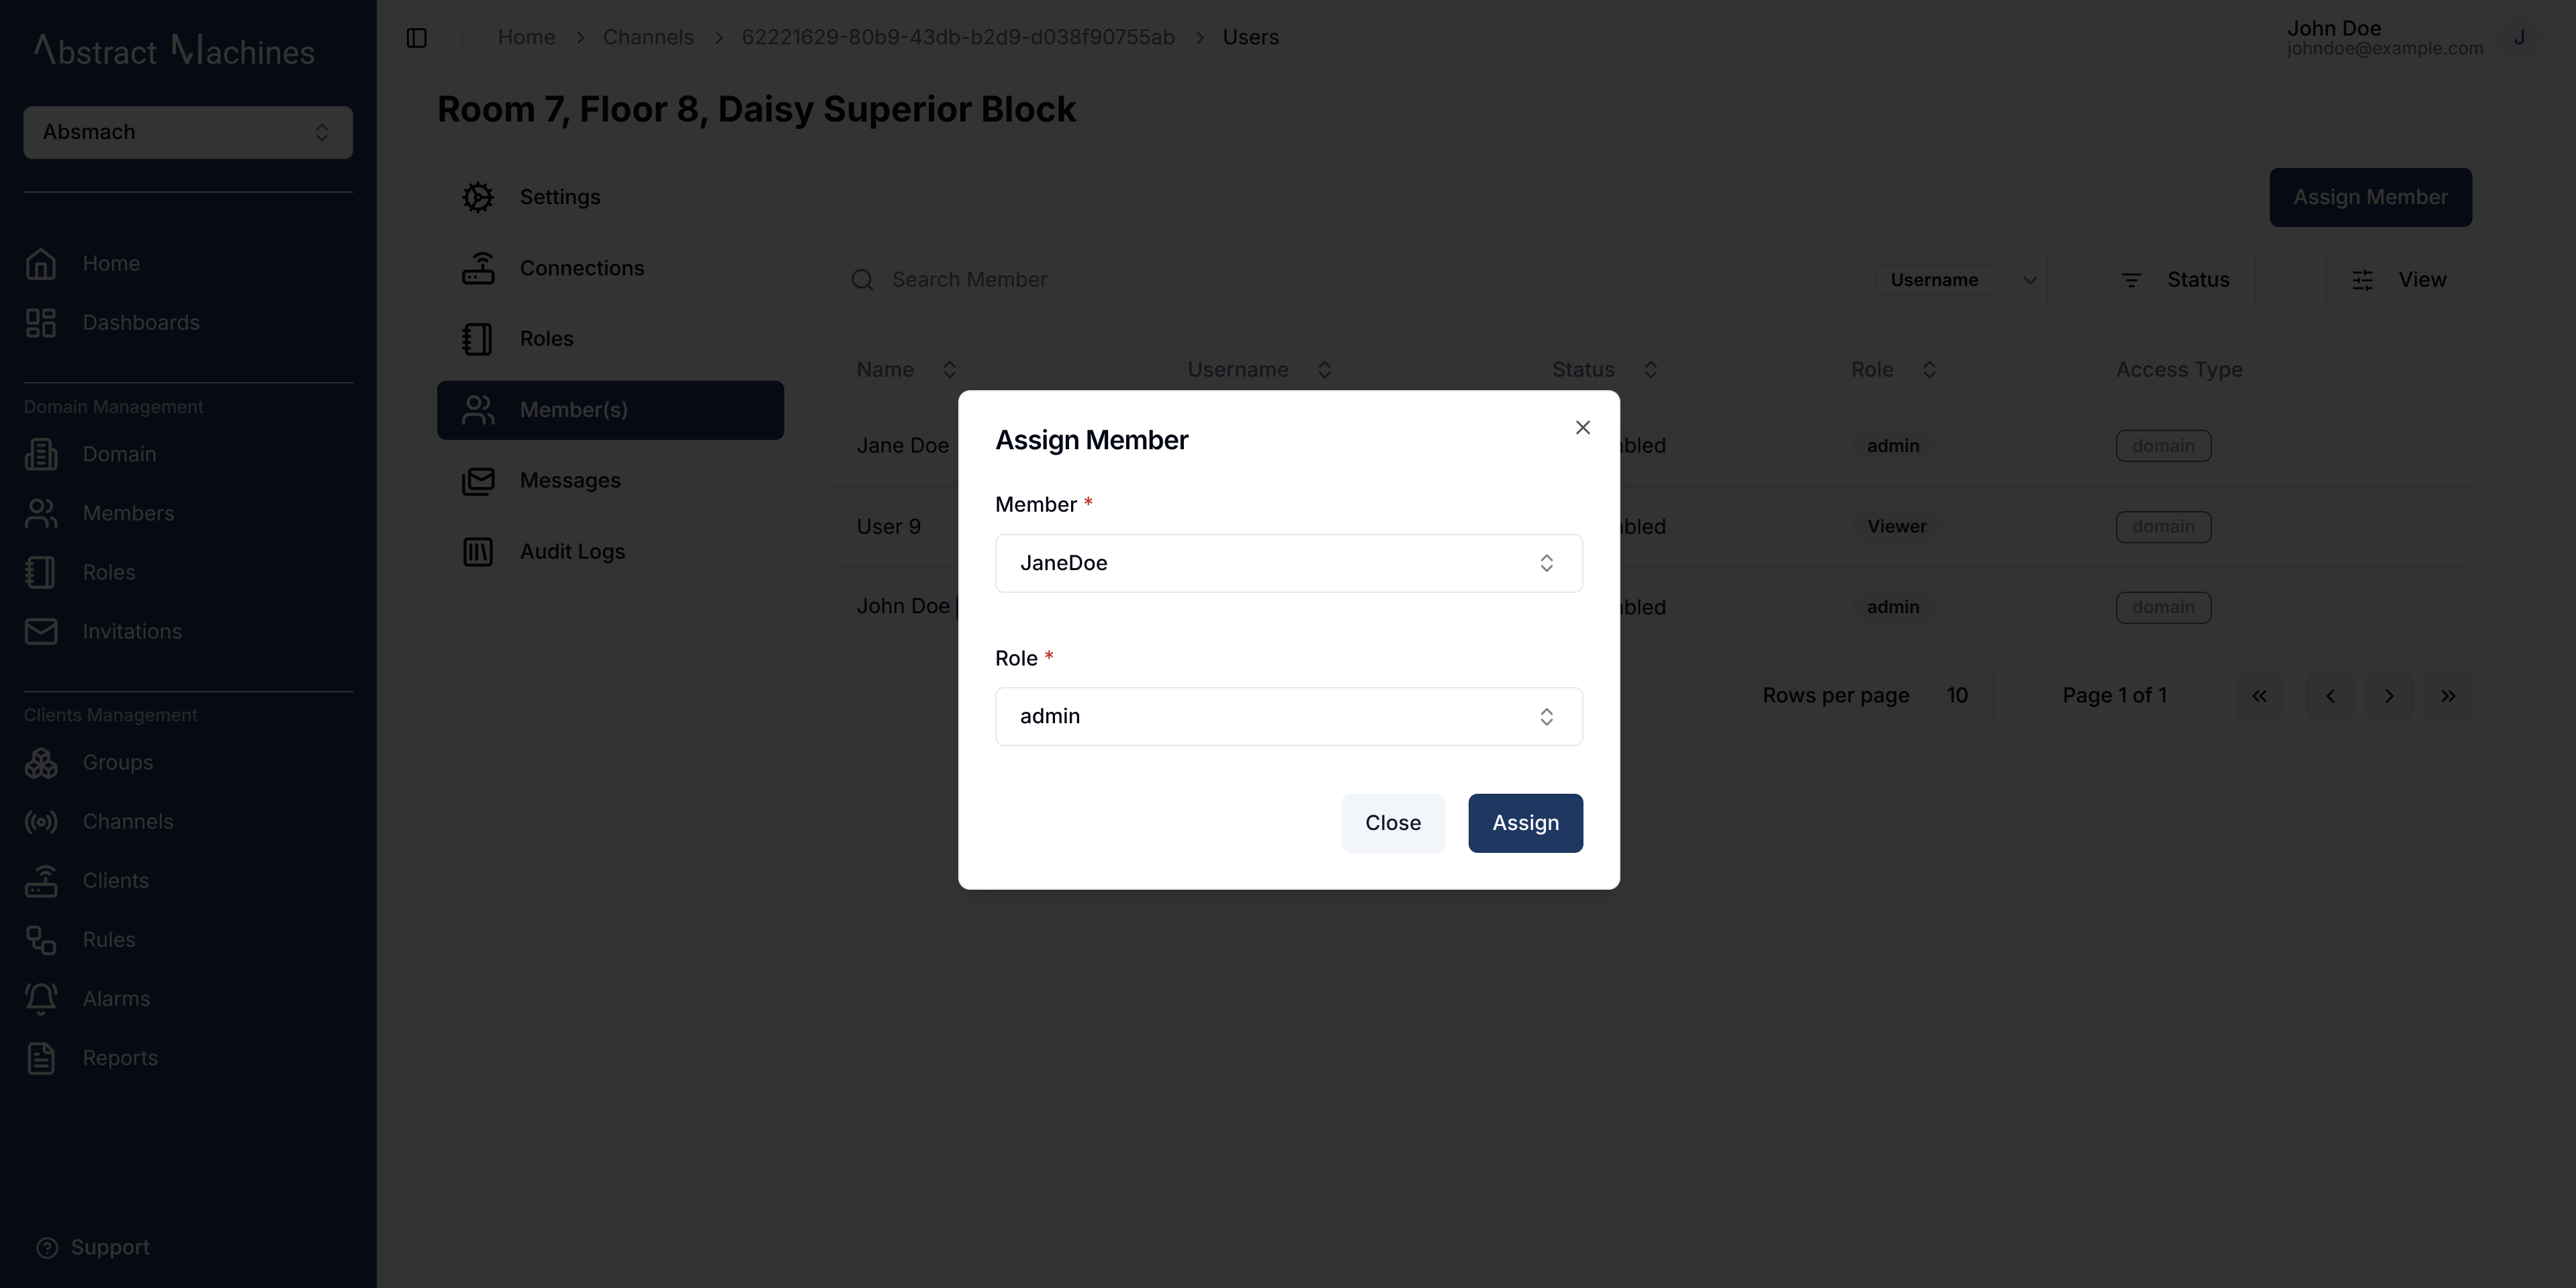
Assign Channel Members
Members can be assigned to a channel by clicking on the Assign Member button.
This will open up a dialog that allows you to select from amongst the Domain Members present from a dropdown list.
The roles presented will also be the very same Channel Roles from above.
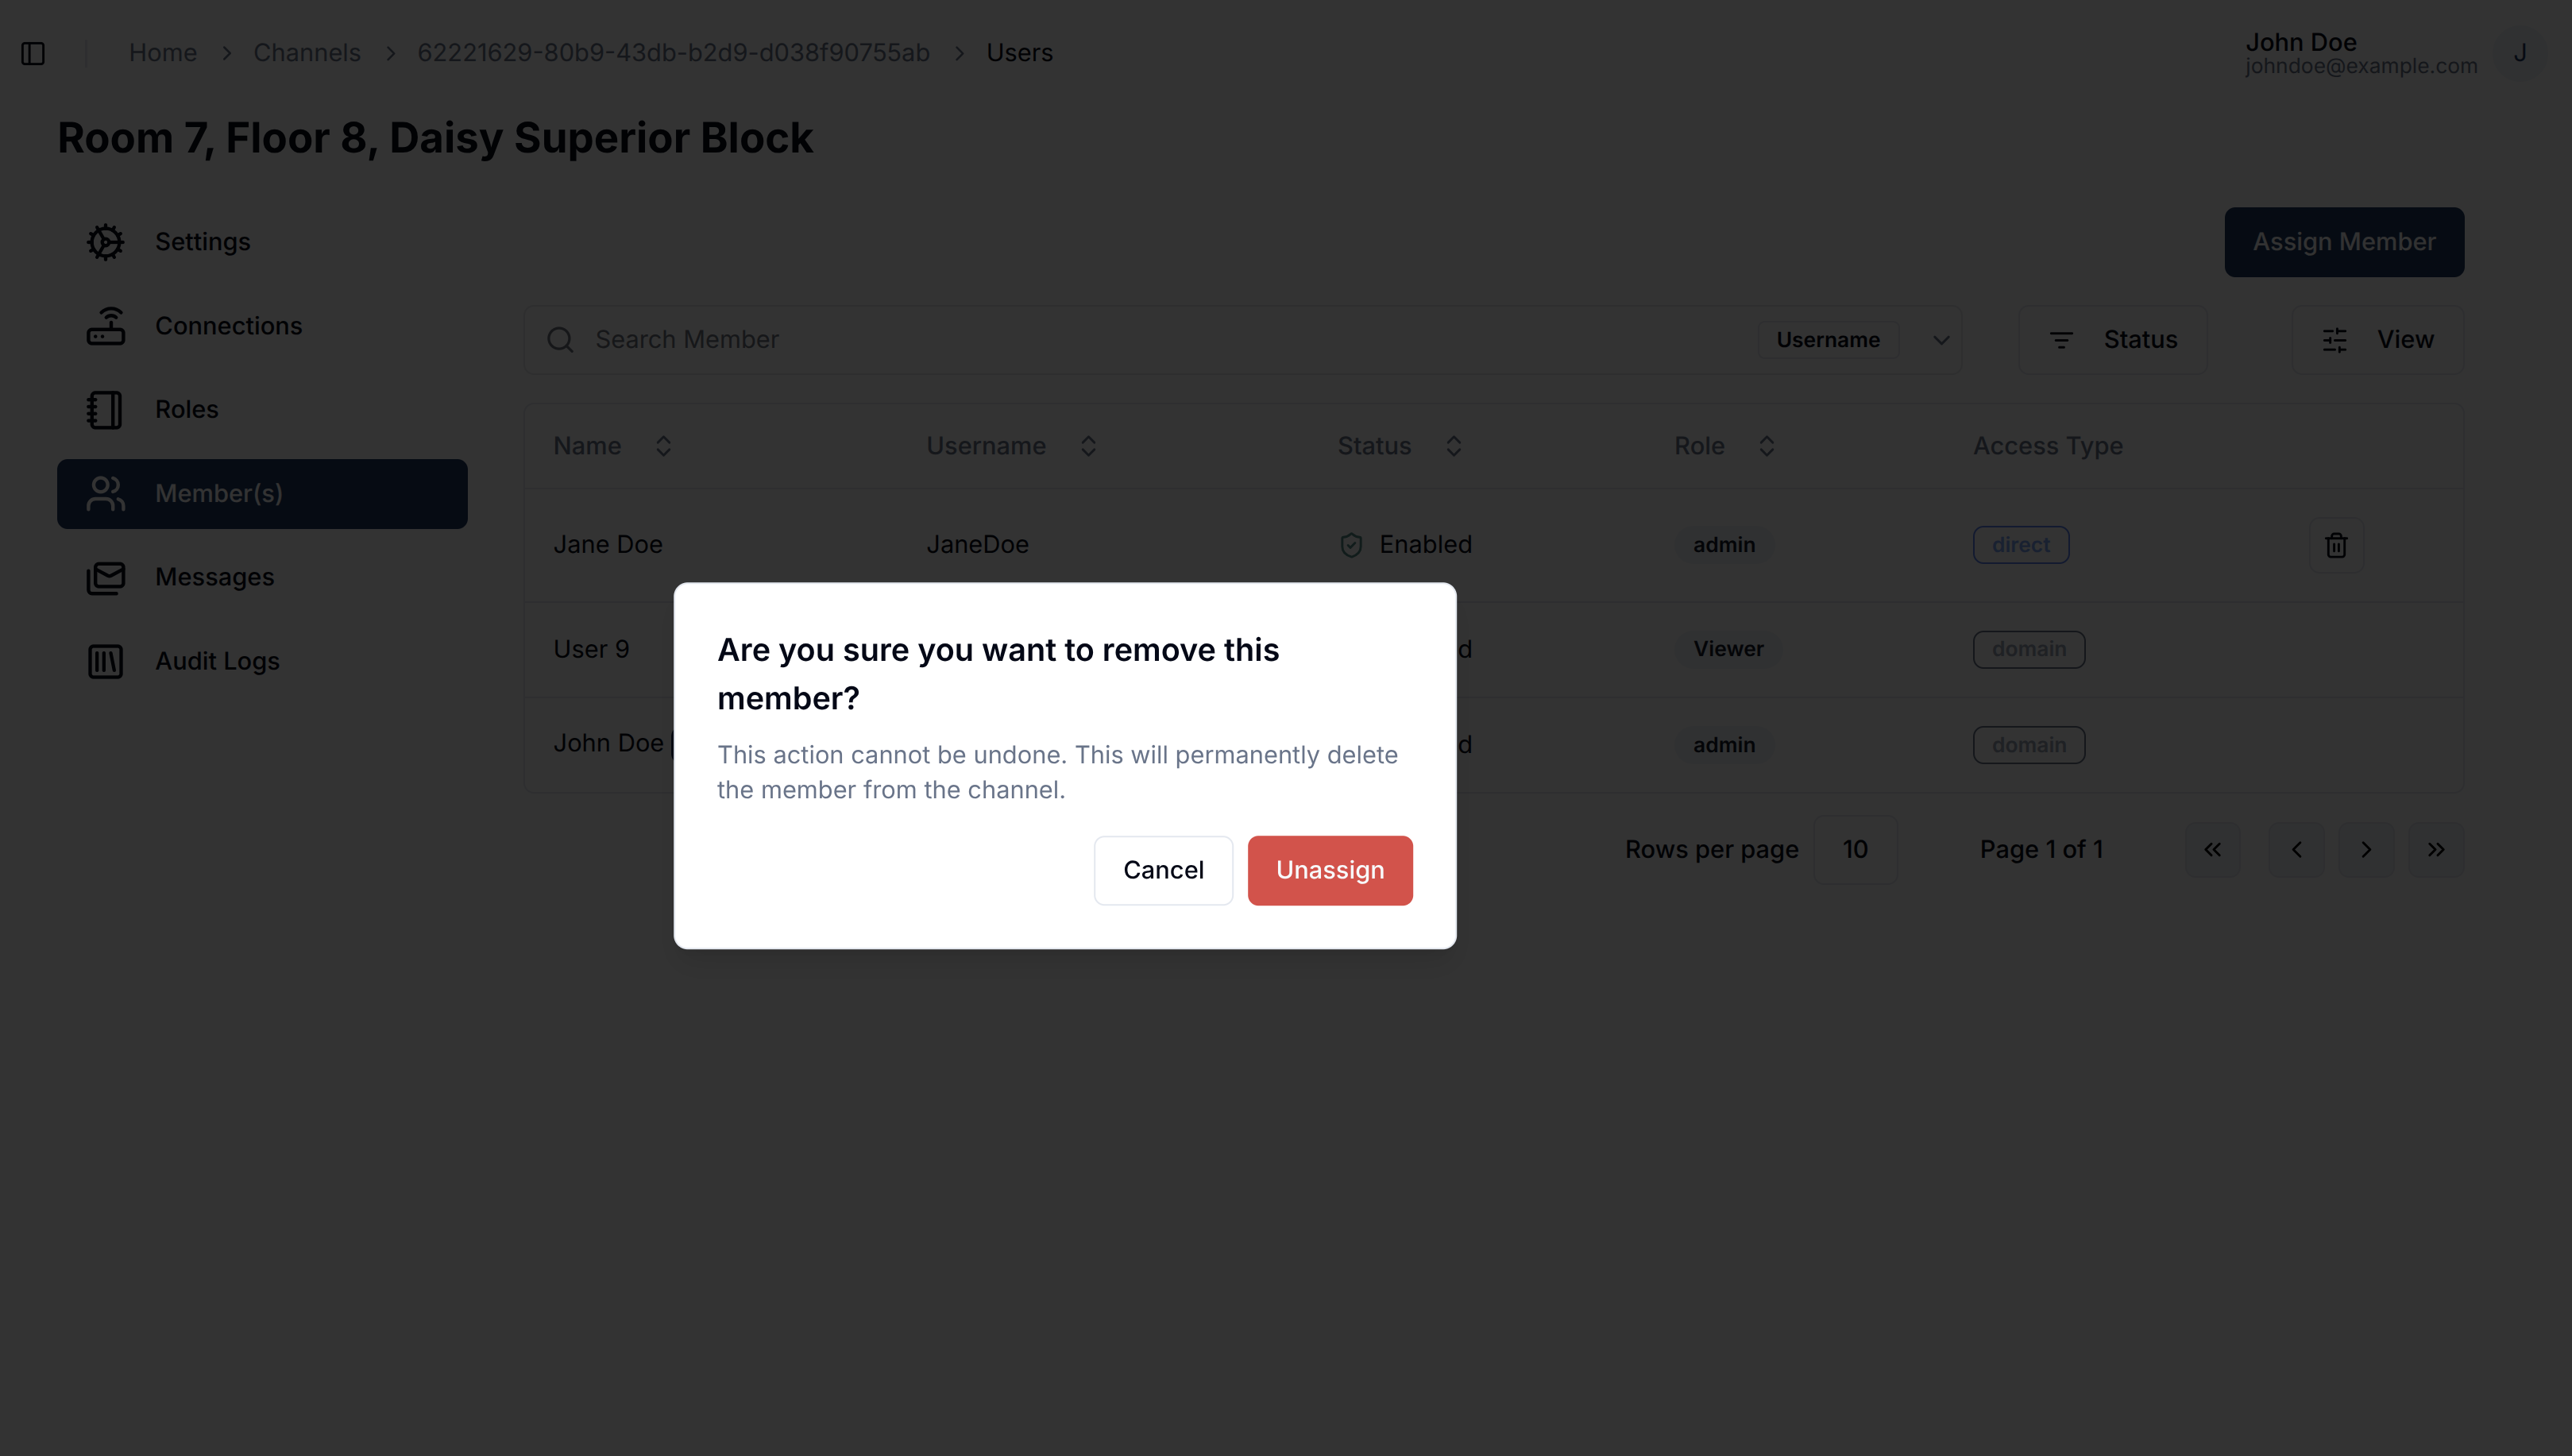
Unassign Channel Members
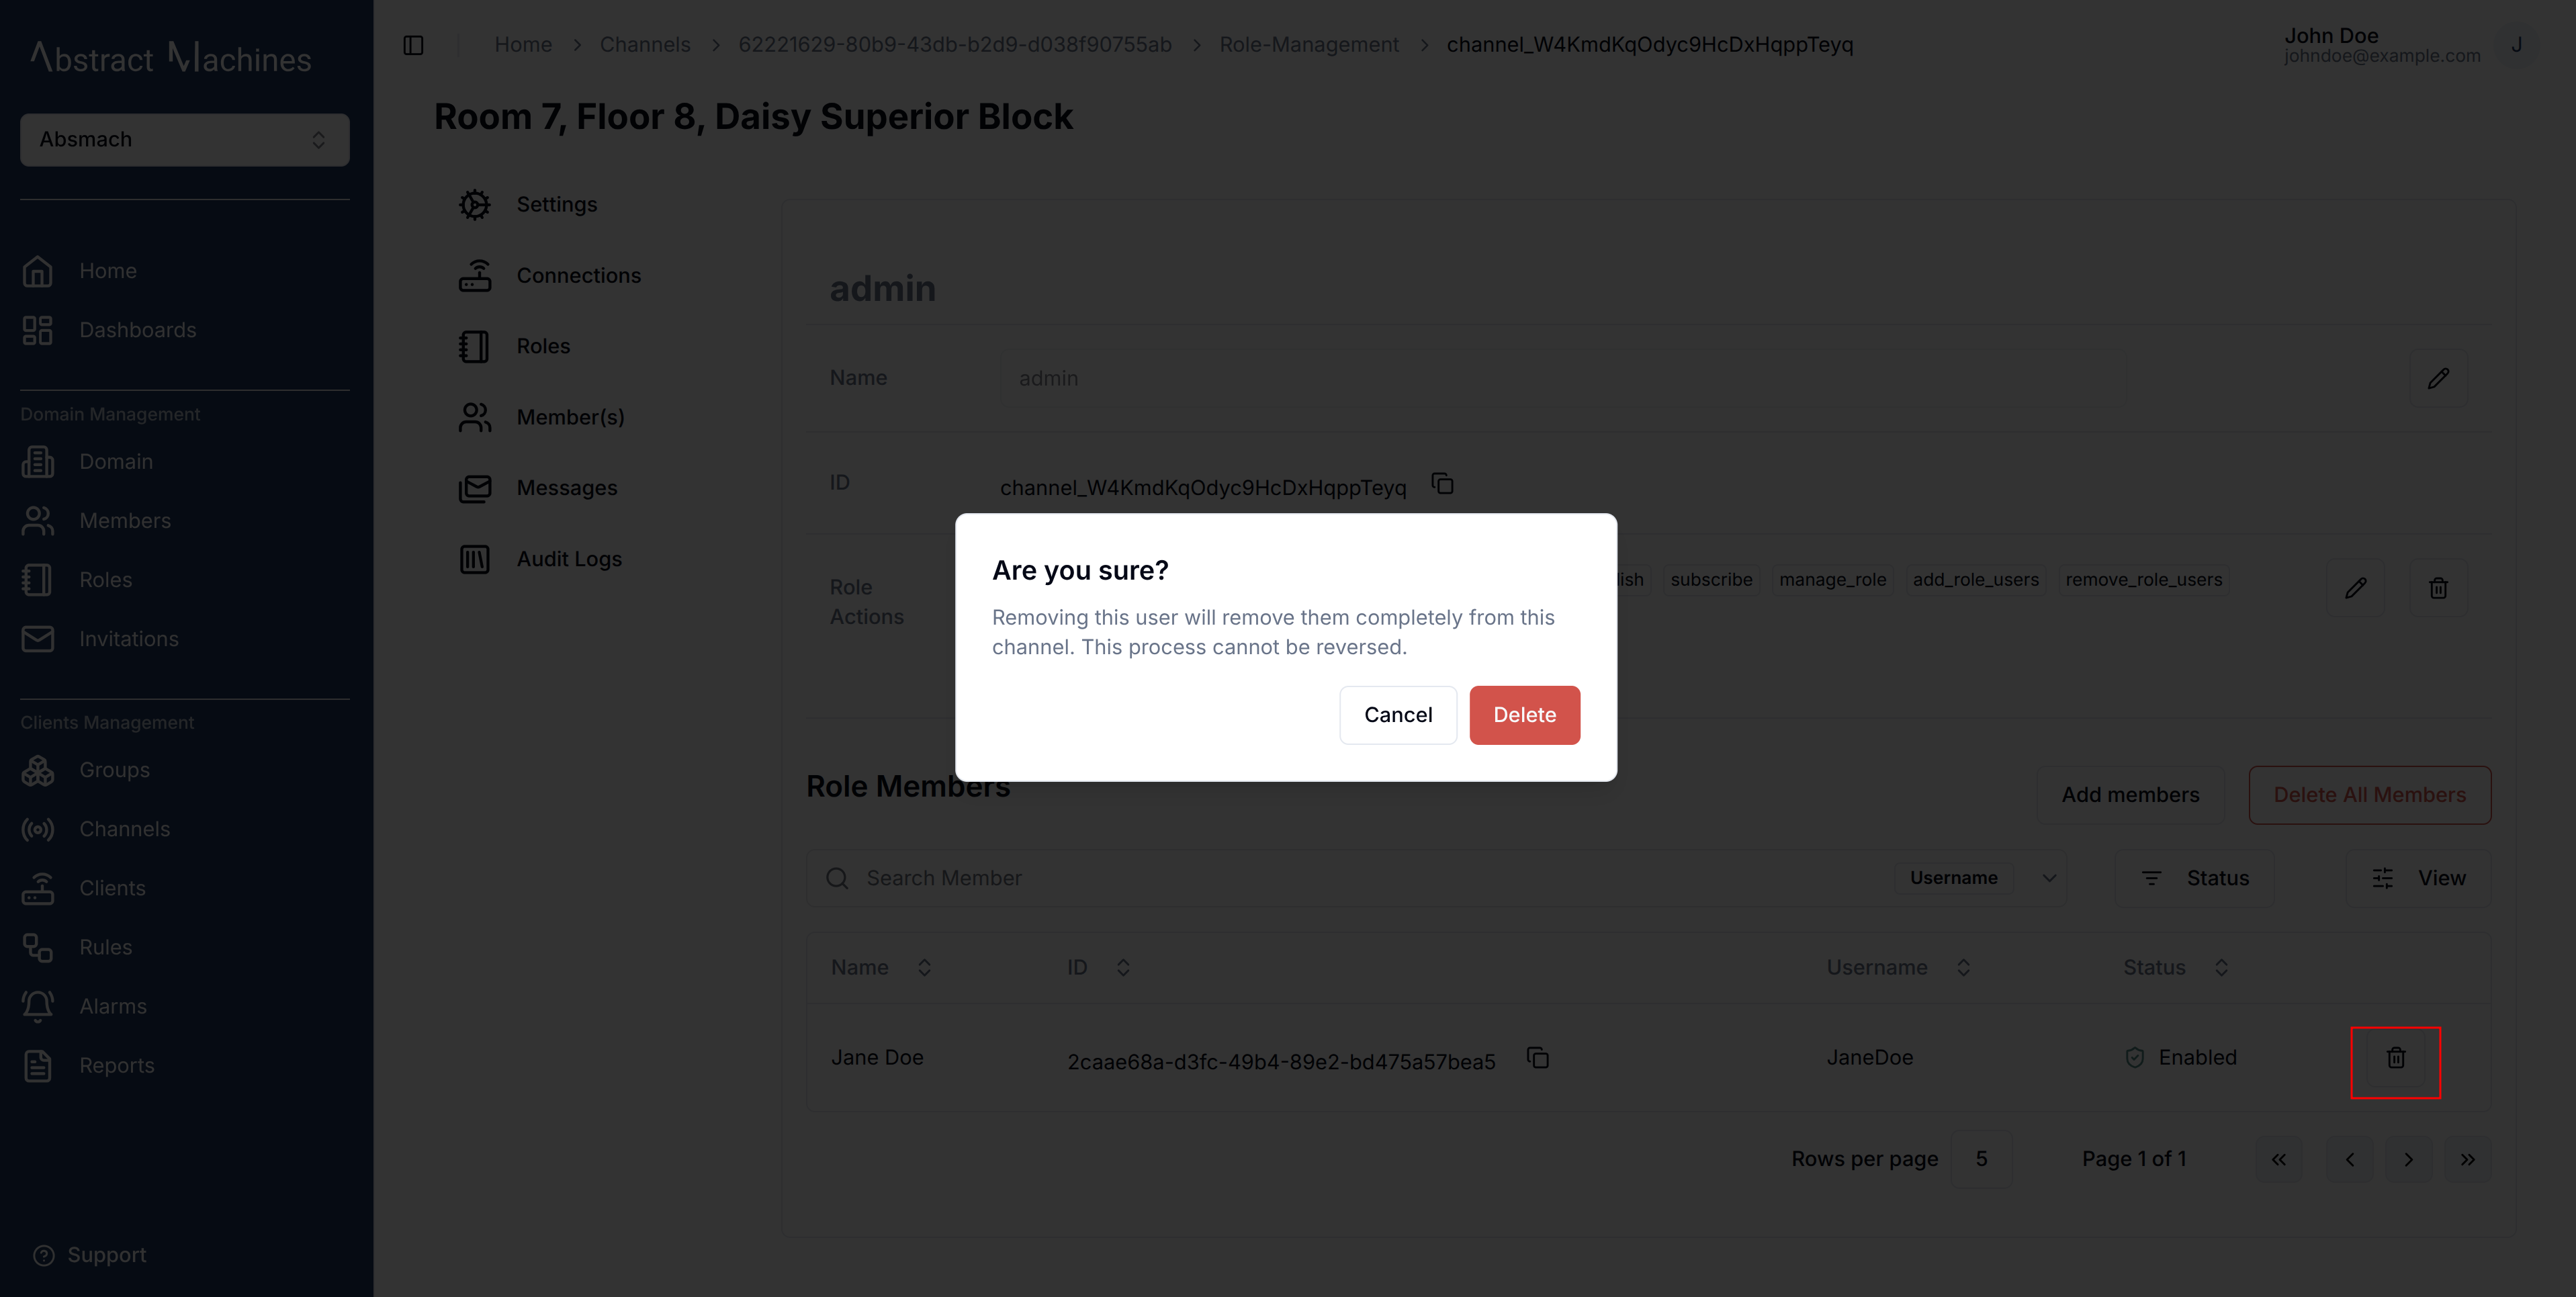
To unassign a specific member from a channel, simply click on the Trash Icon on their row in the table. This will bring up a confirmation dialog.
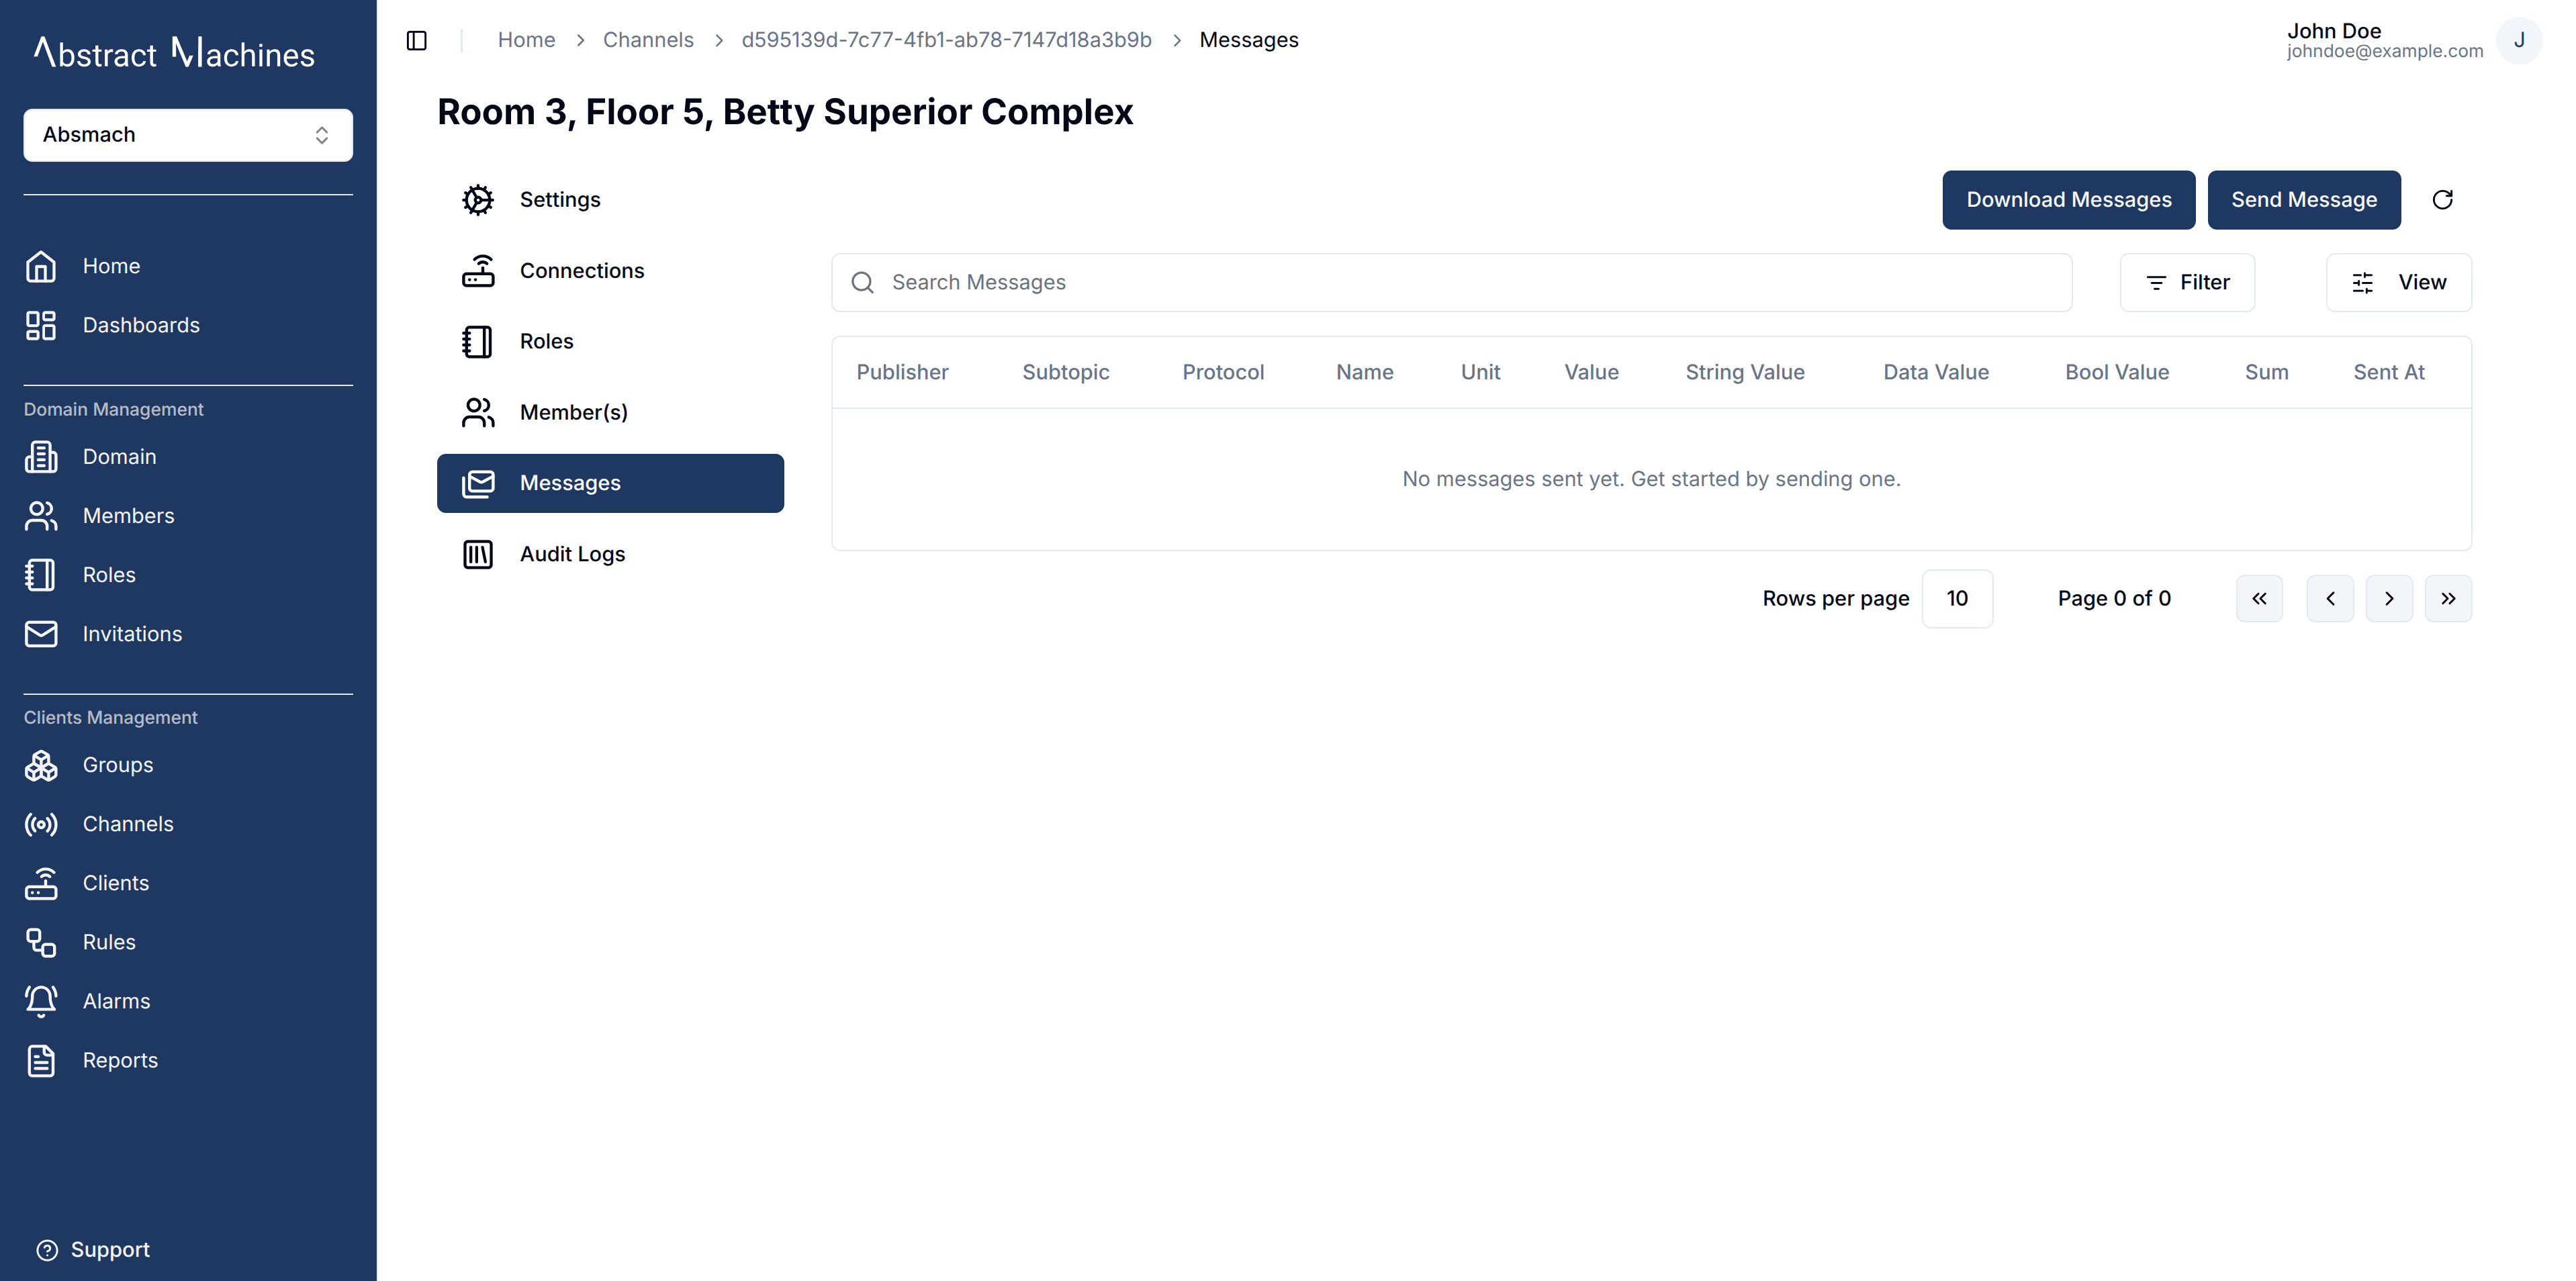
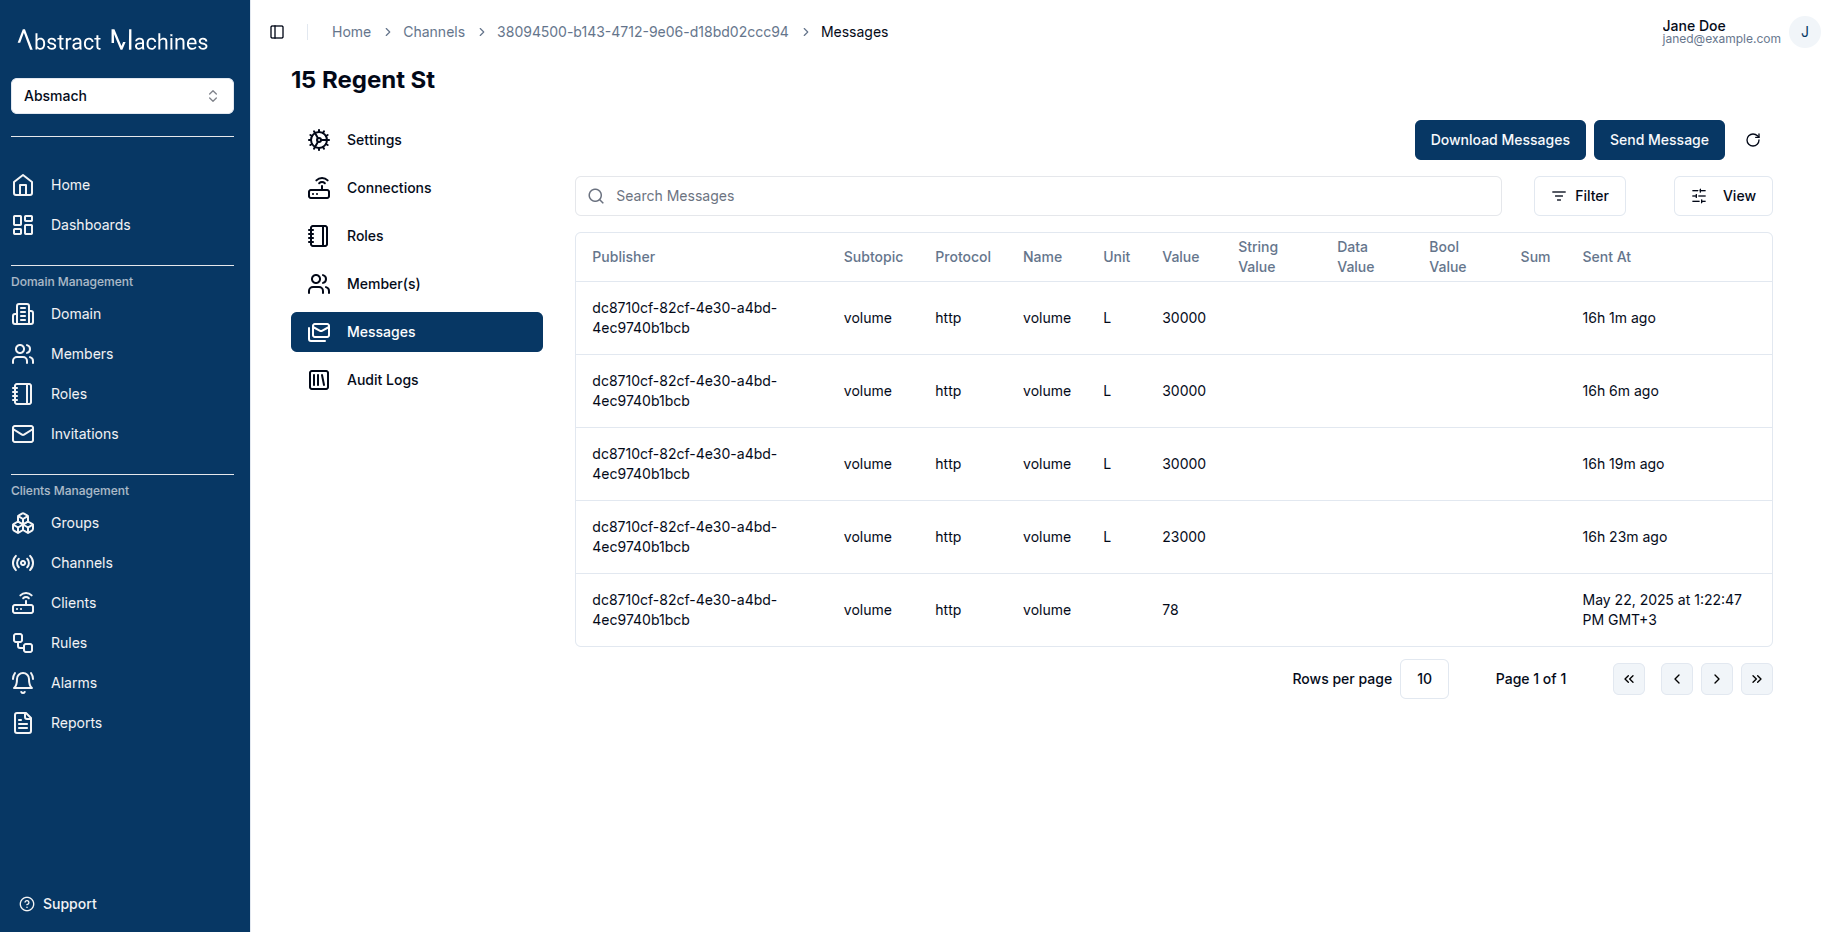
Messages
While on channels, a user can view, send and download messages associated to the channel.
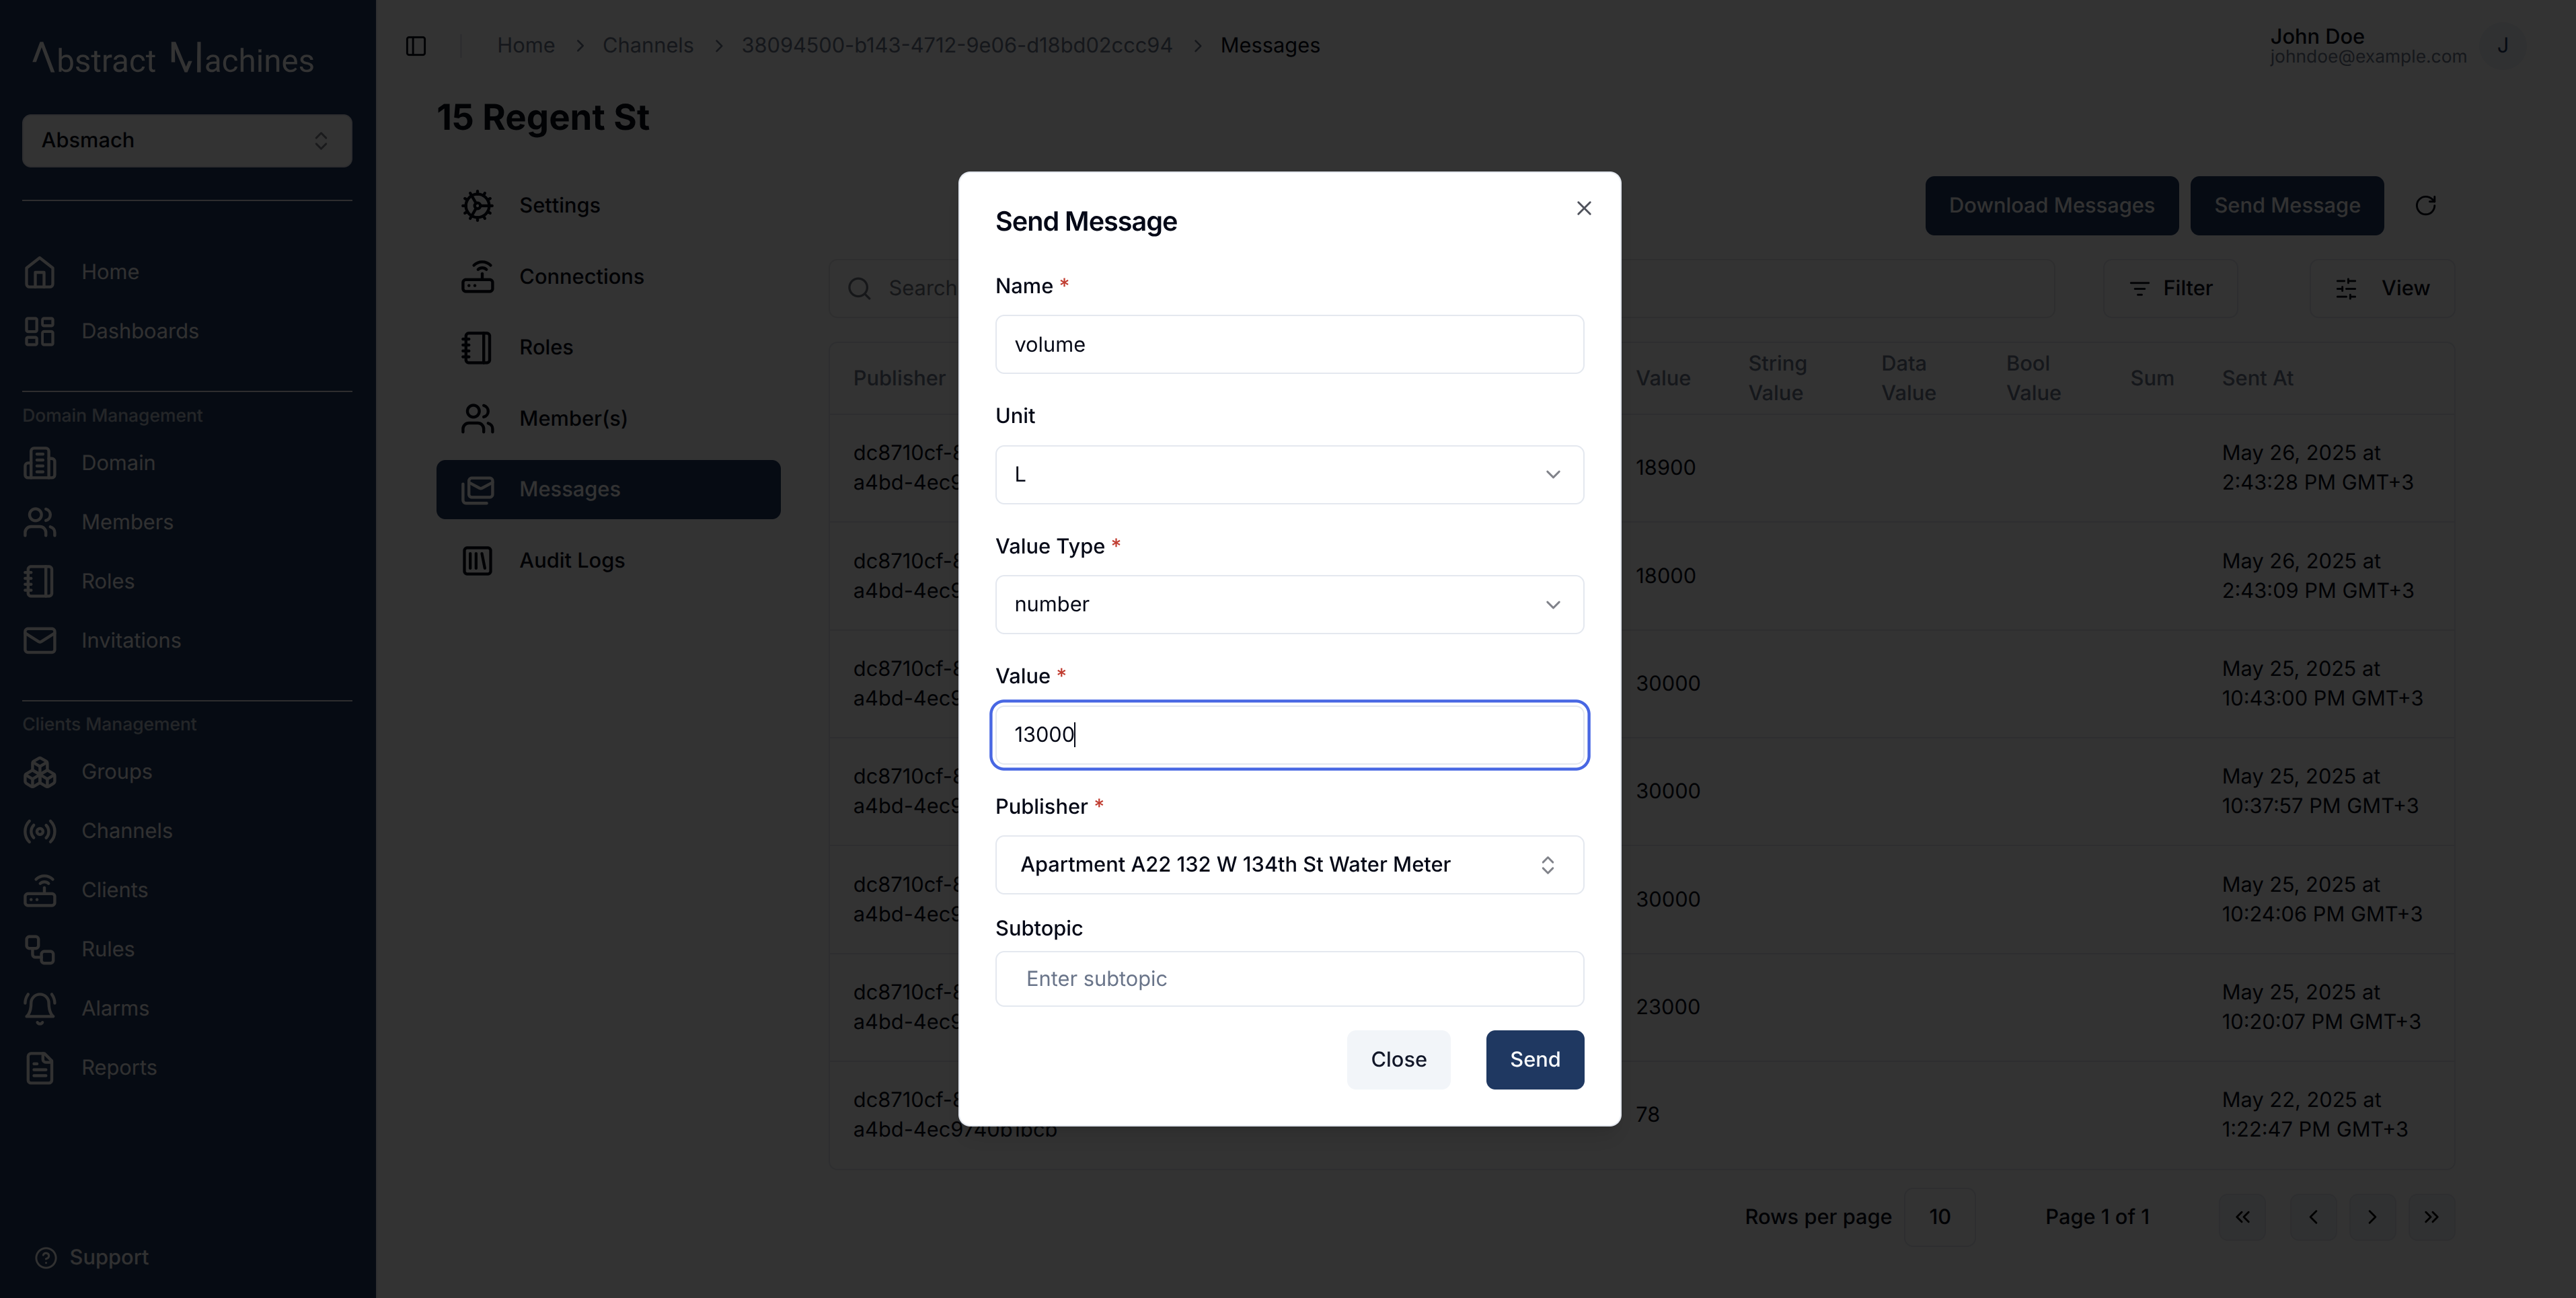
Send Messages
A connected client can be used as a publisher to send a message via the HTTP protocol while on the Magistrala UI.
To send a message navigate to the Messages section and click on the Send Message button.
On the dialog that comes up there are some key fields that must be filled.
These fields include:
- Name - This is the base name of the message.
- Value Type - This would determine the nature of the payload being sent. It could vary between number, boolean, string, or data-value.
- Value - This is the actual value received from the sensor.
- Publisher - This is the connected Client which can be selected from an infinite select. From this client the backend will get the special Client-Key which will be used to send the message.
Additional optional fields that help enhance message clarity:
- Unit - This is the unit of the Value of the payload being sent.
- Subtopic - This is a field that can assist in classifying the messages sent. This field MUST match the Rules Engine Publisher topic for the message to be saved in the database.
Messages sent are in SenML format. The Magistrala UI also sends these messages via HTTP. A user can send their messages using the command terminal over other protocols such as MQTT or WebSocket. Further information on these protocols is discussed here.
For a message to be saved on the Magistrala database, a Rule must be created in Rules Engine in relation to the specific channel and topic. This has been further discussed in the Rules Engine documentation.
The messages table will then update to include the message sent with the latest message appearing first.
Filter Messages
Magistrala provides a detailed Messages Filter Panel to help you query and view only the messages you’re interested in. By clicking on the Filter button in the Messages section, a filter menu appears with various filtering options:
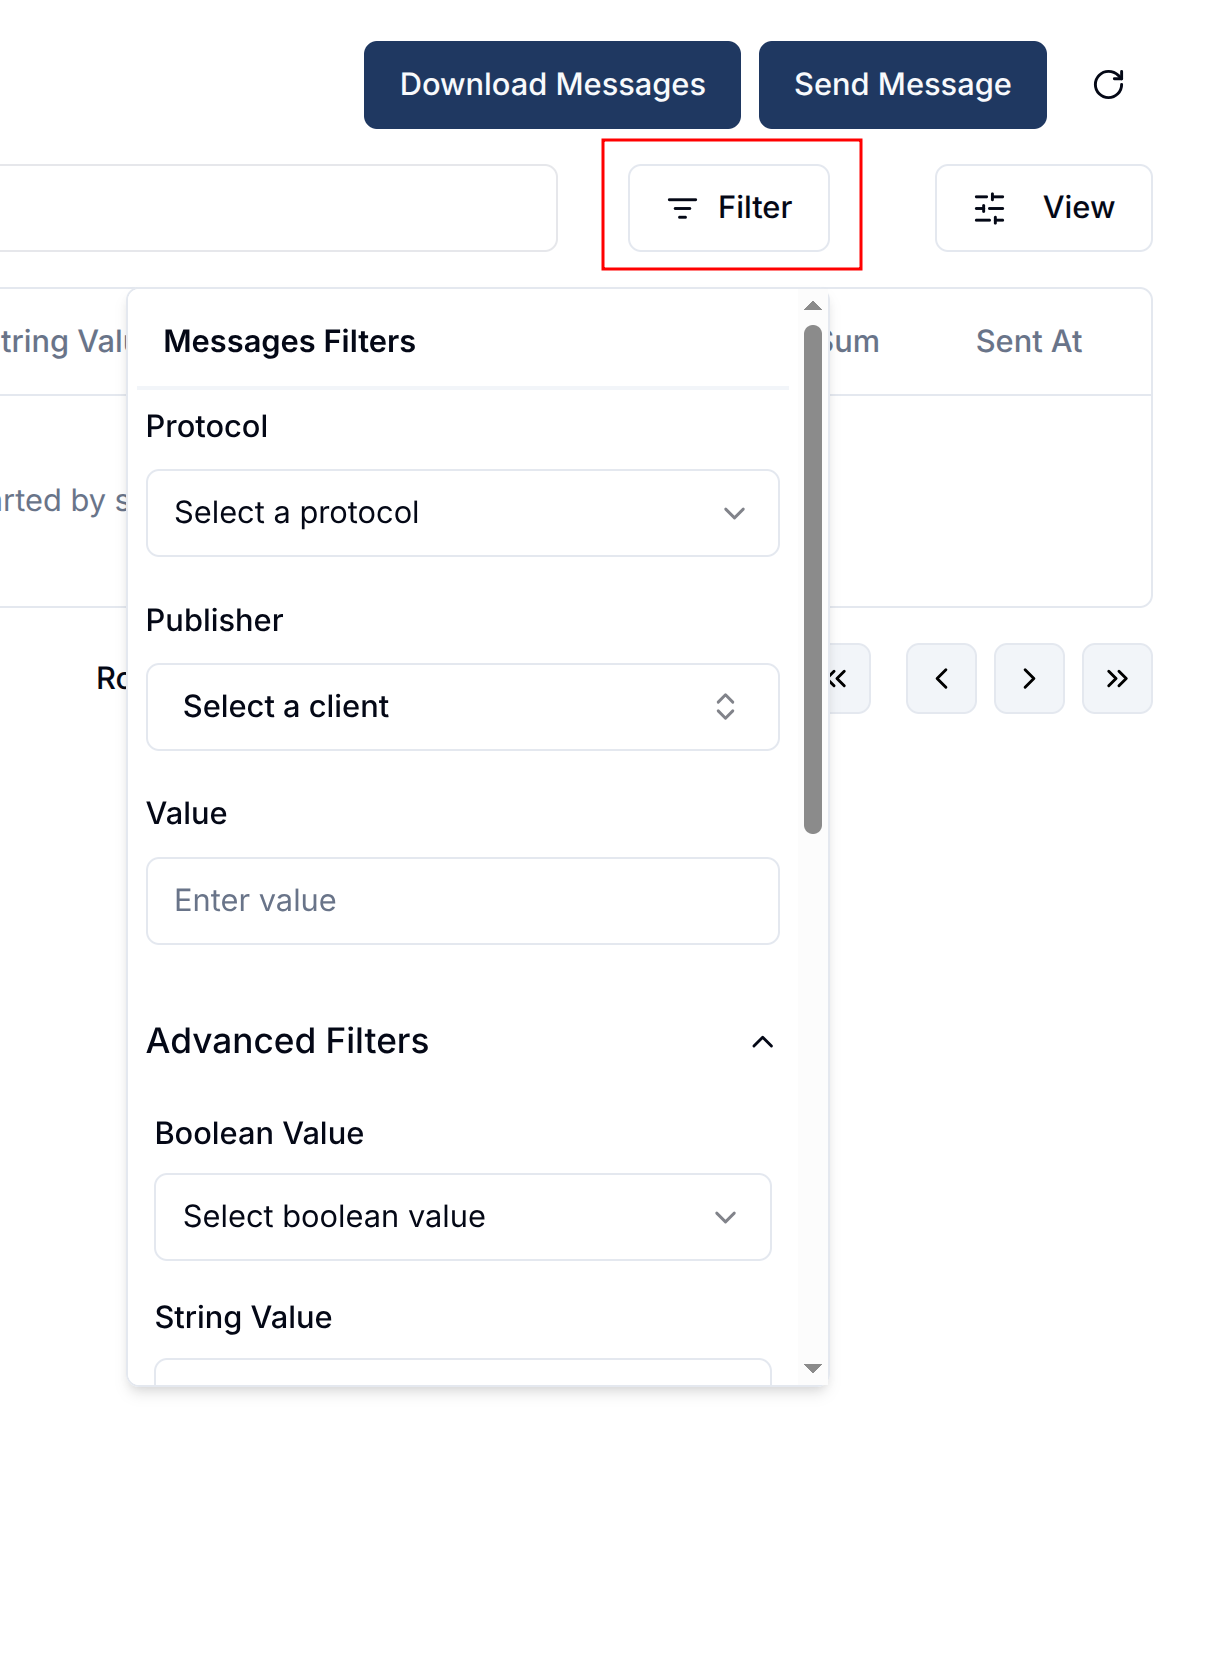
You can filter messages by:
- Protocol – Select the communication protocol used (e.g., MQTT, HTTP).
- Publisher – Choose the client that published the message.
- Value – Input specific values to filter by.
- Boolean Value – Filter by true/false type messages.
- String Value / Data Value – Provide string or data-specific content to match.
- Time Range – Use the From and To date fields to filter messages over a specific time window.
- Aggregation – Select aggregation methods like
avg,sum,min,maxetc. for time-series aggregation. - Interval – Set intervals for the aggregation (e.g.,
1m,10s,1h).
Once filters are selected, click the Update button to refresh the message list.
You can also reset all filters by clicking the Clear All button.
Download Messages
To download messages for reporting or analysis, click on the Download button. A dialog will appear that lets you customize which messages are downloaded:
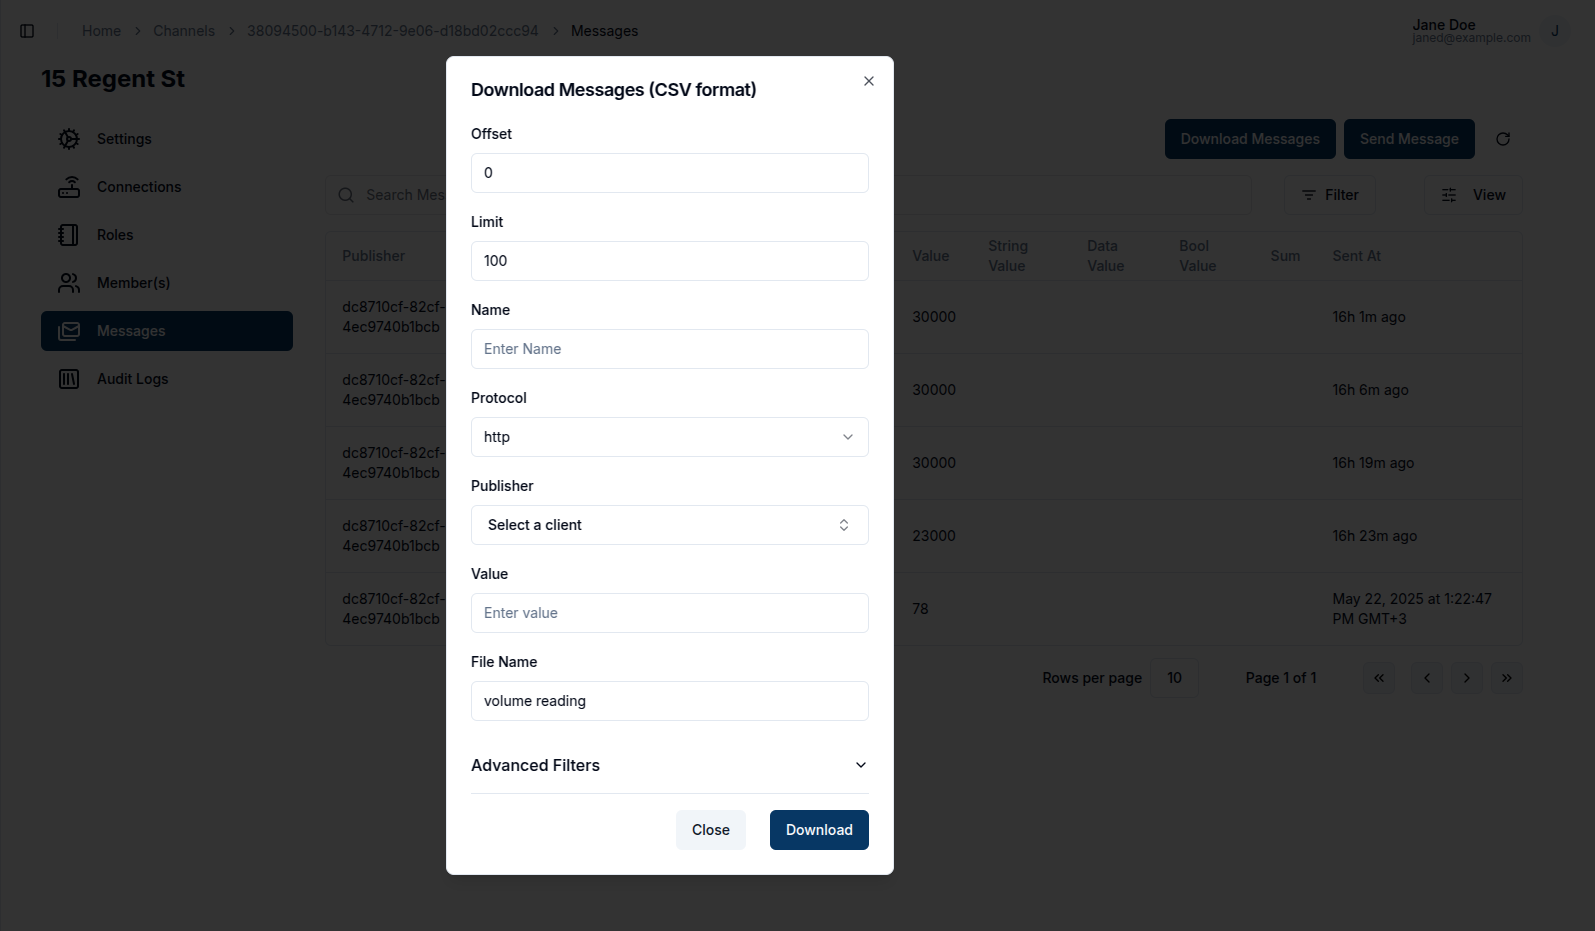
In the download dialog, you can configure:
- Offset & Limit – Control pagination of the result set.
- Name – Filter messages by message name.
- Protocol – Choose protocol type.
- Publisher – Filter by client who published the messages.
- Value – Match a specific message value.
- File Name – Customize the name of the downloaded file. If a name is not provided we will default to using the Channel ID as the csv file name.
Click Download to generate and download the CSV file containing the matching messages.
Audit Logs
Audit logs track all channel events, from creation to updates and disabling. Through these logs a detailed report of what procedures and changes the Channel undergoes can be tracked.