Reports
Overview
The Reports service enables users to generate, schedule, email and download data reports from connected devices and sensors.
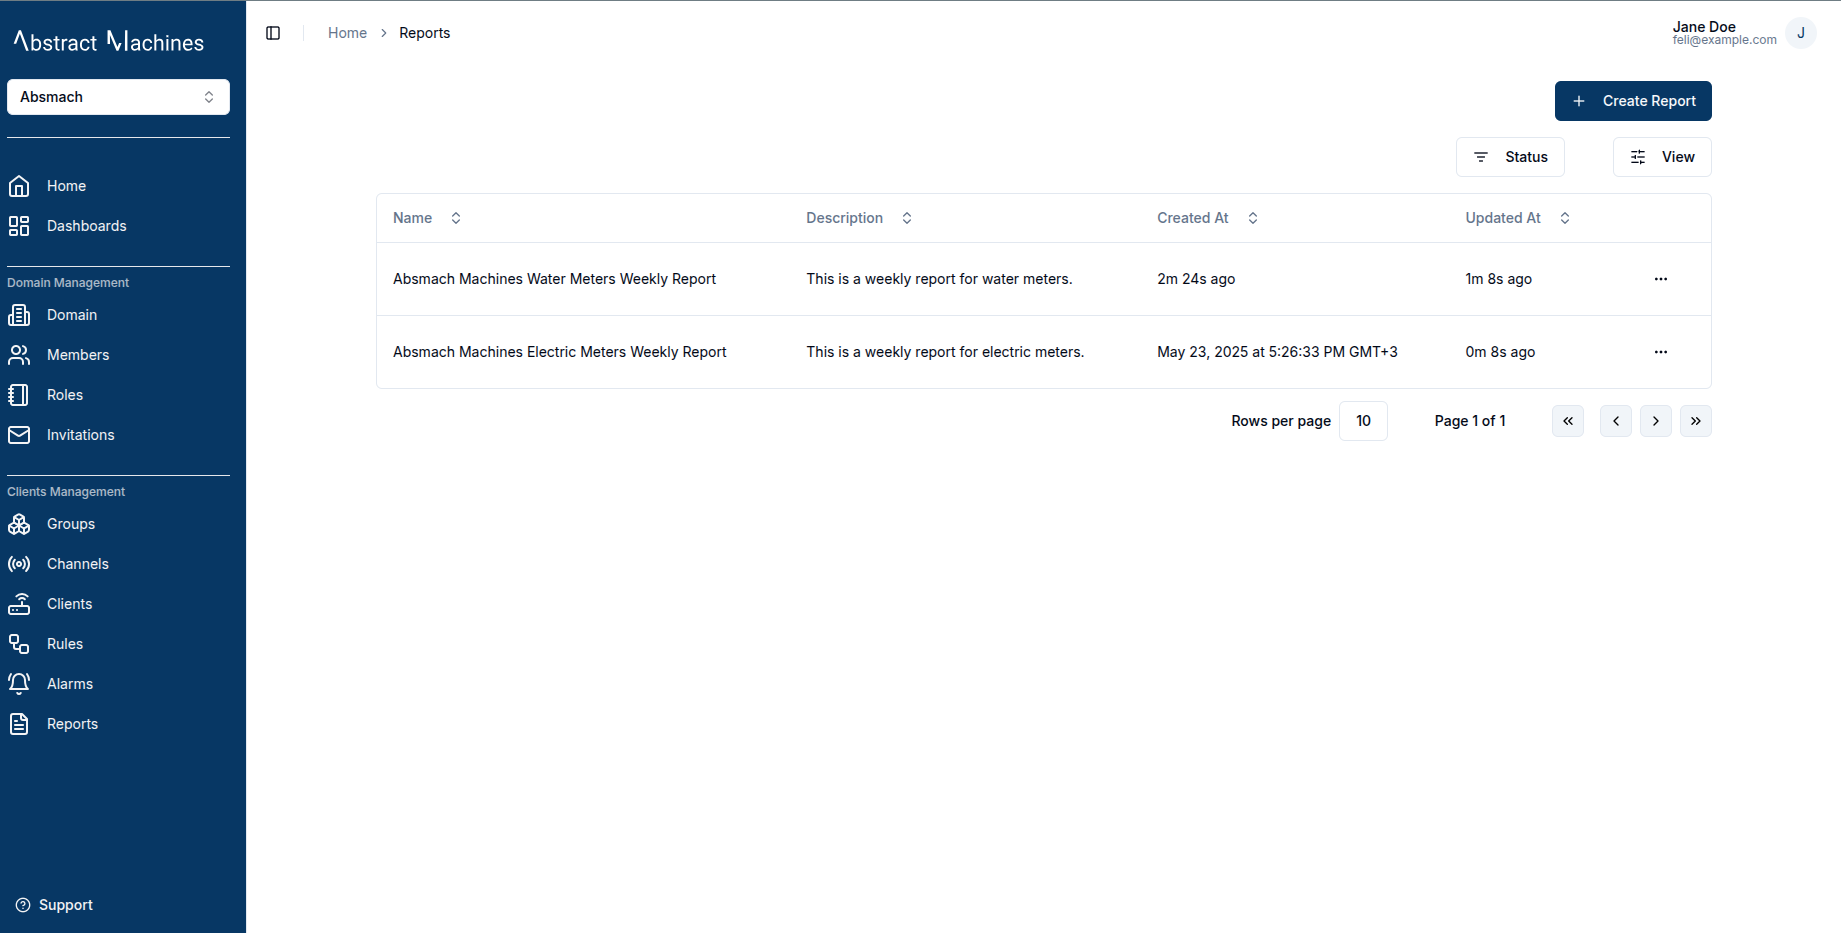
Create a report
To create a report, click the Create Report button at the top right of the reports page.
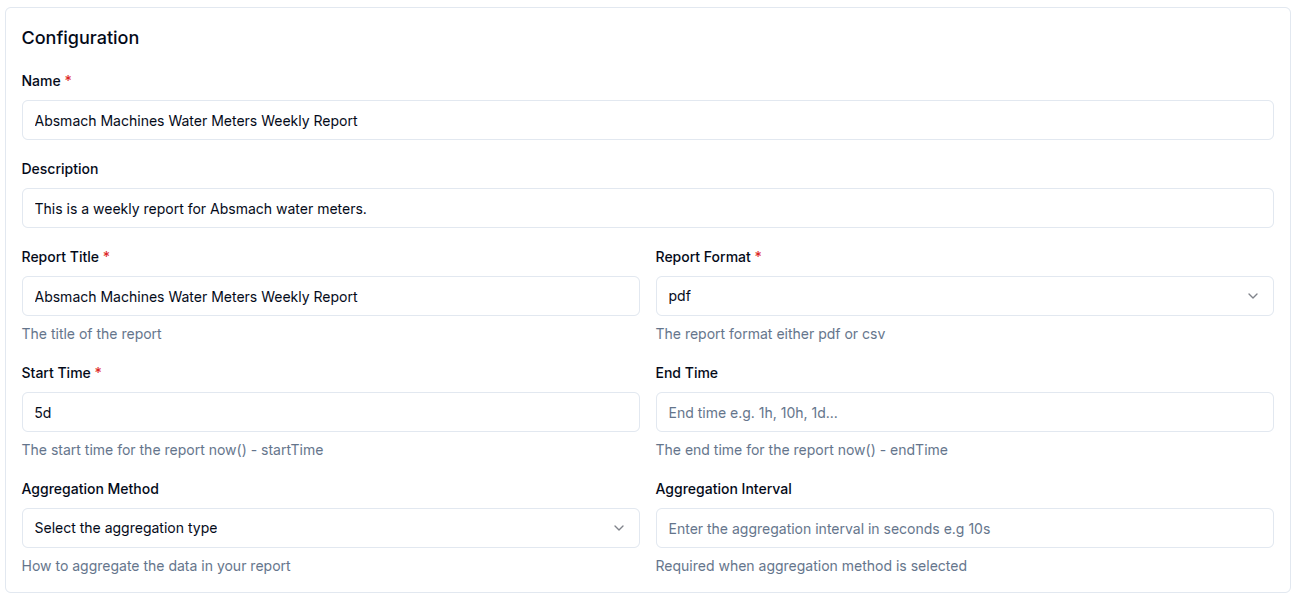
This action redirects users to report creation page where required details can be provided. There are two main sections Configuration and Metrics.
In the Configuration section, the user is required to input general settings for the report such as:
| Property | Description | Required |
|---|---|---|
| Name | Descriptive name for the report | ✅ |
| Description | Additional context about the report | Optional |
| Report Title | The title for the report | ✅ |
| Report Format | The file format for the report(pdf or csv) | ✅ |
| Start Time | The start time of the report | ✅ |
| End Time | The end time for the report | Optional |
| Aggregation Method | The aggregation method e.g Maximum, Minimum e.t.c | Optional |
| Aggregation Interval | The interval used for aggregating messages | Optional |
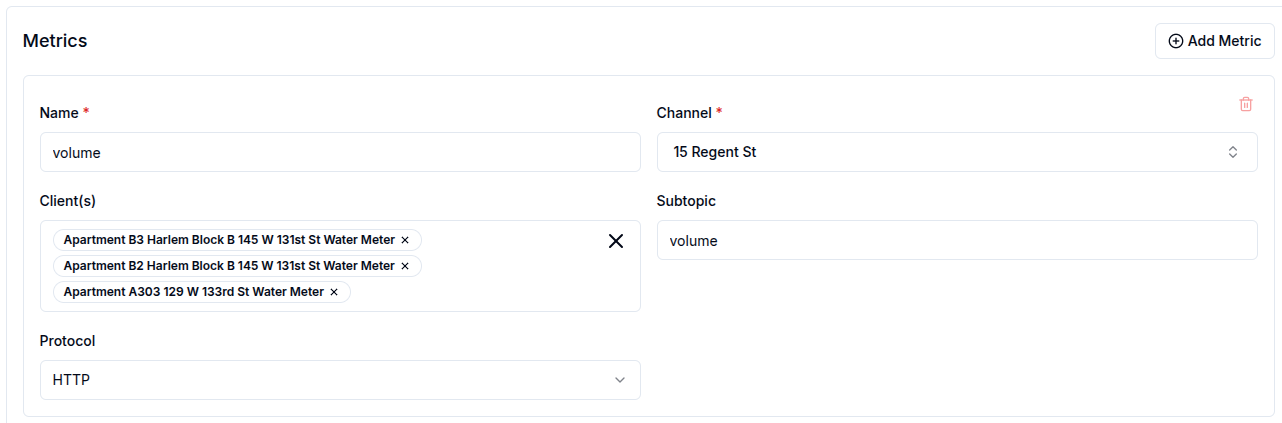
In the Metrics section, users can define specific filters such as:
| Property | Description | Required |
|---|---|---|
| Name | The value name of the message | ✅ |
| Channel | The channel that subscribed to the message | ✅ |
| Clients | The clients that sent the messages | Optional |
| Subtopic | The subtopic of the message | Optional |
| Protocol | The protocol used to send the message (HTTP, MQTT, WebSocket,or COAP) | Optional |
Users can click the Add Metric button to add multiple metrics to a single report.
Generate an instant report
To generate an instant report, click the Generate Instant Report button. The report will be generated based on the provided configuration.
Download a report
To download a report, click the Download Report button. The report will be downloaded in the format specified in the report format field.
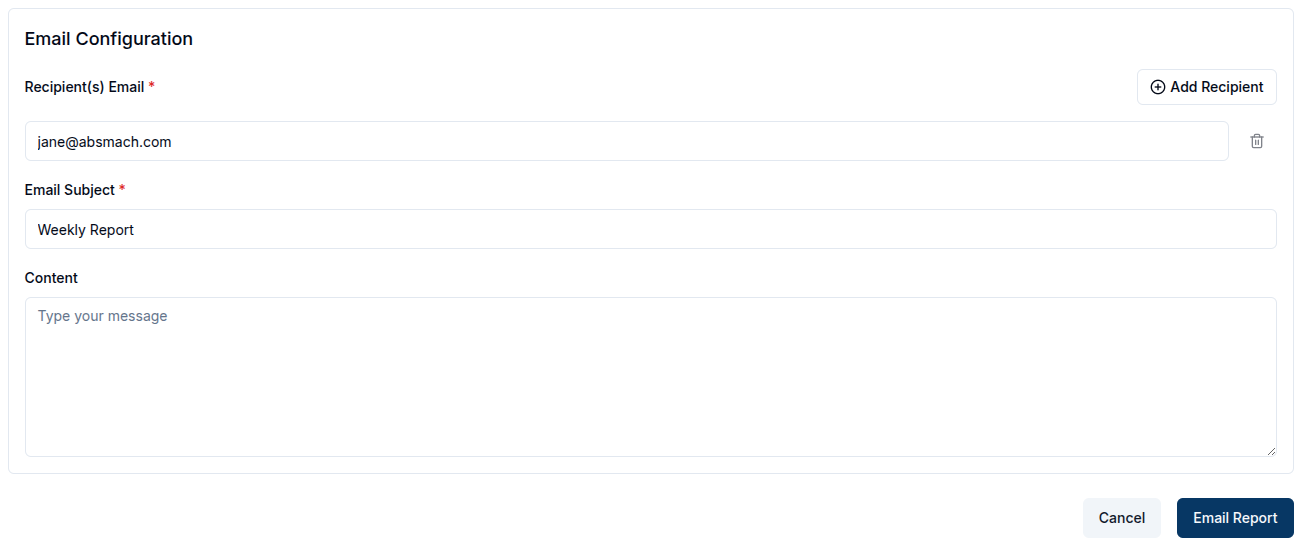
Email a report
To email a report, click the Email Report button, fill in the required fields, and the report will be sent to the specified recipients.
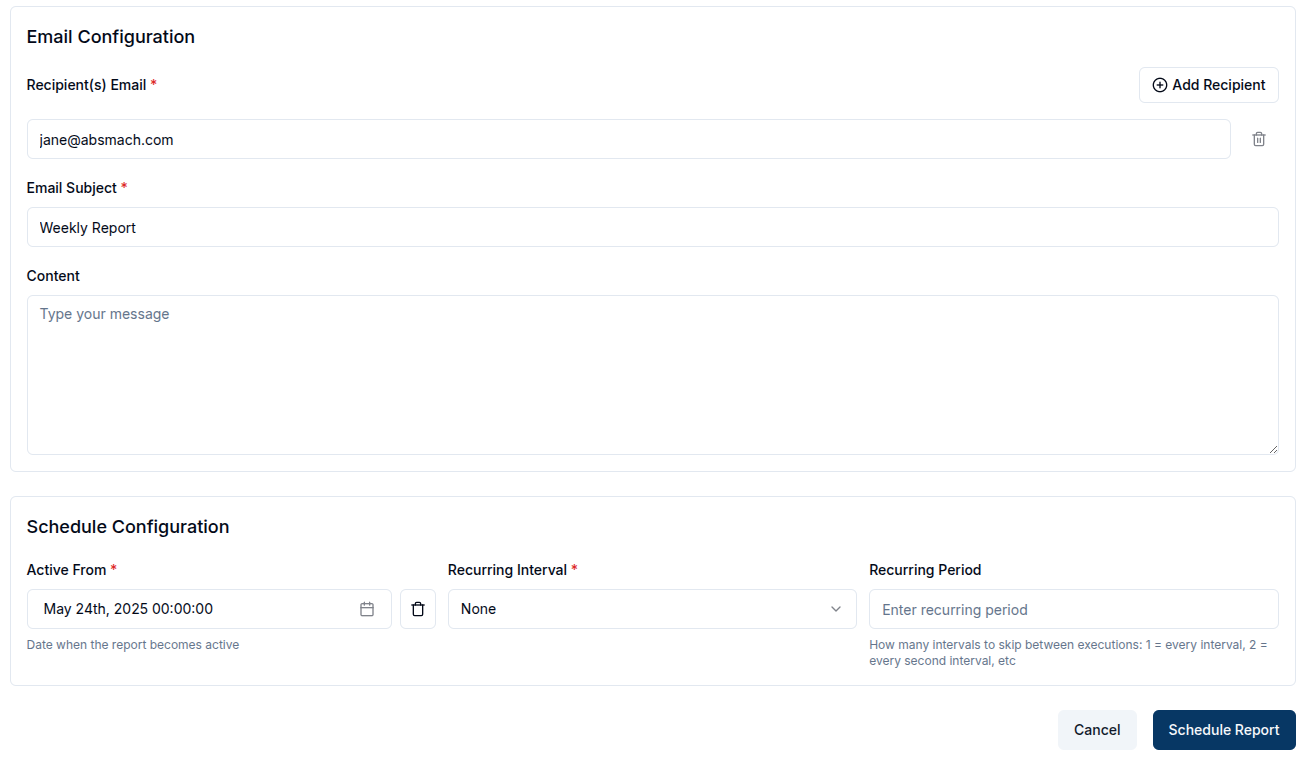
Schedule a report
To schedule a report, click the Schedule Report button and two sections (Email Configuration and Schedule Configuration )appear.
In Email Configuration, users can configure how the report will be sent via email. The fields to be filled include:
| Property | Description | Required |
|---|---|---|
| Recipient(s) Email | The recipient's email address(es) | ✅ |
| Email Subject | The subject line of the email | ✅ |
| Report Format | The file format for the report (PDF or CSV). | ✅ |
In Schedule Configuration, users can configure when the report should be sent.
The fields to be filled include:
| Property | Description | Required |
|---|---|---|
| Active From | The start date for the report | ✅ |
| Occurs at | The time of the report should be sent | ✅ |
| Recurring Interval | How often the report should repeat (e.g., daily, weekly). | ✅ |
| Recurring Period | How many intervals to skip between executions (e.g., 1 = every interval, 2 = every second interval, etc.). | Optional |
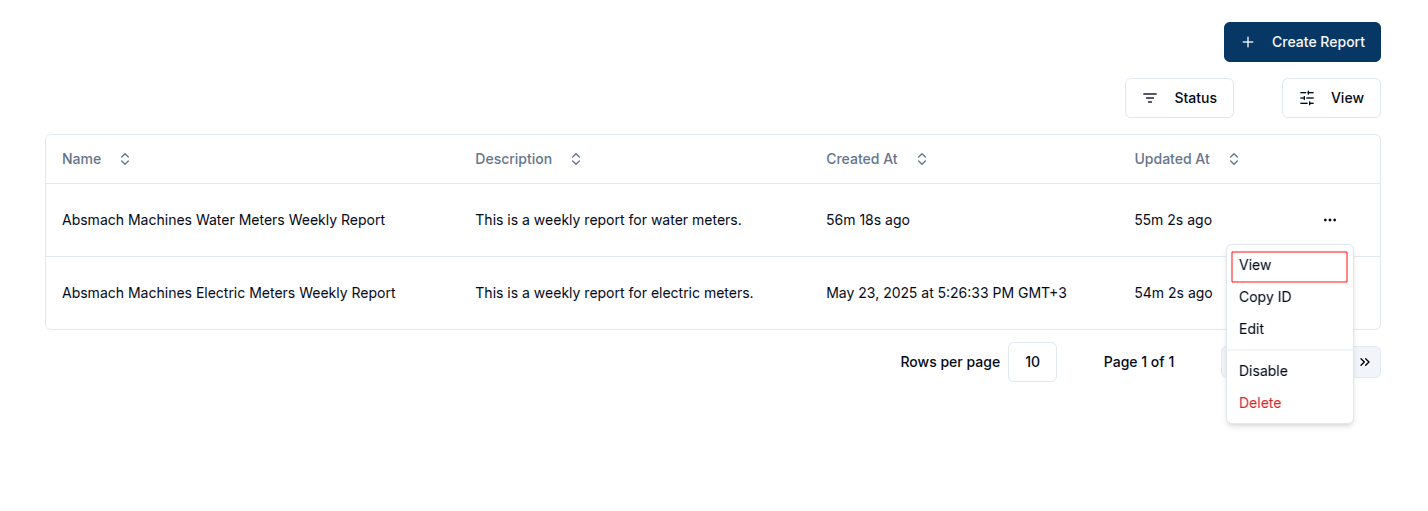
View a report
After a report is created, it will be added to the reports table. To view a report, click the row or click the View button in the row actions.
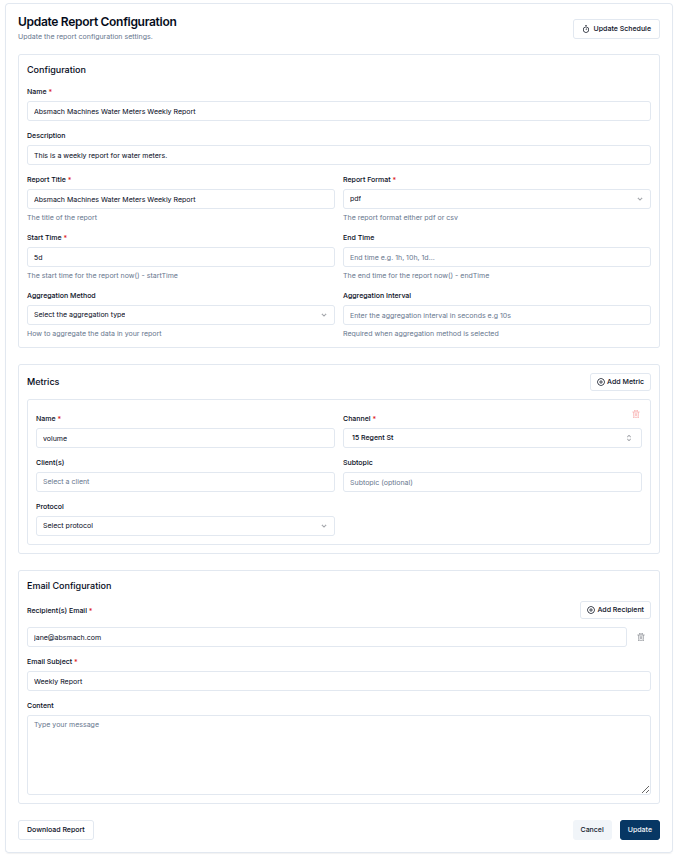
Update a report
While on the View Report Page, the user can update the details of the report, modify the schedule, add metrics or recipients, or download the report.
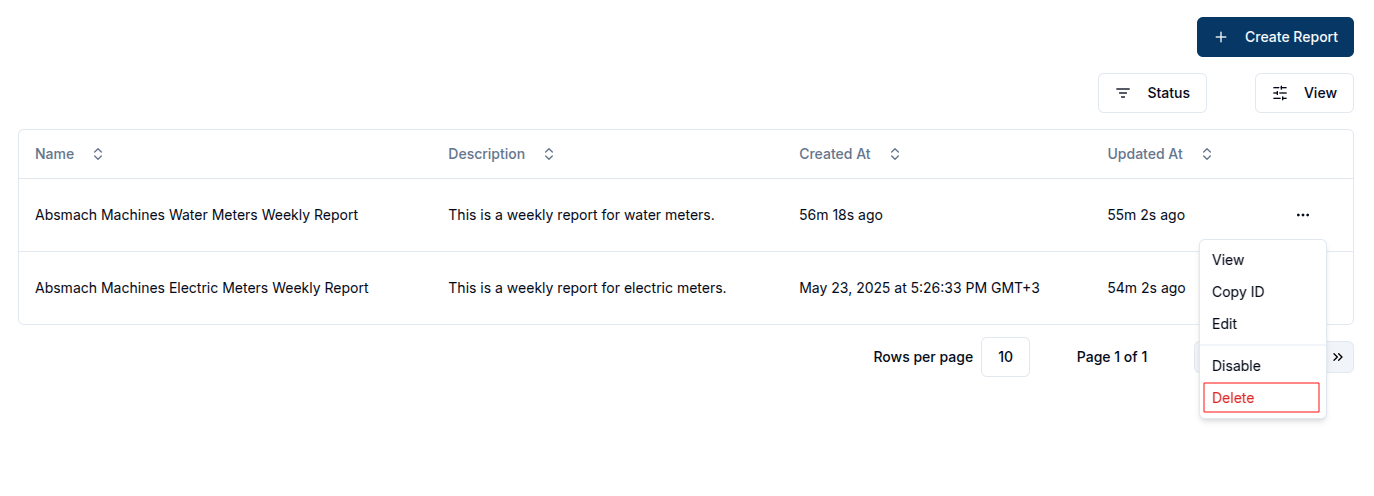
Delete a report
To delete a report, click the Delete button in the row actions.